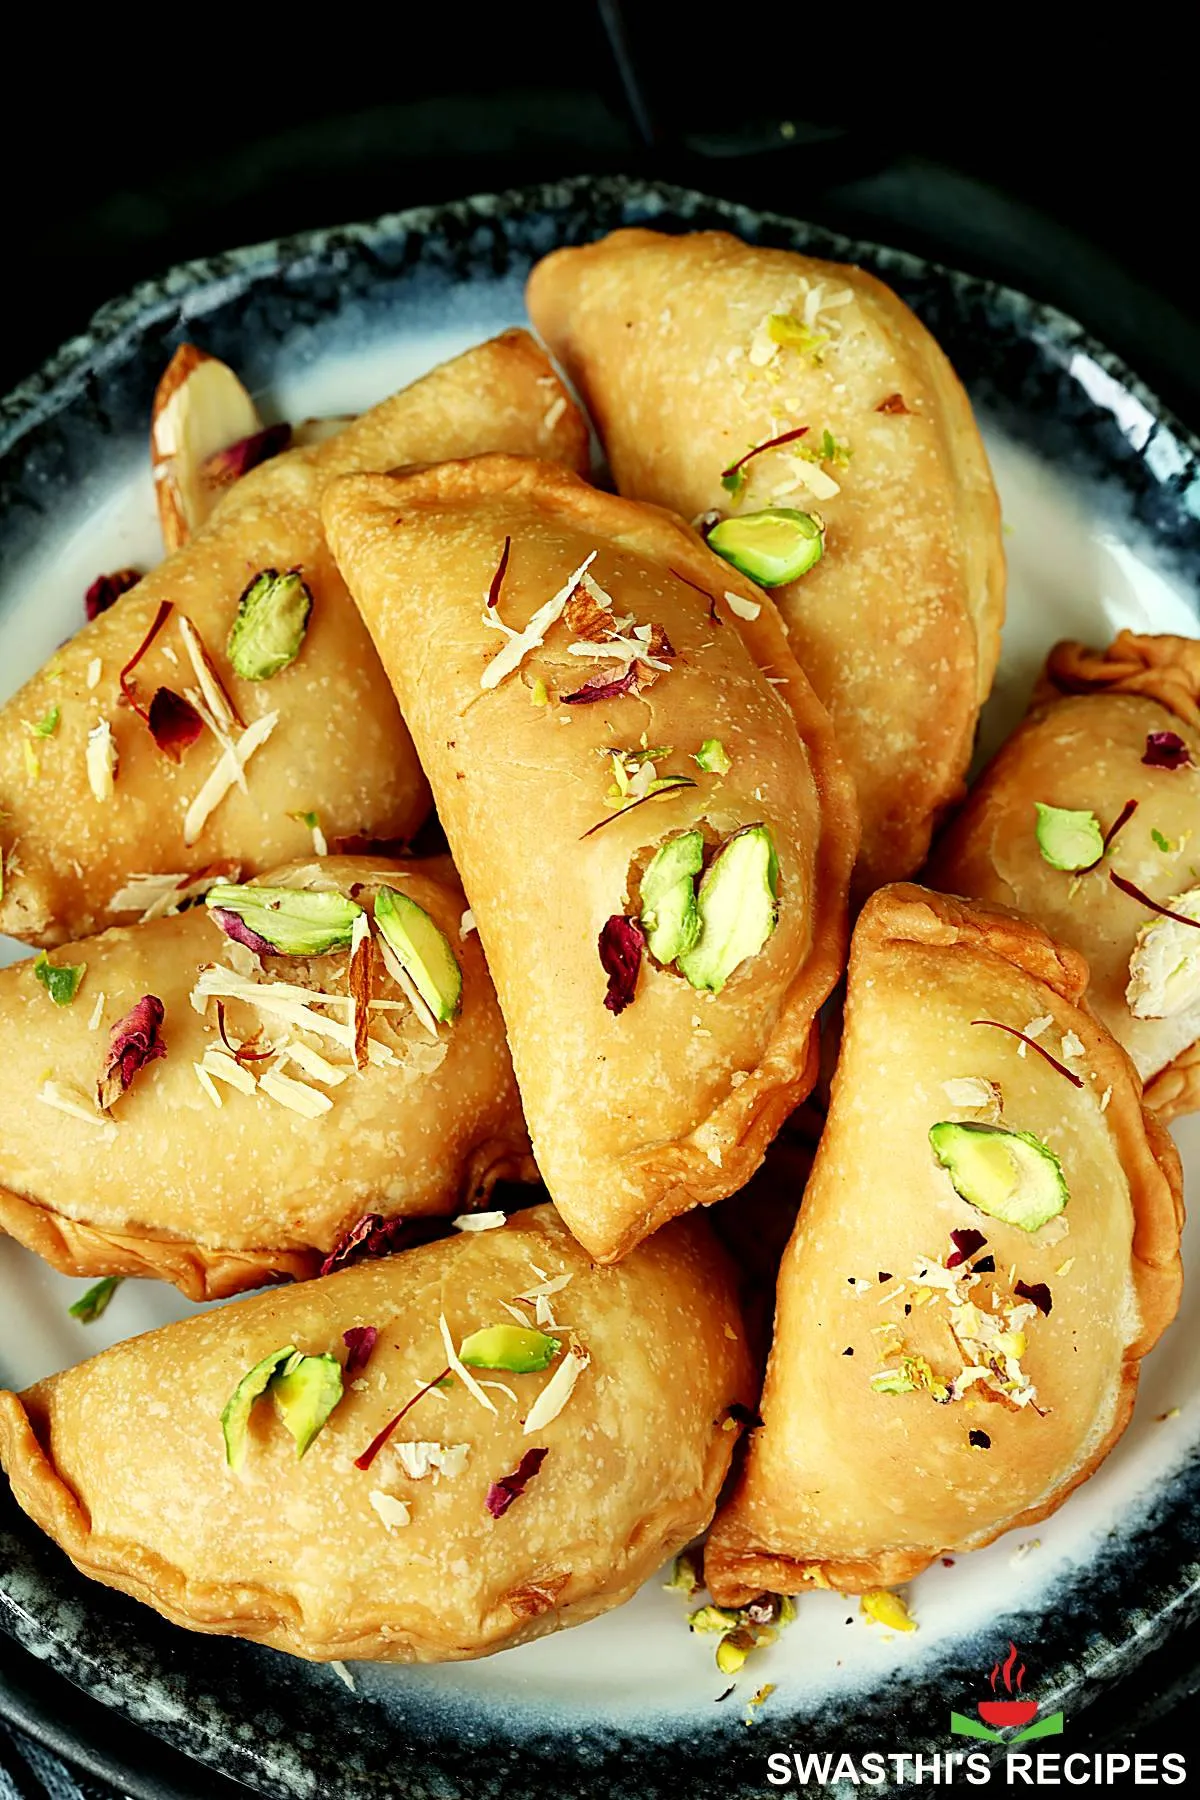
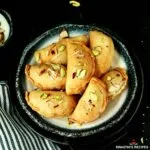
Gujiya Recipe for Diwali
Updated: October 6, 2025, By Swasthi
Celebrate this Diwali with homemade Gujiya! These flaky Gujiya are far superior to the store bought versions for their flavor and amazing texture. You will love the exceptional crunchy goodness in every bite that’s combined with a delicious, sweet, aromatic and rich filling. In this post I share the easiest recipe to make crispy and delicious gujiya that can be deep fried, oven baked or air fried.
When you try out these homemade Gujiya you will realize how delicious, crisp and flavorful they are when compared to the store bought version. The non-fried versions, air fried and baked are equally great. I felt the non-fried versions are best dipped/ brushed with the sugar syrup – chasni, unless you prefer medium to low sweet. So I’m giving you the option to make the sugar syrup.
About Gujiya
Gujiya is a deep-fried sweet pastry that’s filled with a mixture of khoya (milk solids), nuts, grated coconut, sugar and ground cardamoms. It’s a traditional North-Indian festive dessert popularly made during Diwali and Holi.
Gujiya are half-moon shaped and the preparation method is similar to the Maharashtrian karanji and South Indian Chandrakala but the fillings vary. While karanji filling is made with semolina & coconut as the main ingredients, Gujiya filling is made with khoya also known as mawa.
Khoya is traditionally made by condensing and cooking down high fat milk until all the moisture dries out. This process takes several hours, so most Indian households use the store bought khoya, which is sold in the freezer section of the Indian groceries and super markets. It is also labelled as mawa or milk solids.
Ingredients & Substitutes
- Khoya/ mawa: I use unsweetened from Amul brand (not sponspored).
- Flour: Traditionally these are made with maida, a kind of all-purpose flour. This gives the gujiya covering the characterstic, flaky, crispness with a neutral flavor. You can get good results with wheat flour/ atta and all-purpose flour in equal quantities. If you want to use only wheat flour, sieve the flour thrice and discard some of the bran else your gujiya won’t keep crisp for longer.
- Ghee & oil: Use ghee for the moyan – to make the crust. Ghee prevents your gujiyas from soaking up the flavor of oil. But if you can’t then try unrefined peanut or coconut oil.
- Suji: A small amount of fine semolina helps soak up any excess moisture in your khoya and helps keep the filling dry. Excess moisture in your khoya may open up the gujiyas while frying. Apart from that suji adds a nice crunch. But feel free to sub with 2 tbsps chopped nuts if you think your mawa has no excess moisture after roasting.
- Mixed nuts: They add a nice crunch to the filling.
I show how to shape the gujiya without a mold but if you have one you may use it.
More Diwali & Holi Recipes you may like
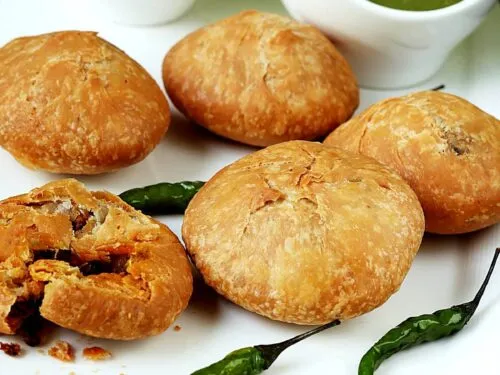
Kachori
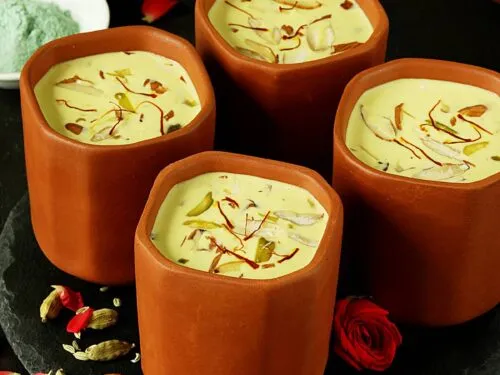
Thandai Recipe
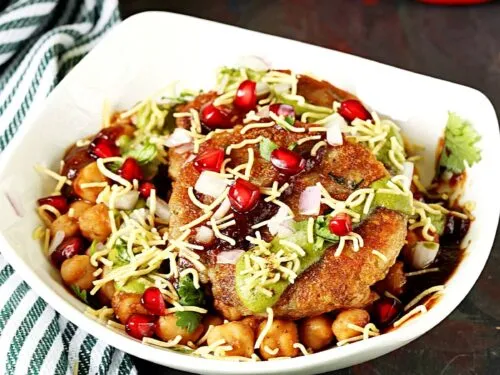
Chole Tikki Chaat
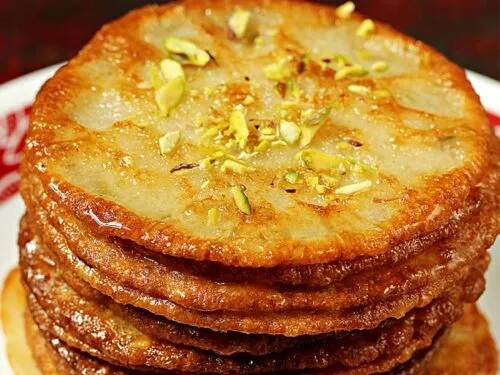
Malpua
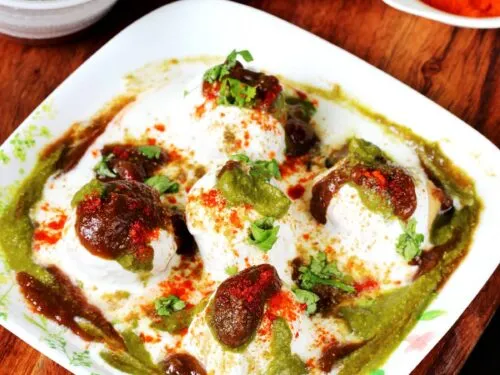
Dahi Vada
Photo Guide
How to make Gujiya (Stepwise photos)
Make the filling
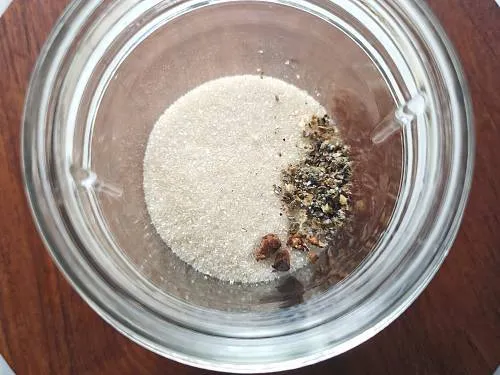
1. To a small grinder jar add the following ingredients and grind to a very fine powder –
- ⅓ cup organic sugar
- ½ teaspoon seeds from 10 green cardamoms (or sub with ½ to 1 teaspoon ground cardamom)
- ¼ teaspoon ground/grated nutmeg/ jaiphal + 1 strand of mace (optional)
2. To make the filling you will need the following ingredients:
- 1½ tablespoons ghee (23 ml)
- ¼ cup chopped mixed nuts (40 grams – 8 almonds, 8 cashews, 10 pistas chopped, optional – 1 tbsp chironji seeds)
- ¼ cup unsweetened shredded coconut (optional, dried coconut/ copra 25 grams)
- 1½ tablespoons sooji/ fine semolina (18 grams or sub with 2 tbsps more nuts)
- 200 grams unsweetened mawa/khoya (milk solids, I use amul)

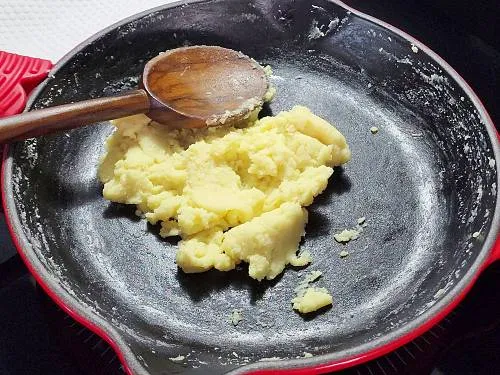
3. Heat half a tablespoon ghee in a wide pan and add the khoya.

4. Saute and cook for 8 to 10 mins.
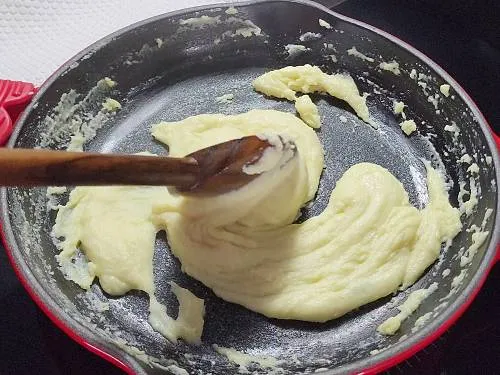
5. It turns gooey in the intial stage and later cooks down to a drier texture, losing its moisture. Transfer to a plate & cool down.
6. Meanwhile heat the remaining 1 tablespoon ghee and fry the chopped nuts for 1 to 2 mins, until golden. Mix in the rava and dried coconut. Fry on a low to medium heat until the sooji is light golden and crisp. It takes me another 4 mins. Turn off the stove and cool down completely.

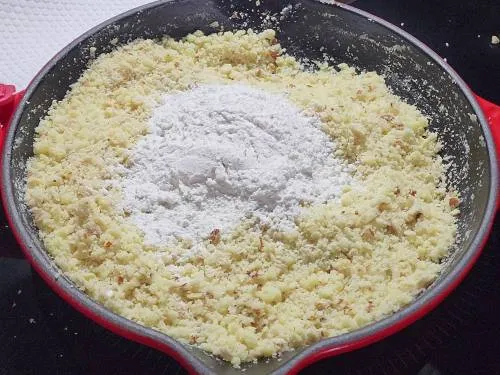
7. Add the cooled mawa/khoya and mix well with the rest of the cooled ingredients – rava, coconut, and fried nuts. Make sure all the fried ingredients are cooled before adding the mawa.

8. Mix 4 to 5 tablespoons of the powdered sugar. Taste test and add more to your taste. I used up all of the sugar that I ground. Ideally your filling should be sweeter than you would normally prefer because the crust/covering is not sweetened.
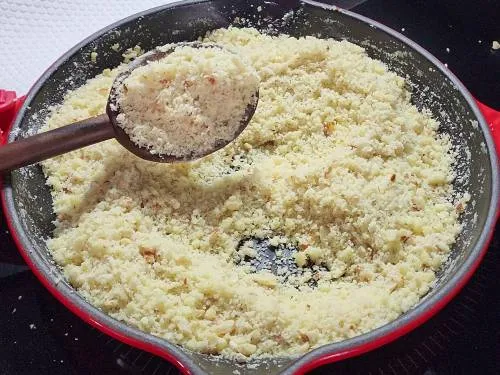
9. The filling should be dry as seen in the image.
Make the dough for covering
10. To a large mixing bowl, add
- 2 cups organic all-purpose flour/ maida (250 grams or use 1 cup atta and 1 cup maida)
- ⅛ teaspoon sea salt or table salt
- ¼ cup ghee (60 ml)
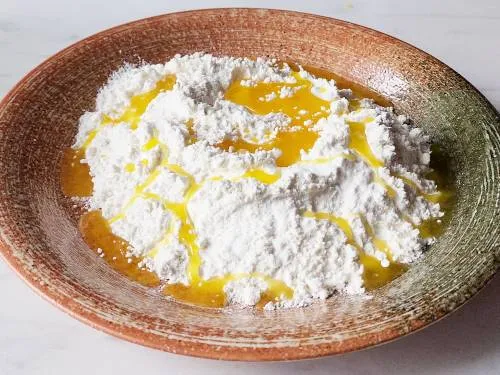
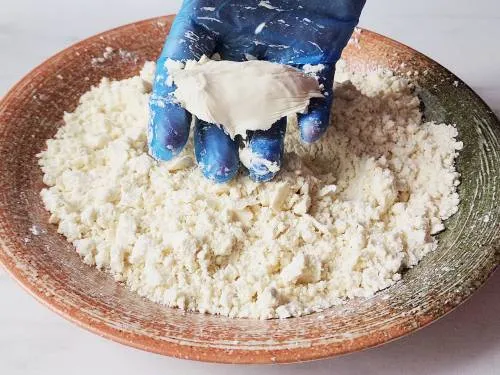
11. Using your fingers, incorporate/mix the ghee well with the flour until it looks like bread crumbs (takes about 3 mins). Take a handful of flour and press down with your fingers to form a fist. It should hold shape without breaking as seen in the image. This means there is enough fat/ moyan in the flour.
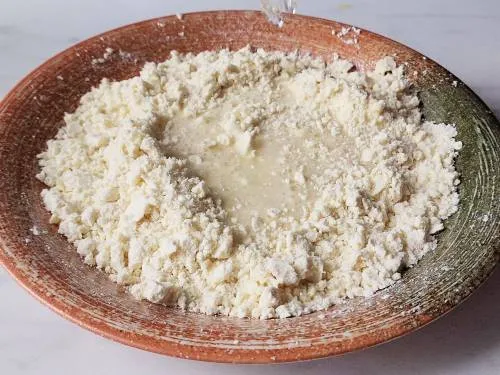
12. You will need a little over ⅓ cup/ 80 ml water to form the dough. Start adding water little by little and form a non-sticky yet slightly stiff dough. It should not be too dry or crumbly and should not be too soft like roti dough. I used 1 to 2 tbsp more. Depending on your climatic conditions and kind of flour, you may need little more or less.
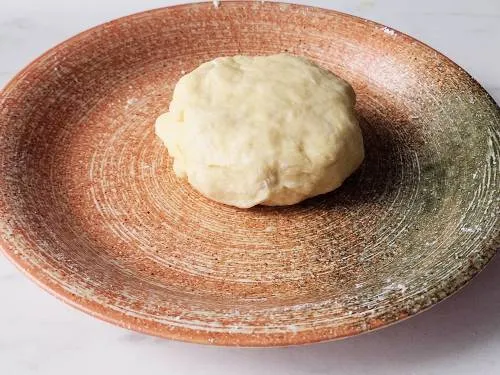
13. Don’t knead at this stage. Cover and rest for 15 to 20 mins.
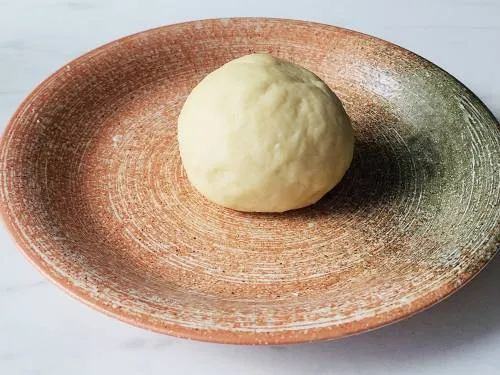
14. When you are ready to shape the gujiya, knead the dough for 2 to 3 mins until elastic and pliable. Don’t overwork.
Shape the Gujiya
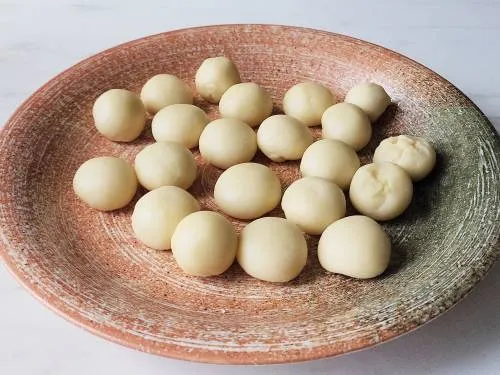
15. Divide the gujiya dough to 15 equal portions (about 24 to 25 grams each). Knead for a min & roll to smooth balls in between your palms. Remember not to overwork with the dough. Keep them covered in the bowl with a plate.
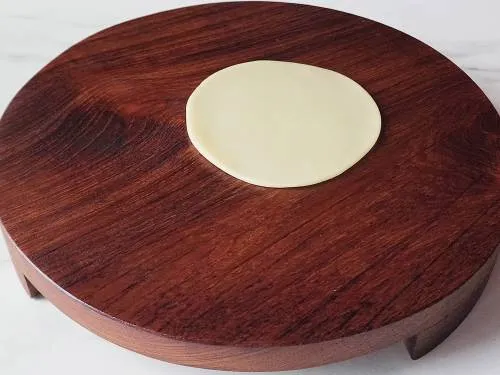
16. Due to the high amaount of fats/ghee in the dough you won’t need to use dry flour while rolling. Place a dough ball on a rolling board and roll to a little larger than 4 inch even roti. Using a 4 inch cookie cutter or a steel lid cut to a puri. Remove the excess dough around and keep it covered to reuse later, at the end.
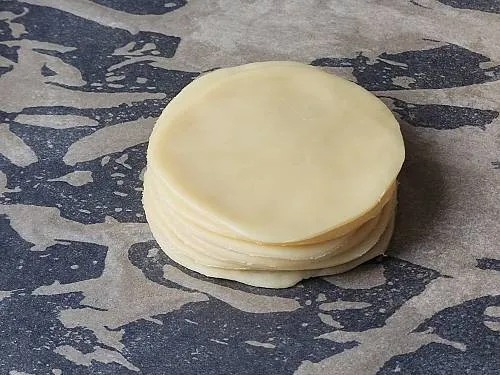
17. Transfer the gujiya puri to a parchment placed over a plate/tray. Reverse a large bowl over them to cover, so they don’t dry out. Make all the puris and stack them. Don’t worry they won’t stick due to high fats.
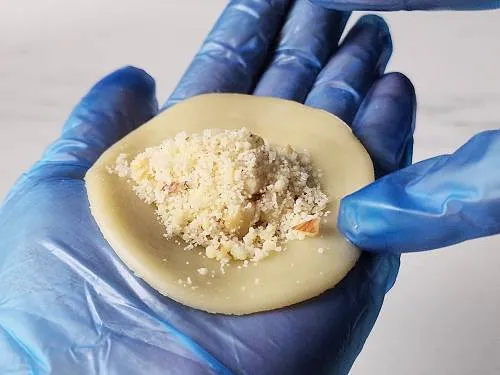
18. Add 2 to 3 teaspoons gujiya filling to the center of the rolled puri. Dip your finger in water and smear across the edges. If you add a lot of filling you won’t be able to seal them well & the filling may come out while frying. The filling should be in proportion to the size of your gujiya puri. So judge accordingly.
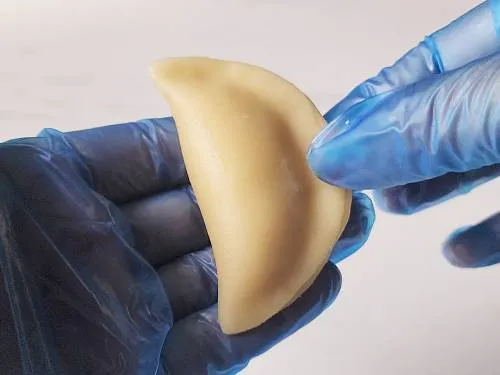
19. Fold to make a half moon or a semi-circle.

20. Press down the edges gently to secure the filling. Avoid pressing down the edges too thin as they can break while frying.
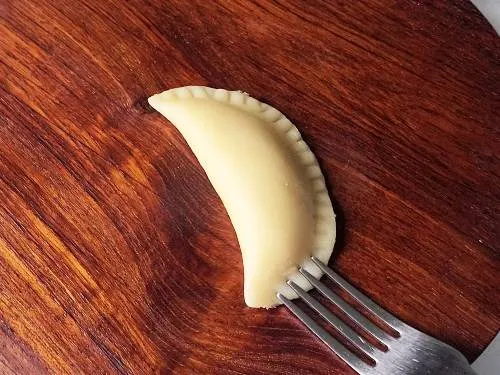
21. Place the gujiya on a board and press down the edges with a fork or use a pastry cutter wheel.
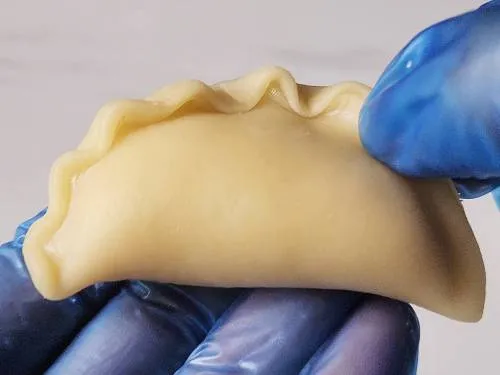
22. Alternately make small folds from one end to the other. (check the video). If you have a gujiya mold you may grease it first and place the puri, add the filling to both the sides and press down.
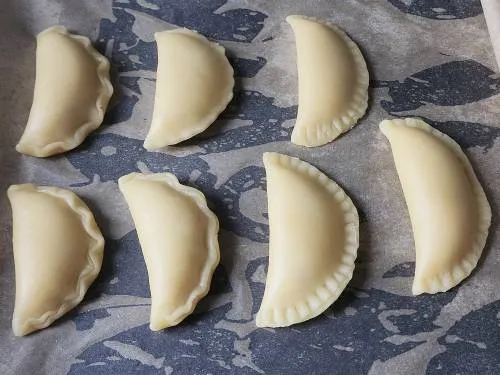
23. Place the shaped gujiyas on a deep tray and keep them covered with a parchment or another tray. Do not let them dry out as they can open up while frying. This way shape all the gujiyas. At the end you will be left with some dough, you may either make gujiya or make savory diamond cuts.
Fry the Gujiya
You can start heating the oil once your first batch of gujiyas are shaped & ready to go for frying. While the oil heats and the gujiyas are getting fried, you can fill and shape the subsequent batches.
24. Pour oil to a medium sized heavy bottom kadai or a deep fry pan. Heat it on a medium to medium low, until slightly hot (medium hot). A small piece of dough added to the oil should sink down and produce only a few small bubbles in the oil. See the image below. It should not be sizzling hot. If the oil is not hot enough, your gujiyas may open up, if it is very hot, gujiyas will brown without cooking the pastry dough from inside, resulting in softer gujiya.
25. Gently slide them one after the other. Add as many as your pan fits. I fry 4 to 5 in each batch. Fry them undisturbed for 12 mins on a low heat. Avoid touching them. At 10 to 12 mins mark, you will see them float and they are firm enough. Regulate the heat to medium and turn to the other side with a spider.
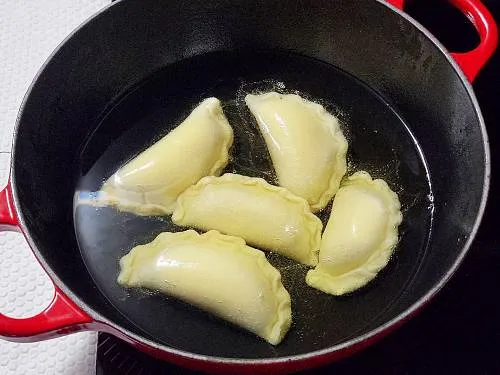
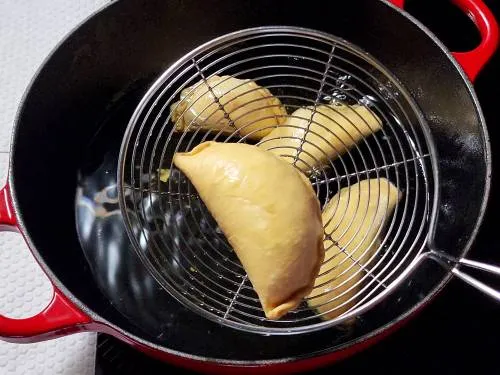
26. Fry until evenly light golden and crisp, stirring as required. Do not brown them. It takes me another 8 mins but this may vary depending on your cookware, heat source and the amount of oil. It takes me 18 to 20 mins but be cautious at 16 mins. Remove to a cooling rack. Let the oil temperature come down before you fry the next batch of gujiya.
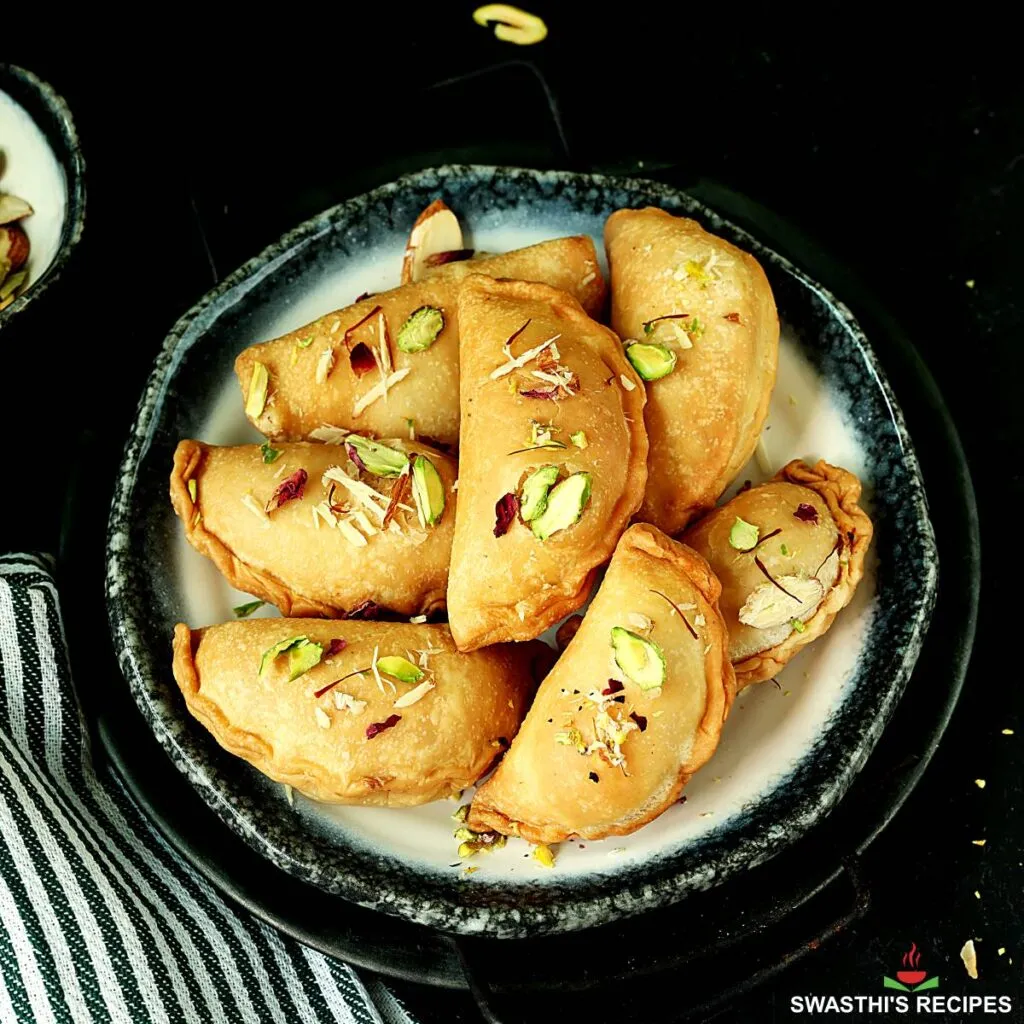
Storage: Cool down completely and store in a air tight steel or glass container at room temperature for 3 days. They also keep good in the refrigerator for 10 days but require reheating to crisp up. Reheat in the oven or in the air fryer until crisp. Garnish with sliced pistachios, almonds, rose petals and edible silver (vark) before serving.
If you want to dip them in the sugar syrup, scroll down to the sugar syrup section.
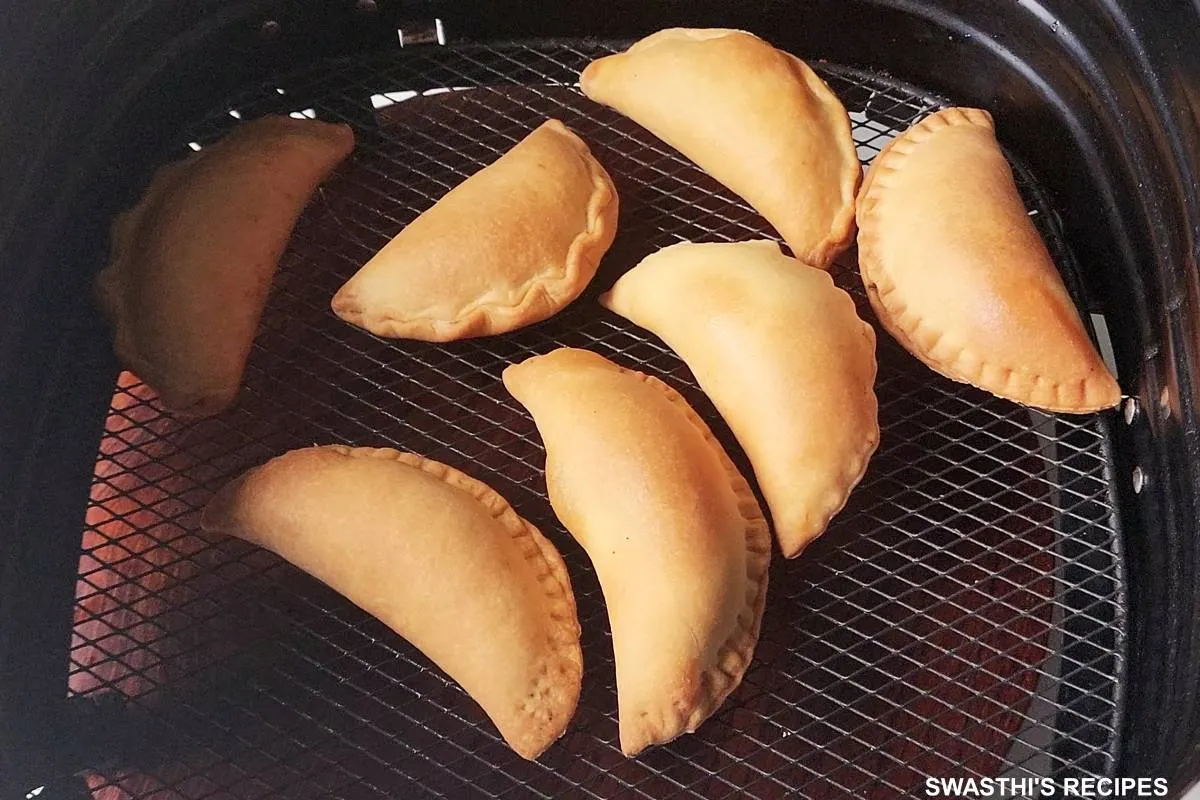
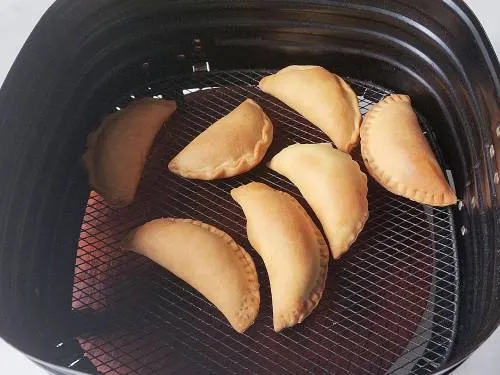
Air fry gujiya
27. Preheat your air fryer to 360 F – 180 C for 5 mins. Place the gujiyas in the air fryer basket, spacing them apart. Air fry for 7 mins. Wear mittens & turn them to the other side with a tong. Air fry for 5 more mins.
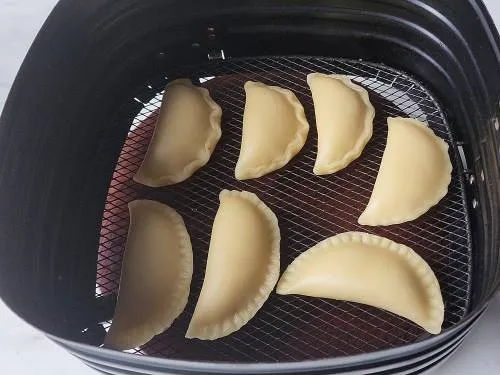
28. Brush them with ghee or oil. Let cool down completely to experience their great flaky, crispy and crunchy texture. If you want brush them with sugar syrup (recipe below). I felt the air fried version is best with the sugar syrup. Garnish with sliced nuts, crushed dried rose petals or vark.
Chasni (sugar syrup)
- Add 1 cup sugar to a pot or a kadai and pour ¾ cup water. Add half teaspoon cardamom powder and a pinch of saffron strands. Bring to a rolling boil, stirring until the sugar dissolves. Cook until it turns slightly sticky.
- Take half a tsp of syrup, cool down slightly and test by dipping your fingers in the syrup. It is ready when it is sticky. Cool down the syrup slightly until warm.
- Add your gujiyas to the warm syrup and remove with a fork to a cooling rack. Garnish with sliced nuts, rose petals and edible silver.
Expert Tips
- Sweetener: If you have a sweet tooth, go ahead and add more powdered sugar. The covering is not sweetened so feel free to add more sweetner to the filling else you feel the crust is bland.
- Stiff dough: It is essential for the dough to be stiff like samosa and kachori dough. To achieve that using water only as needed is very crucial. Adding more will make the dough soft like the roti dough. This excess moisture creates many tiny bubbles on the gujiya when fried in hot oil and you risk tearing them while frying.
- Smooth dough balls: The dough balls should be smooth by shaping and a little kneading. The smoothness should come from rolling the dough in your palms not by adding more water.
- Do not overwork: It is very important not to overwork with the dough. Overkneading creates large bubbles over the gujiyas, while frying and air frying.
- Store the dough: If you are air frying, you may store the prepared dough for 2 days but you need to bring to room temperature before shaping.
- Extra filling: You will be left with a little more filling which you can eat on its own or add a splash of milk and make to ladoo.
Related Recipes
Recipe Card
Gujiya Recipe for Diwali
For best results follow the step-by-step photos above the recipe card
Ingredients (US cup = 240ml )
For the outer covering
- 2 cups (250 grams) all-purpose flour / maida (unbleached or organic, or use 50/50 atta & maida)
- ⅛ teaspoon sea salt or table salt
- ¼ cup (60 ml) ghee
- ⅓ cup (80 ml) water (+ 1 to 2 tbsps more as required)
For the filling
- 200 grams unsweetened mawa/khoya (milk solids, crumbled with hand)
- 1½ tablespoons (23 ml) ghee (divided ½+1)
- ¼ cup (40 grams) chopped nuts (8 almonds, 8 cashews, 10 pistas, opional – 1 tbsp chironji)
- 1½ tablespoons (18 grams) sooji/ fine semolina (or use 2 tbsps more chopped nuts)
- ¼ cup (25 grams) unsweetened shredded coconut (dried coconut, optional)
- ⅓ cup organic sugar (adjust to taste)
- ½ to 1 teaspoon ground green cardamom (or ½ teaspoon seeds from 10 green cardamoms)
- ¼ teaspoon ground nutmeg/ jaiphal + 1 strand of mace (optional)
Instructions
Make Gujiya filling
- Heat a medium pan with ½ tbsp ghee and fry mawa for 8 to 10 mins. Transfer to a plate to cool down.
- Add the remaining ghee and fry the nuts until light golden, for 1 to 2 mins. Stir in the rava and coconut. Fry on a low to medium heat until rava is light golden and crisp. (Takes about 4 mins). Turn off and cool down completely.
- Meanwhile add sugar, cardamom seeds, mace and nutmeg to a small grinder and grind to a super fine powder.
- Mix together cooled mawa, rava, coconut, and fried nuts. Stir in the powdered sugar, starting with lower amount and adjust to taste.
Make the dough
- Mix together flour, salt and ghee with your fingers, until well incorporated & looks like bread crumbs.
- Pour water little by little to form a non-sticky and slightly stiff dough. It should not be too dry as well. Cover and rest for 15 to 20 mins.
- When you are ready to shape the gujiya, knead the dough for 3 mins until elastic and pliable.
Shape the Gujiya
- Divide into 15 portions. Knead for a min & roll to smooth balls in between your palms. Keep them covered in the bowl with a cloth or plate.
- Place a dough ball on a rolling board and roll to a little larger than 4 inch even roti. Using a 4 inch cookie cutter or a steel lid cut to a puri. Remove the excess dough around and keep it covered to reuse later, at the end.
- Transfer a puri to a parchment placed over a plate/tray. Make all the puris and stack them.
- Spoon 2 to 3 teaspoons gujiya filling to the center of the puri. Dip your finger in water and smear across the edges.
- Shape/fold it to a half moon/ semi-circle. Press down the edges to secure the filling. Place on a board and make design with a fork or a pastry cutter wheel or make small folds from one end to the other. Alternately you may use a greased gujiya mold to shape.
- Transfer to a deep tray and keep the gujiyas covered with a cloth or a tray. This way shape all the gujiyas. Use up the remaing cut out dough and roll to a gujiya.
Fry the Gujiya
- Heat oil in a deep pan/ kadai until slightly hot (medium hot). A small piece of dough added to the oil should sink down and create only a few small bubbles in the oil. (It should not be sizzling hot)
- Gently slide as many gujiyas (one by one) as your pan fits (I fry 4 to 5) and let them fry for 12 mins on a low heat. Do not disturb/ touch them. When they are firm (at 10 to 12 mins mark), regulate the heat to medium and turn them to the other side with a spider.
- Fry until golden and crisp. It takes me another 8 mins (total 16 to 20 mins, timing may vary). Remove to a cooling rack. Let the oil temperature come down before you fry the next batch of gujiya.
Air fry gujiya
- Preheat the air fryer to 360 F – 180 C for 5 mins. Place the gujiyas in the air fryer basket and air fry for 7 mins.
- Turn them to the other side with a tong and air fry for 5 more mins.
- Brush them with ghee or oil. Let cool down and brush sugar syrup if you want. Garnish with sliced nuts, crushed dried rose petals or varq.
NUTRITION INFO (estimation only)
© Swasthi’s Recipes
About Swasthi
I’m Swasthi Shreekanth, the recipe developer, food photographer & food writer behind Swasthi’s Recipes. My aim is to help you cook great Indian food with my time-tested recipes. After 2 decades of experience in practical Indian cooking I started this blog to help people cook better & more often at home. Whether you are a novice or an experienced cook I am sure Swasthi’s Recipes will assist you to enhance your cooking skills. More about me
Follow Swasthi’s Recipes
Comments
Excellent gujiya. Made a batch in the air fryer and they literally surprised my family. so crisp and I love the tip of brushing them with ghee. Really good but I want to make another batch with gur and fry them. Should I cook the filling with gur or just add it after cooling.
Hi Tejal,
Adding jaggery is best when you air fry or bake the gujiyas. If you fry the jaggery gujiyas, they may break or likely open up. Due to low heat frying jaggery can melt and mess up. Since there are different kinds of jaggery in the market, I can’t say much. Thanks for trying and letting me know how they turned out for you
Hi, Can I make the filling a day ahead and refrigerate? Is it okay to leave the mawa at room temperature for a few days? I’ve made the filling already but will make the gujiya a day later. Thanks for your reply
Hi Priyani,
Yes you can make the filling ahead and refrigerate up to 7 days. I wouldn’t suggest leaving mawa at room temperature but you may leave the gujiyas after they are fried. Hope this helps
Perfect gujiya. I leftout the suji and used some tutti fruitis. I also made the chasni and decorated with the tuttis.
Thanks Akhila. Love your thought of adding tutti fruttis, sounds really fancy
Never expected my gujiya to turn out this good in the first try! They came out excellent. Thank you for posting.
You are most welcome Priyanka. Thanks for letting me know