Khaman Dhokla Recipe
Updated: December 3, 2024, By Swasthi Shreekanth
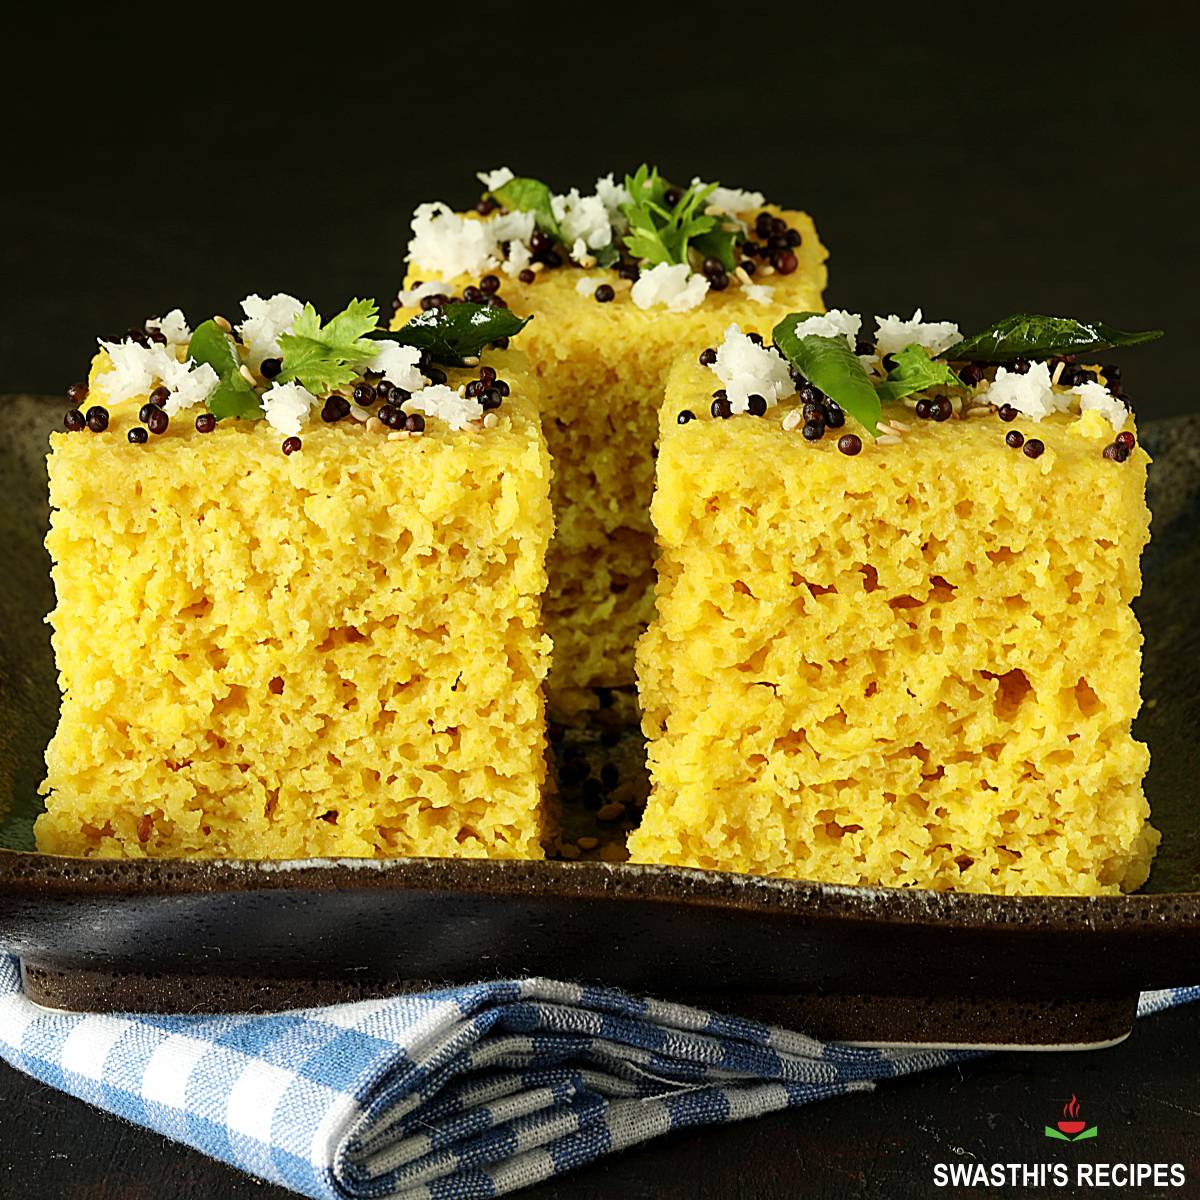
Khaman Dhokla is a steamed savory cake made with spiced gram flour batter. It is finished with a tempering of curry leaves, mustard seeds and green chilies. Lastly Dhokla is garnished with grated raw coconut and coriander leaves.
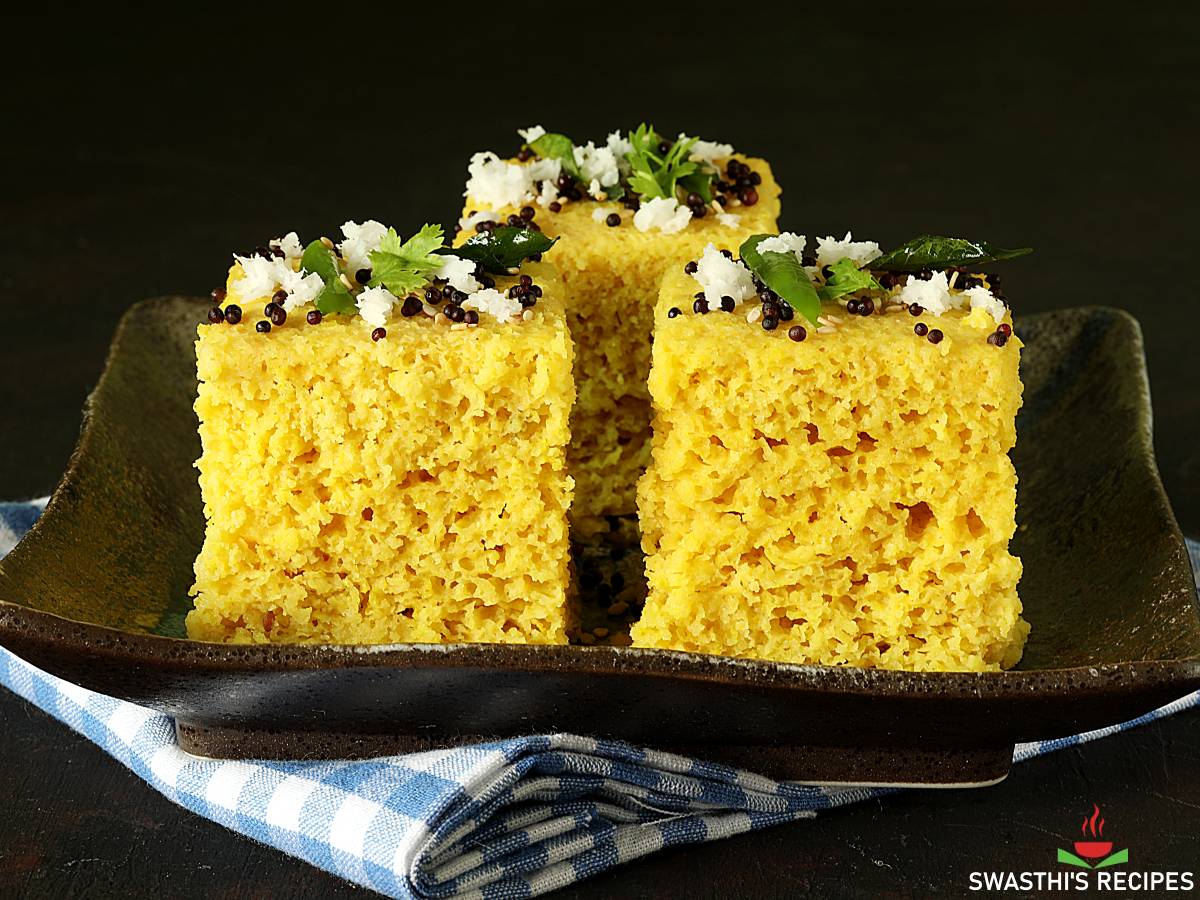
Here is the recipe to make the perfect Khaman Dhokla at home. It is soft, fluffy, spongy and super delicious, just like the one you get in your favorite eateries.

Gujarati Cuisine is very popular for a longlist of yummy snack foods like Khandvi, fafda, Dabeli, khakra and handvo. Khaman is yet another and is more commonly known as Khaman Dhokla across other regions of India, mostly on the restaurant menus and eateries.
What is Dhokla & Khaman
Traditionally, Dhokla and Khaman are 2 different snacks but both are savory steamed cakes. While the former is made with fermented rice and lentil batter, the latter is made with a batter of gram flour and a leavening agent like baking soda or eno (fruit salt).
The difference between these two, is somewhat similar to the traditional Idli vs Rava Idli. While one is made with ground and fermented batter, the other is simply made with an instant batter that consists of a leavening agent, which helps to bypass the fermentation process.
Table of contents
The process of steaming the batter and tempering remains the same. The prepared batter is poured to a mould and steamed in a steamer or a pot to cook up a fluffy Khaman Dhokla. It is aromatically tempered with fresh curry leaves, mustard seeds and chilies. It looks beautiful when garnished with coconut and coriander leaves.
Dhokla is an all-time classic hit that can impress anyone. From tea parties, potlucks to Indian themed dinner, it is a show stopper and everyone falls in love with it instantly. So what are you waiting for, give this a try!
Ingredients & Substitutes
- Pantry Staples – You need pantry staples like gram flour (besan), salt, mustard seeds, curry leaves, green chilies, ginger, turmeric etc.
- Leavening Agent (Eno vs Baking Soda) – This recipe requires plain unflavored Eno (blue pack) also known as fruit salt or it can be substituted with a leavening agent like baking soda. However I have found that Eno gives the best results without affecting the color or taste of your dhokla.
- Acidic Ingredient: – Citric Acid or lemon juice is required to activate the leavening agent. You get the best results with citric acid but lemon juice works. Citric acid together with Eno gives the best airy and fluffy khaman dhokla. Choose food grade citric acid that is from a natural source and is Non-gmo.
More Snacks Recipes
Misal Pav
Masala Puri
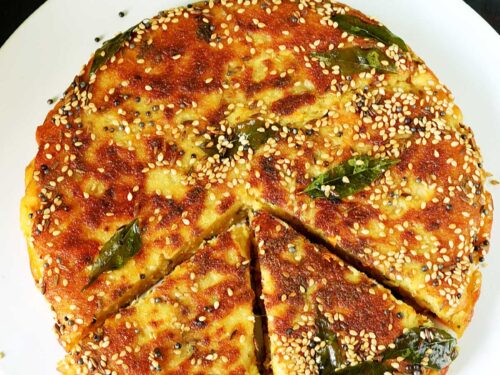
Handvo Recipe
Ragda Patties
Potato Wedges
Aloo Bhujia
Photo Guide
How to make Khaman Dhokla (Stepwise Photos)
Preparation
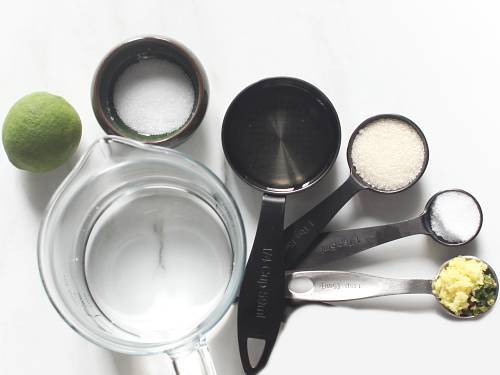
1. To a mixing bowl or a jug, pour ½ cup water. Add ½ tablespoon ginger paste, green chili paste (from 1 No), ⅓ teaspoon salt, 1 teaspoon sugar, 1 tablespoon oil and 1 tablespoon lemon juice or ⅓ teaspoon citric acid. In restaurants, citric acid is used in place of lemon juice. If using citric acid, look for natural pure citric acid. I am using citric acid here.
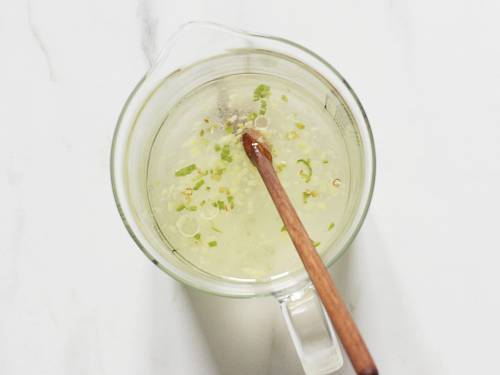
2. Add all the ingredients to the water and stir well until the sugar dissolves. Keep this aside.
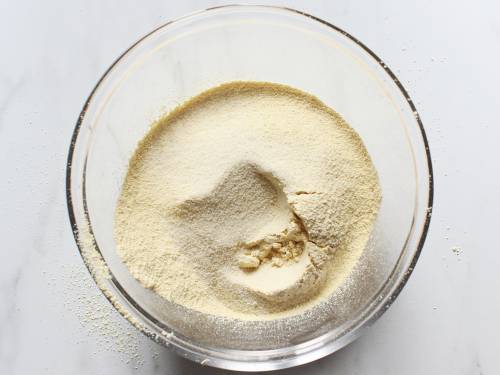
3. Place a sieve over a large mixing bowl. Add 1 cup besan (125 grams) and ¼ teaspoon turmeric to it.
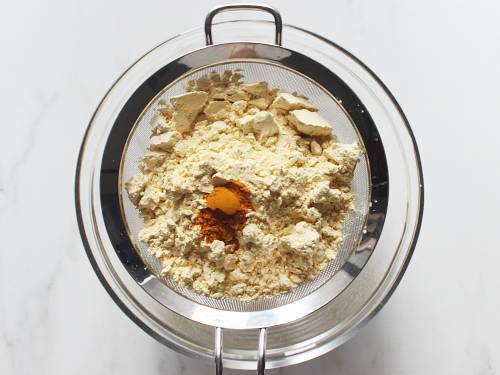
4. Sieve them and then add 1 tablespoon fine semolina (suji). Mix everything well.
Make Batter
5. Pour the spiced water we made at step 2 and mix well to a lump-free batter. At the end of this step you will have a thick batter.
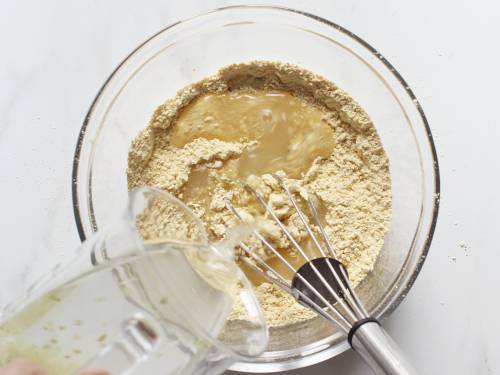
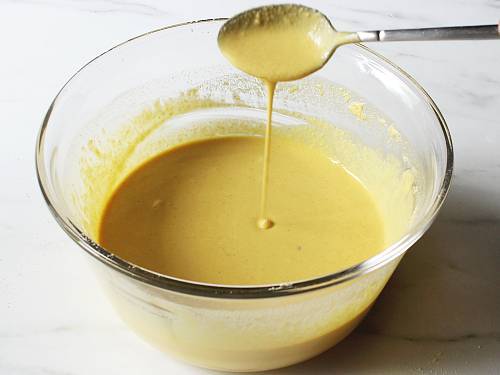
6. Add more water as needed to make a free flowing yet slightly thick batter. The quantity of water to use depends on the texture of flour. You may need 4 to 5 tbsps water at this stage.
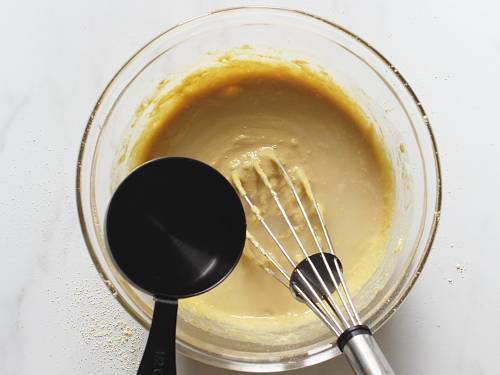
7. Beat the batter very well in one direction (clock-wise or anti-clock wise) with your whisk for exactly 50 to 60 seconds.
8. Dip a spoon and check the consistency. It should not be too runny or too thick. But has to coat the back of the spoon well and should not be very thick.
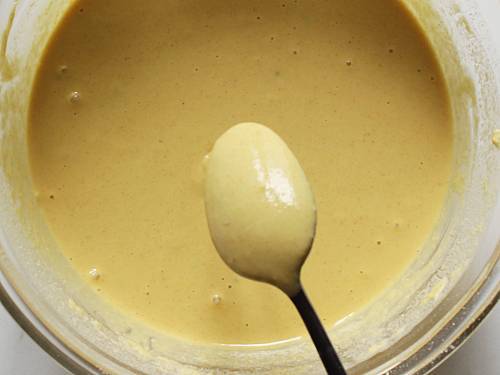
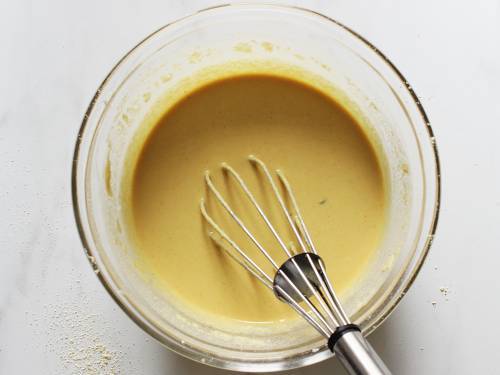
9. This is the consistency of the batter. It should not be of a ribbon consistency. Keep this aside and prepare the steamer.
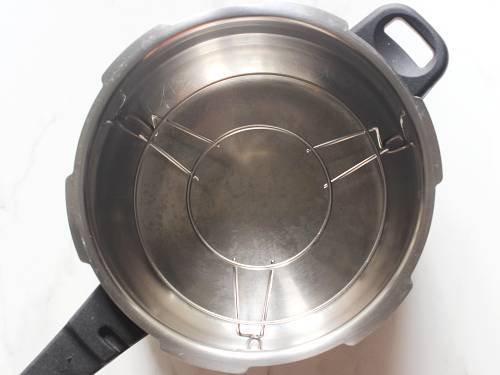
10. Pour 2½ to 3½ cups water to a large pot or a steamer. Place a steel rack or a ring or a long legged trivet. Cover and bring the water to a rolling boil. Ensure there is enough water in your steamer so it can steam constantly for 20 mins. (I pour about 4 cups as I use a large pot)
Steam Dhokla
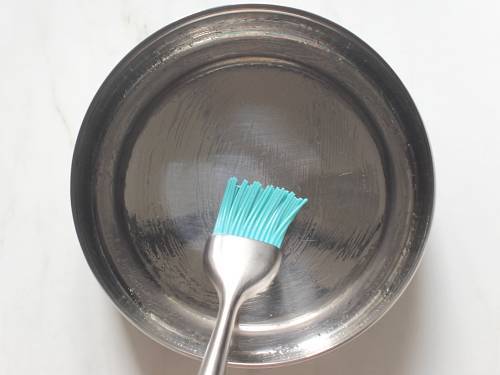
11. Meanwhile add half to 1 teaspoon oil and grease a 5 inch box or a cake pan. I used a steel box. Grease the sides as well. If you do not have a pan, you can also use your masala dabba cups.
12. When you see the water in the steamer is about to come to a boil, then add ¾ teaspoon eno (fruit salt) and pour 1 tablespoon water to the dhokla batter. You will see the eno activates and froths up.
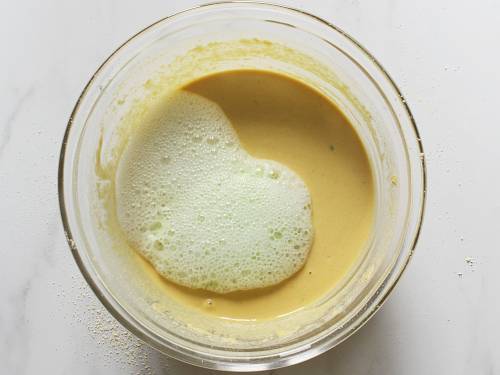
13. Quickly mix everything well to incorporate it with the batter. As you mix, the khaman dhokla batter begins to thicken and turns light. Run the whisk around the bowl including the sides to mix it evenly. If you don’t mix the batter evenly all over, dhokla will be dense in some parts.

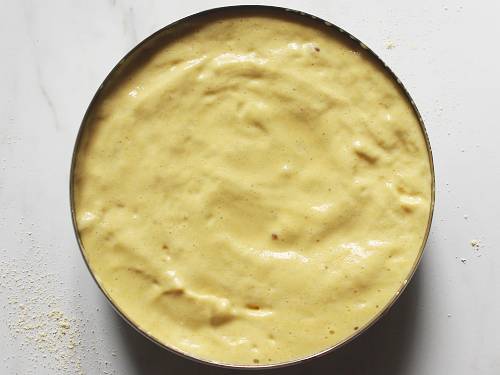
14. Immediately pour this to the box or pan. It is very common to see uneven surface on top. Optionally using your whisk slightly smoothen the top quickly.
15. Note after adding eno, the batter has to go straight into the steamer that’s ready with boiling water. Place it in the steamer and cover it. Your lid should have a vent for the steam to escape otherwise some amount of moisture may come on top of the dhokla. You can also use your pressure cooker lid without the whistle.
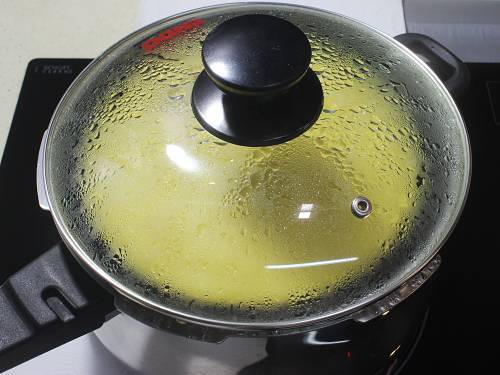
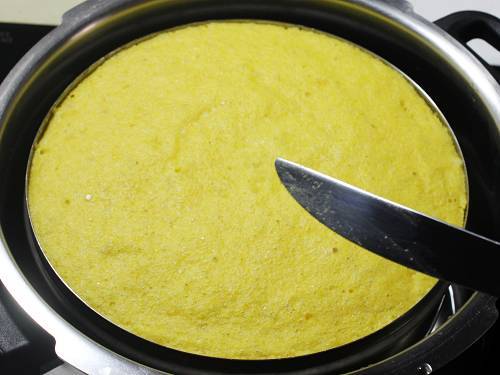
16. Steam it for 18 to 20 mins on a moderately high flame. It has to be steamed constantly. After 5 mins or so I reduce the heat a bit as the water comes out from the sides. This again depends on your stove and steamer. Once done, a knife inserted in the center should come out clean. Turn off the stove and leave it covered in the pot for another 5 mins.
Temper Dhokla
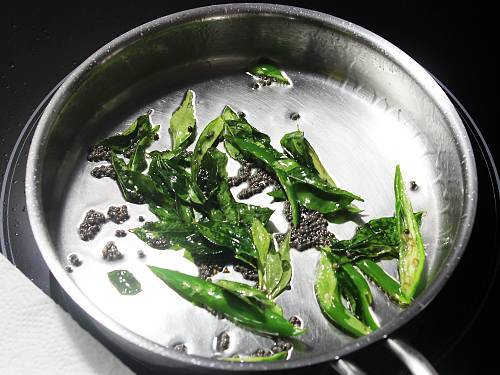
17. Pour 1 tablespoon oil to a tadka pan and heat it. Add ¾ teaspoon mustard seeds. When they begin to crackle, add 1 sprig curry leaves and 2 sliced green chilies. Saute for a while until the curry leaves turn crisp.
18. You can add 1 tablespoon sesame seeds at this stage if you like. But I do not add them here as we prefer to sprinkle the toasted sesame while serving. Turn the flame low and add the sesame seeds. Saute until they crackle. Lastly add ⅛ teaspoon hing, 1 to 2 tablespoons sugar and ¼ teaspoon salt. Mix the hing with oil.

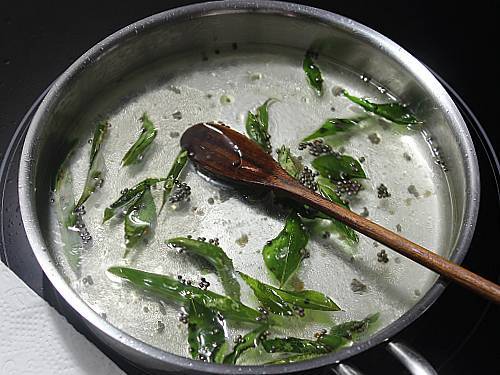
19. Next pour ½ cup water. Bring it to a rolling boil and turn off. Stir a few times to dissolve the sugar. Cover this and leave it to cool down a bit.
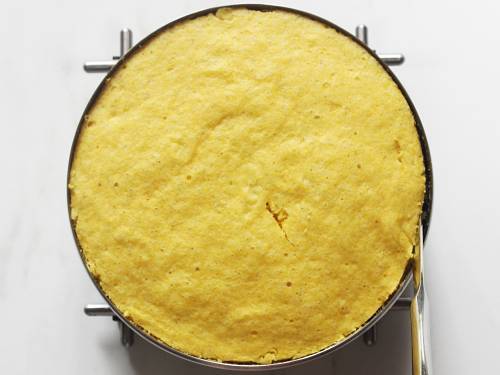
20. Remove the dhokla pan from the steamer and cool it completely. After it cools down, using a knife loosen the sides if needed. If your tin has even sides, then the dhokla will loosen on it’s own. Since mine has a design/dent on the sides, I had to run a knife.
21. Keep a plate over the pan and invert the dhokla to the plate. Ensure the dhokla has cooled completely before removing it. Cut to squares. Since I doubled the recipe (2x) I got so many pieces.

21. I prefer to pour the warm tempering on the dhokla. Spread the spices all over. First pour half cup of the tempering water and wait for a while. Then pour the rest. All of the water will be absorbed by the dhokla.
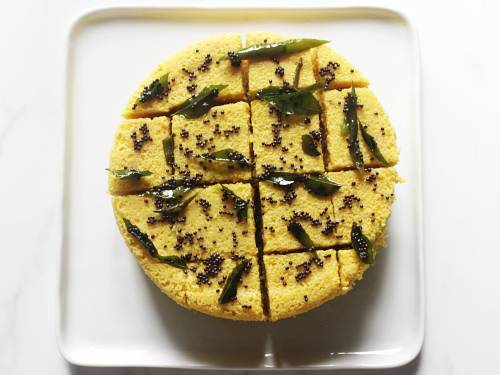
Cool completely. Garnish just before serving.
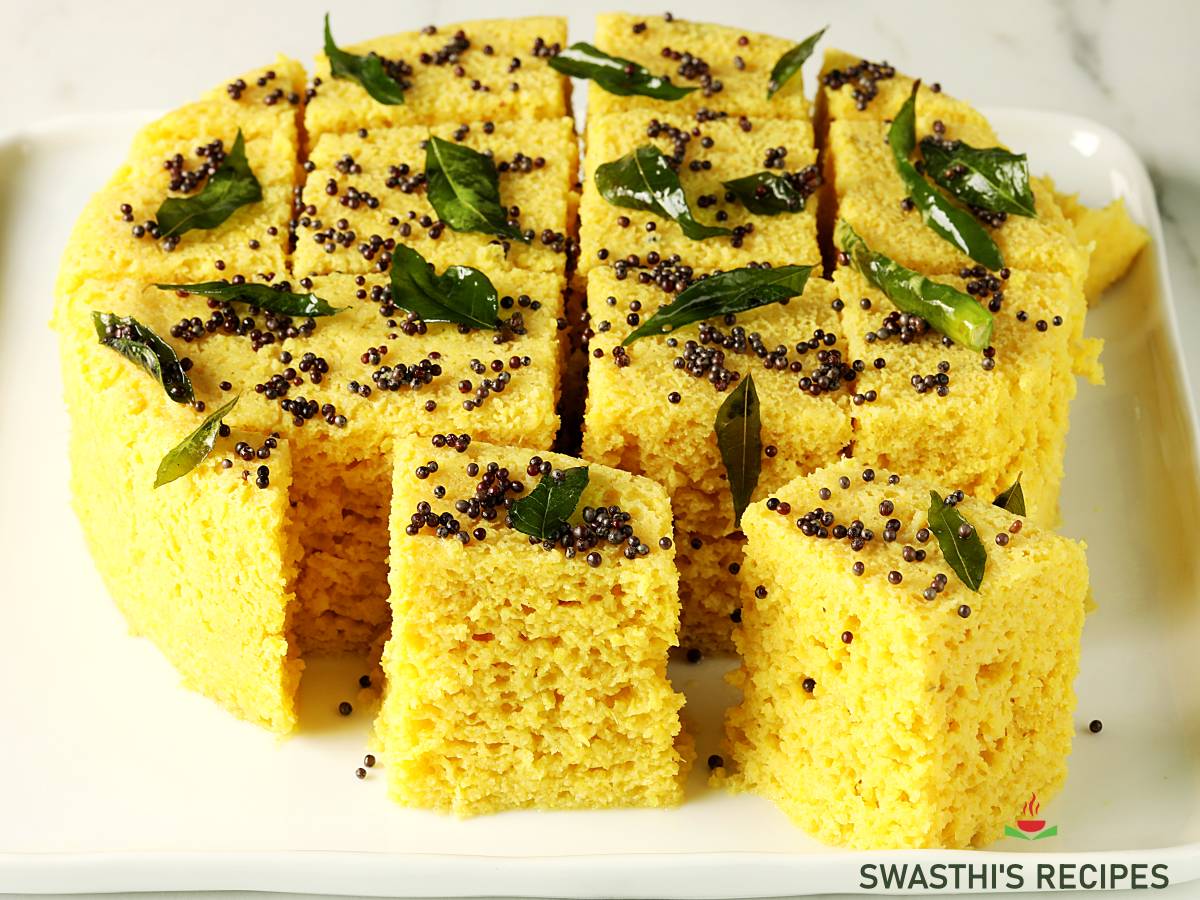
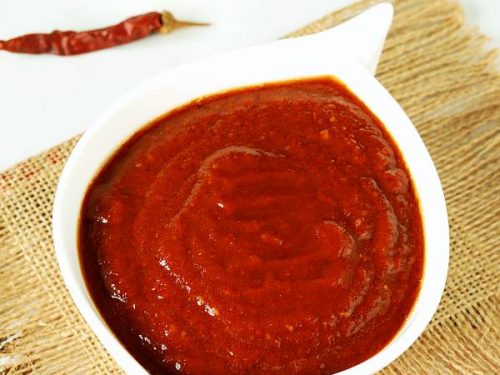
Sprinkle toasted sesame seeds along with fresh coconut & fine chopped coriander leaves. Serve dhokla with Coriander Chutney or Red Garlic Chutney.
Store & Reheat
To refrigerate, keep the cooled dhokla (without coconut) in a air tight box and use up within 2 days. To reheat, steam again in a steamer or a cooker until very hot. Or Place the bowl uncovered in the Instant pot and pressure cook for 0 mins. Steaming dhokla after refrigerating will make it super soft and spongy.
If you feel it has become dry, you may make a fresh tempering with little water and pour just before serving.
Expert Tips
- Consistency of batter is the key to make a spongy dhokla. If there is not enough water in the batter, dhokla will turn out dense and crumbly. Ideally it should not be too thick and not too thin/ runny. It has to be thick enough to coat the back of a spoon and thin enough that it doesn’t have a ribbon consistency.
- So you can add as much or less water as needed until you get this right consistency. Use a tablespoon to pour additional water so you don’t add a lot.
- Amount of water to add depends on the texture of the besan. I have always made this with fine besan and the amount of water mentioned in the recipe card works well for me. Depending on the texture you may need more or less.
- Steaming: Batter has to be steamed for a good 20 mins. Ensure there is enough water in your steamer/ pot to steam constantly for 20 mins. If the water in your pot gets over, then pour hot water from the sides to your pot.
- Pouring cold water will cool down your steamer instantly and will stop steaming your dhokla halfway. In this case, leavening agent won’t work as efficiently as it should & makes the dhokla partially dense.
Faqs
Here are some of the reasons for dhokla not being spongy – batter is not of the right consistency, keeping the batter for long time without steaming after adding eno or interrupting the steaming process midway.
Too much of leavening agent can make the dhokla bitter. To avoid the bitter taste, use it only in the recommended quantities along with a acidic ingredient.
Eno with citric acid gives the best results. However Eno with lemon/ lime juice also works well but there is a slight difference in the rise and airy texture.
How to avoid orange/ red spots in your dhokla?
Baking soda reacts with turmeric and can cause orange to red spots in your dhokla. There are 2 key points to note if you do not want orange or red spots in your dhokla.
Firstly after making the batter, whisk it very well for 50 to 60 seconds in one direction. This incorporates the turmeric well with the other ingredients in the batter. Since there is no more concentrated turmeric particles in the batter, you won’t see the red patches in your dhokla.
Secondly, activate the eno with a tablespoon of water when you add it to the batter. Water not only helps to activate it instantly but also ensures all of the powder is dissolved well which can otherwise easily impart those red and orange patches if it comes in contact with any undissolved turmeric.
Related Recipes

Recipe Card
Khaman Dhokla Recipe (Soft & Fluffy)
Ingredients
- 1 cup (125 grams) besan (gram flour)
- 1 tablespoon (10 grams) fine semolina (fine suji/ rava)
- ¼ teaspoon turmeric
- ½ cup water (to start off)
- 1 teaspoon sugar
- ⅓ teaspoon salt
- 1 tablespoon oil
- ½ tablespoon ginger paste
- 1 green chili paste (or deseeded and minced)
- ⅓ teaspoon natural citric acid (or 1 tablespoon lemon or lime juice)
- ¼ cup water (+ 1 to 2 tbsp more or as needed) (read notes)
- ¾ teaspoon Eno (unflavored fruit salt)
- 1 tablespoon oil
- ¾ teaspoon mustard seeds
- ⅛ teaspoon hing (asafoetida)
- 1 sprig curry leaves
- 2 slit green chilies (adjust to taste)
- 1 to 2 tablespoons sugar (adjust to taste)
- ¼ teaspoon salt (adjust to taste)
- ½ cup water (adjust as needed, read notes)
Method
- Pour water to a bowl. Add salt, sugar, oil, ginger paste, green chili paste and lemon juice or citric acid. Mix all the ingredients and stir well until the sugar dissolves. Keep this aside.½ cup water, 1 teaspoon sugar, ⅓ teaspoon salt, 1 tablespoon oil, ½ tablespoon ginger paste, 1 green chili paste, ⅓ teaspoon natural citric acid
- Place a sieve over a large mixing bowl. Add besan and turmeric to it. Sieve them well. To the same bowl, add semolina & give a good mix.1 cup (125 grams) besan, ¼ teaspoon turmeric, 1 tablespoon (10 grams) fine semolina
- Pour the spiced water we made at step 1. Mix well with a whisk to a lump-free batter.
- Batter will be thick at this stage. Pour more water as needed to make a free flowing yet slightly thick batter. The quantity of water to use depends on the texture of flour as well.¼ cup water
- Beat the batter very well in one direction (clock-wise or anti-clock wise) with your whisk for exactly 50 to 60 seconds.
- Batter has to be neither too thick nor too runny. To check the consistency of the dhokla batter, dip a spoon. It has to be thick enough to coat the back of the spoon yet should not be of a ribbon consistency. (Check the step-by-step pictures). Keep this aside and prepare the steamer.
- Pour 2½ to 3½ cups water to a pot or a steamer. Place a steel rack or a ring or a long legged trivet. Cover and bring the water to a rolling boil. (I pour about 4 cups as I use a large pot)
- Meanwhile grease a 5 inch pan or container with ½ to 1 teaspoon oil. Grease the sides as well.
- When you see the water in the steamer is about to come to a boil, then add eno (fruit salt) and pour 1 tablespoon water to the dhokla batter. You will see the eno activates and froths up.¾ teaspoon Eno
- Quickly mix everything well to incorporate it. As you mix, the khaman dhokla batter begins to thicken and turns light. Run the whisk around the bowl including the sides to mix it evenly.
- Immediately pour this to the greased pan. Even out the top with the whisk. Quickly place it in the steamer and cover it.
- Steam it for 18 to 20 mins on a moderately high flame. It has to be steamed constantly through out the time. Once done, a knife inserted in the center should come out clean. Turn off the stove and leave it covered in the pot for another 5 mins.
- Pour oil to a tadka pan and heat it. Add mustard seeds. When they begin to crackle, add curry leaves and sliced green chilies. Saute for a while until the curry leaves turn crisp.1 tablespoon oil, ¾ teaspoon mustard seeds, 1 sprig curry leaves, 2 slit green chilies
- Add hing, sugar and salt. Pour water. Bring it to a rolling boil and turn off. Stir a few times to dissolve the sugar. Cover this and leave it to cool down a bit.⅛ teaspoon hing, 1 to 2 tablespoons sugar, ¼ teaspoon salt, ½ cup water
- Remove the dhokla pan from the steamer and cool it completely. After it cools down, using a knife to loosen the sides if needed.
- Keep a plate over the pan and invert the dhokla to the plate. Ensure the dhokla has cooled completely before removing it. Cut to squares.
- Spread the spices all over the khaman dhokla. First pour half cup of the tempering water and wait for a while. Then pour the rest. All of the water will be absorbed by the dhokla.
- Cool completely. Sprinkle toasted sesame seeds along with fresh coconut & fine chopped coriander leaves. Serve dhokla with Coriander chutney or Red Garlic Chutney.
Notes
- Use unflavored plain Eno (fruit salt). Also confirm it is active by testing it before using. ½ teaspoon baking soda can be used instead of eno. The results are good but not as great as using Eno.
- If using baking soda, please ensure you use one from a good brand. I use Bob’s red mill baking soda.
- Citric acid gives best results. It can be replaced with lemon or lime juice. Look for pure, natural food grade/ food safe citric acid. Using more can make your dhokla sour.
- A combination of eno and citric acid gives the best results. The other best combination is baking soda and citric acid. The least to be preferred is baking soda with lemon juice.
- For a gluten-free option, skip semolina and use gluten-free hing or skip it as well. If you skip semolina, you may need to reduce 1 to 2 tbsps water.
Private Notes
Tried this recipe?
Mention @SwasthisRecipes or tag #swasthisrecipes!About Swasthi
I’m Swasthi Shreekanth, the recipe developer, food photographer & food writer behind Swasthi’s Recipes. My aim is to help you cook great Indian food with my time-tested recipes. After 2 decades of experience in practical Indian cooking I started this blog to help people cook better & more often at home. Whether you are a novice or an experienced cook I am sure Swasthi’s Recipes will assist you to enhance your cooking skills. More about me
Follow Swasthi’s Recipes
Comments
I always struggled to find the right pan for my dhokla. This recipe gave me the idea to use my masala dabba because I didn’t have any steel containers. My dhokls turned out very spongy and tasted yummy. Since my bowl was big, not 5 inch I steamed only for 12 mins. My sis-n-law always adds fresh lemon juice in the tadka. I did the same and it was the best I ever made.
Happy to know the recipe worked well for you. Yes you can use a masala dabba or a cake pan. Thank you so much Divya.
Love your recipes very much and this dhokla is our favorite. I follow the recipe to the T but make the tadka in ghee. Excellent flavor!
Thank you Farah. Nice thought of using ghee. Glad you all love it
Should i cool the tempering water before pouring over the cut dhoklas ?
Yes cool down both slightly – dhokla and tempering water
It turned out perfect. 👌👌
Thanks Vandana
i think it came out well for my first try. I will add either more citric or more lemon/ lime juice to it.
Glad to know! Yes you can add more if you want it tart but there is no going back if you add too much to the batter. There is no fix. It’s better to adjust that by adding to the tempering.
Great dhokla! Worked like a charm in the first try. But why don’t you include baking soda in the ingredients list rather than in the notes. I used it because I didn’t have eno and the results were better than expected. Super soft and delicious.
Thanks Harini for sharing your thoughts. Eno gives better, fluffier results than baking soda. Sometimes baking soda can leave orange colored specks in the khaman. Good to know baking soda worked well for you. Thanks again
Adding all liquid at once makes too many lumps in the batter. I love that you took care of that by adding in batches. The recipe worked well even without sieving. Thank you for the excellent work
Glad to know your dhokla turned out well Om.
Your recipes are very thoughtfully written. I love how you make smart ways of cooking – in this Khaman recipe instead of using multiple vessels for sieving the besan flour you smartly added it as a step after the ingredients are mixed in water so it can directly be dropped into the mixture. This saves time and extra utensils and is much easier. Love your recipes!!
Thank you so much Shreya. Appreciate your time for letting me know!
Thanks for this Perfect & Excellent time tested five star Dhokla recipe.
Maam, how about if I want to try this recipe using whole moong dal. What changes should I make, apart from using batter made from 1 cup whole moon dal soaked overnight?
Hi Gopi,
Glad you like it. I’m yet to share that method on the blog.
EXCELLENT….EASY TO MAKE
Thank you
This recipe looks so good. But I only have a 6 and 7 inch pan. How does the recipe change if I use a larger pan.
Thanks Deepika. The steaming time changes with the size of the pan/bowl. I used a 5 inch steel box which takes 18 to 20 mins. If you want you may go with a larger pan and cut down the steaming time to 15 mins. Hope you get to try.
Bahut khoob
I think this is the best recipe to make khaman dhokla. No lumps in the batter and the measurements are perfect. Came out so fluffy and spongy.
the best and perfect receipe on internet
Thank you so much Smita
Thanks Swasthi for the recipe. Mine turned out fabulous but there was a confusion regarding water in the printed version. No worries because I followed the photo guide but you may want to fix it for others. You should be more clear on the water required to make the batter. Anyways 5 star recipe
You are welcome Himani. Yes sure I will do that. Thanks for sharing back the outcome.
Hi can you please share dhokla recipe using rice and lentils.
Hi,
Yes I can but will take time since I am going on a long holiday.
Eno is sodium carbonate, sodium bicarbonate and citric acid, so banking soda (sodium bicarbonate) alone would not be a good substitute. You would need an acid for the bubbles or use baking powder – because it already has the acid – as a substitute. I usually use a little baking powder with a pick of banking soda and yogurt for awesome bubbles and taste.
Yes, as you said baking soda alone cannot be used. So this recipe suggests using lemon juice or citric acid. I felt eno gives the best results and you get a really soft and fluffy khaman dhokla.
Let me know the quantity of citric acid that is to be used while making dhokla. Can we add lemon and citric acid both. Do reply
Use ⅓ teaspoon natural citric acid. I wouldn’t add both, it can become too sour.
when we double the recipe does the citric acid quantity also doubles ??coz it doesn’t show that
Yes you should double. That’s because the plugin can’t double or triple for substitutes.
Can I use any other flour beside besan for this recipe? Thank You.
Susan, it can be made with fine semolina or sorghum flour. But it won’t taste this good. If you want to try use very fine semolina and adjust the amount of water
No, Dhokla is traditionally made with besan. I cannot think of any other flour that can be a good substitute.
Yes I agree with that but some people can’t eat besan due to allergies or stomach problems so I mentioned that.
Very easy to make, it’s very light and tasty also. Thank u for this recipe
Glad you like it Kriti. Thank you