Poha Chivda Recipe
Updated: September 16, 2023, By Swasthi Shreekanth
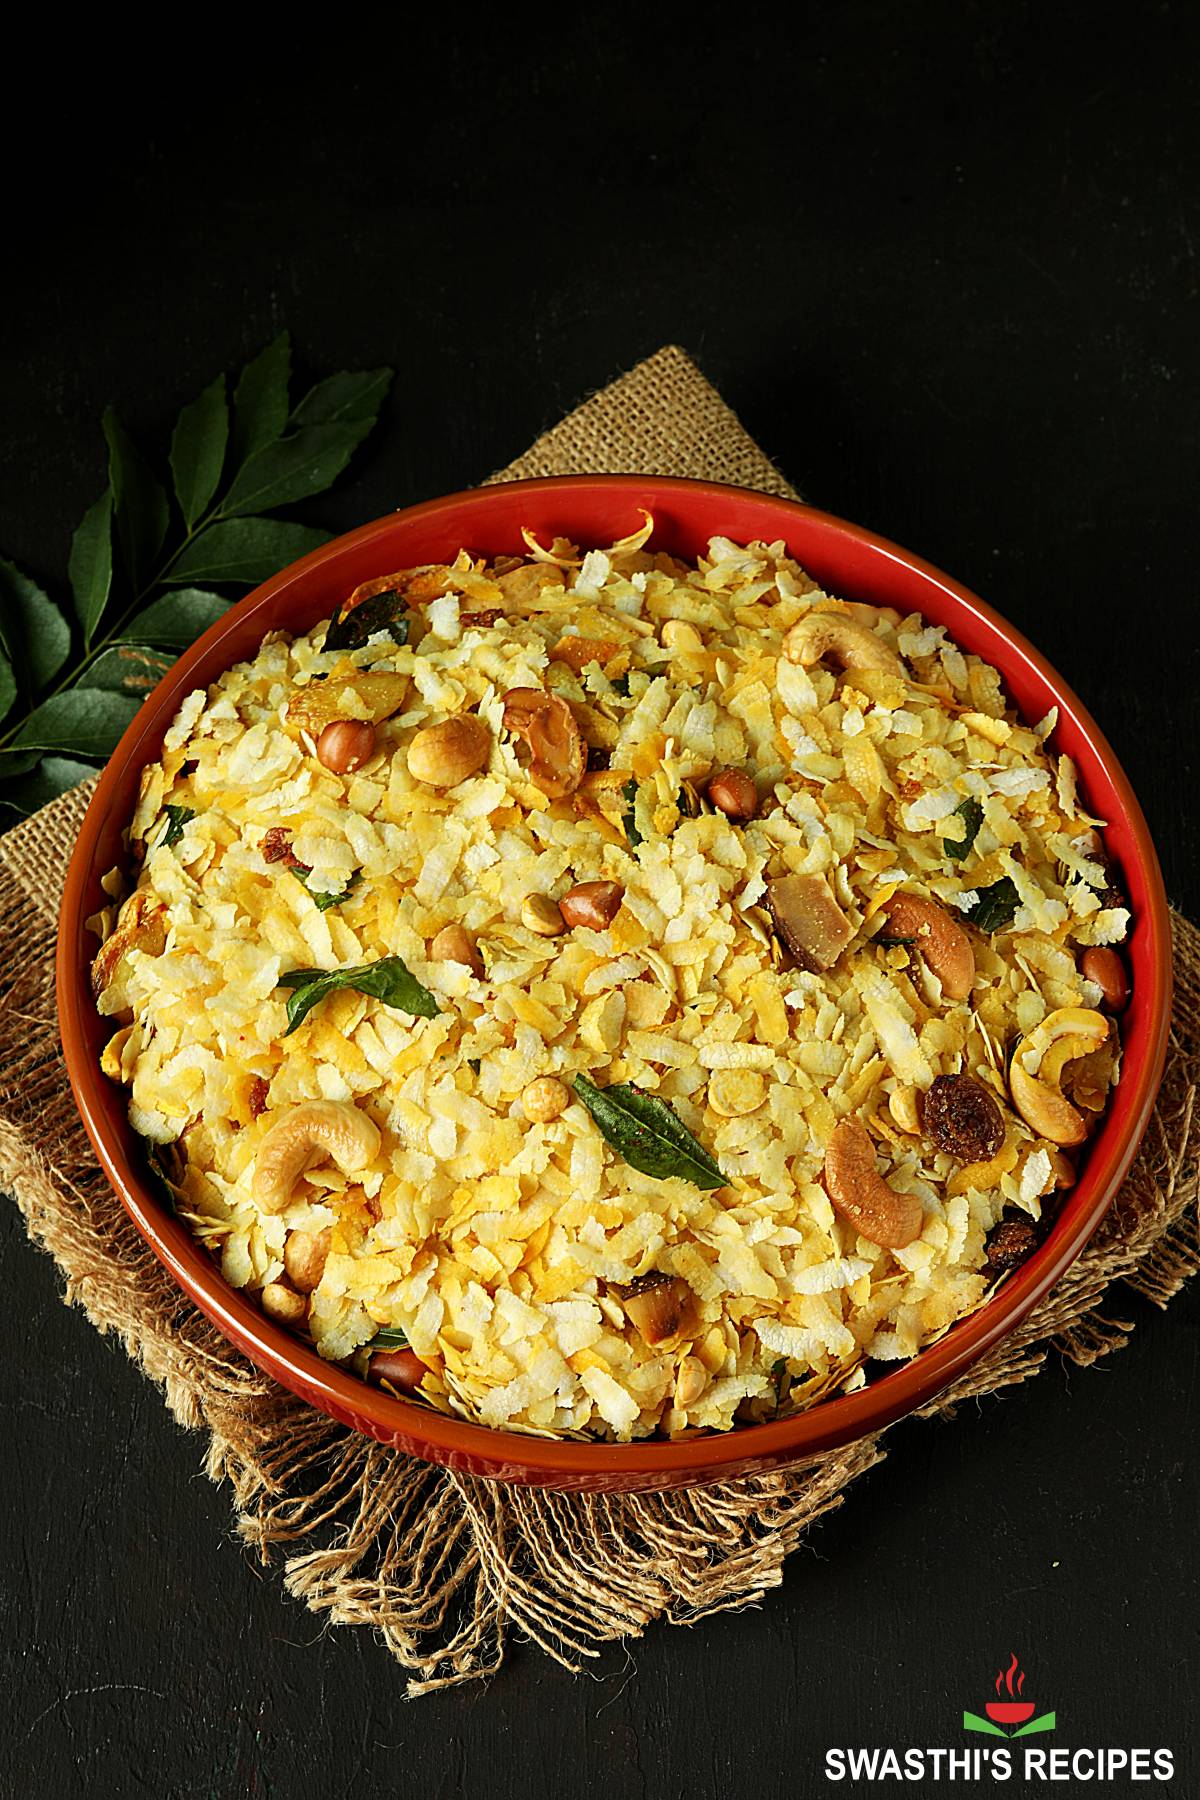
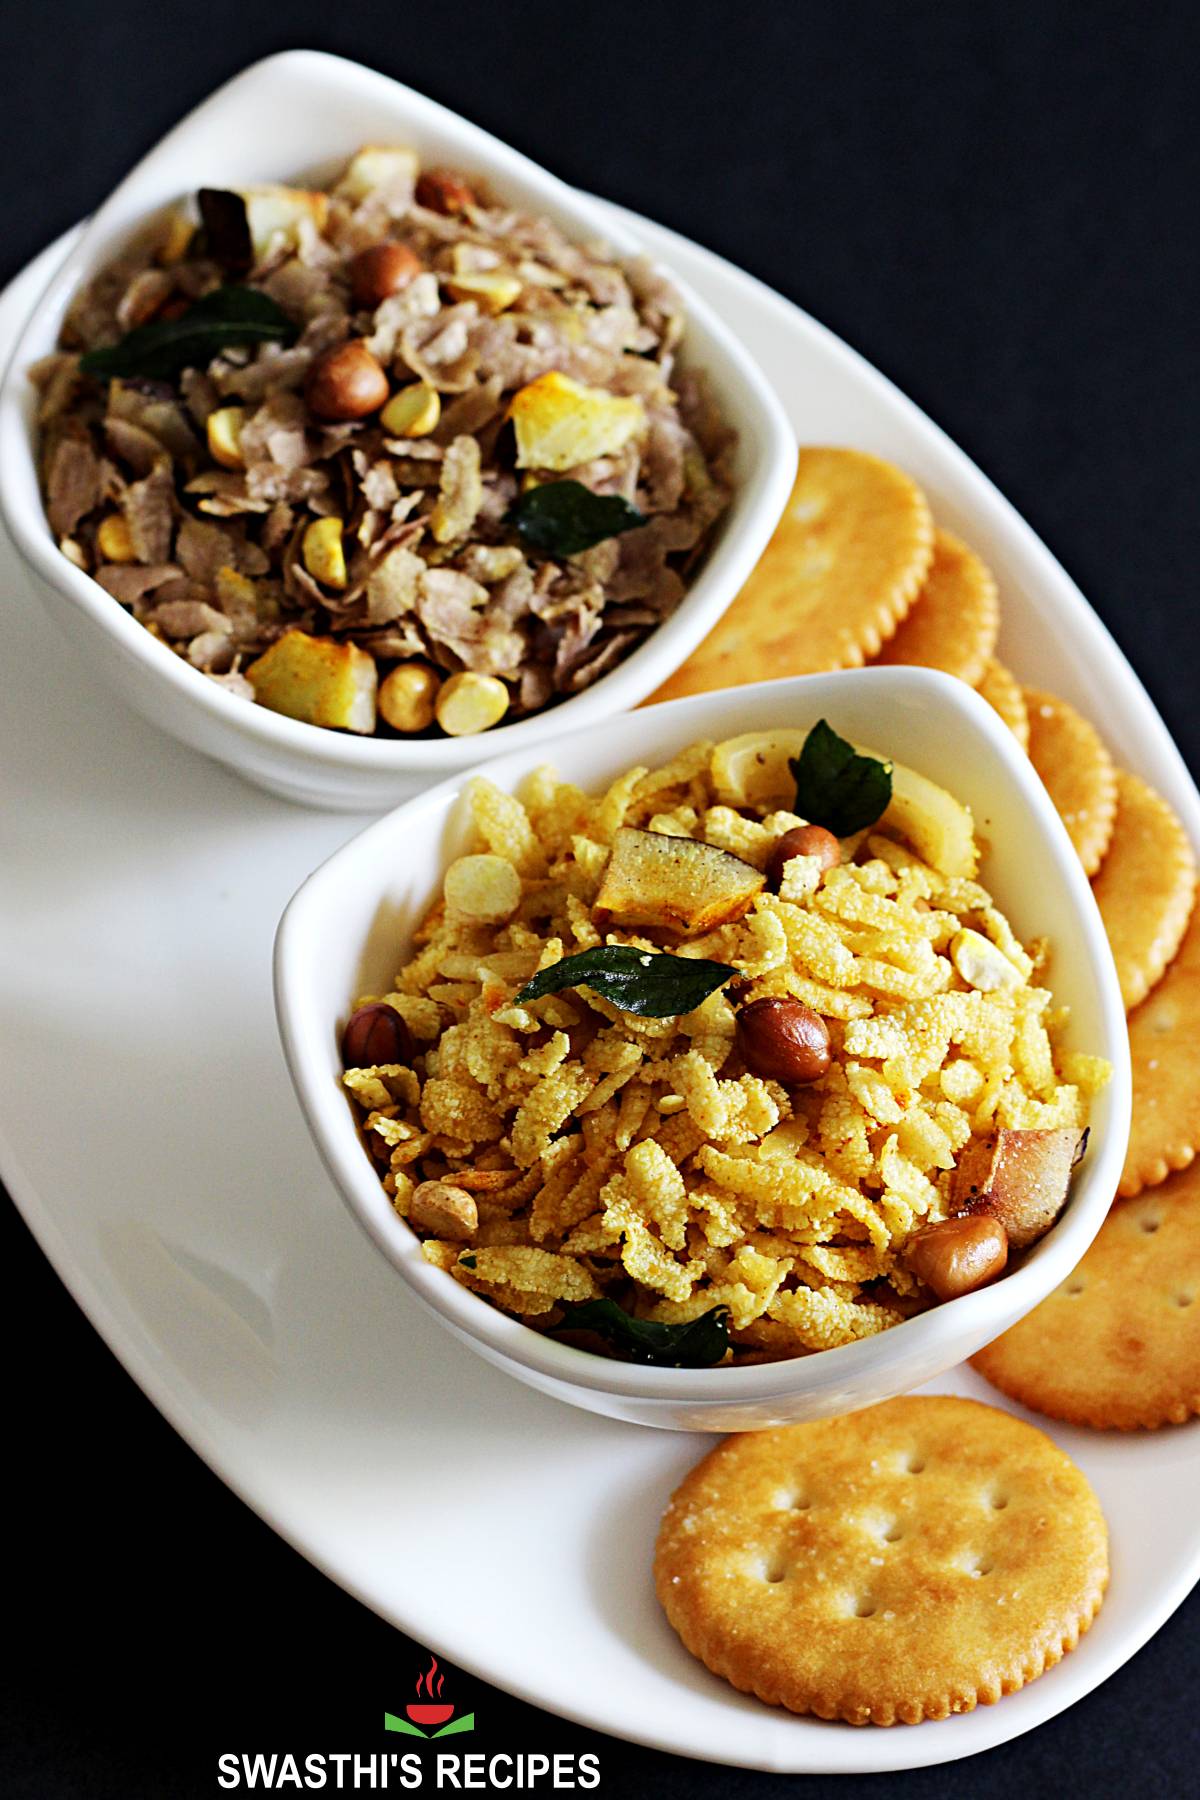
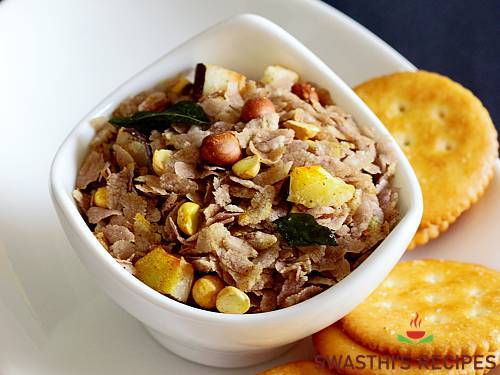
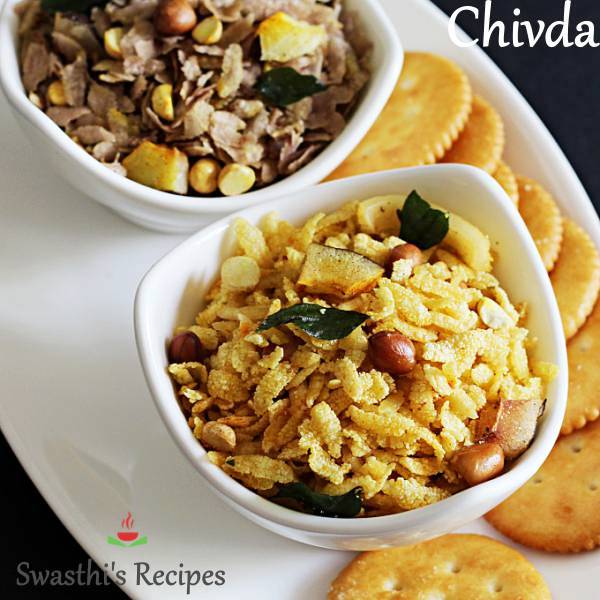
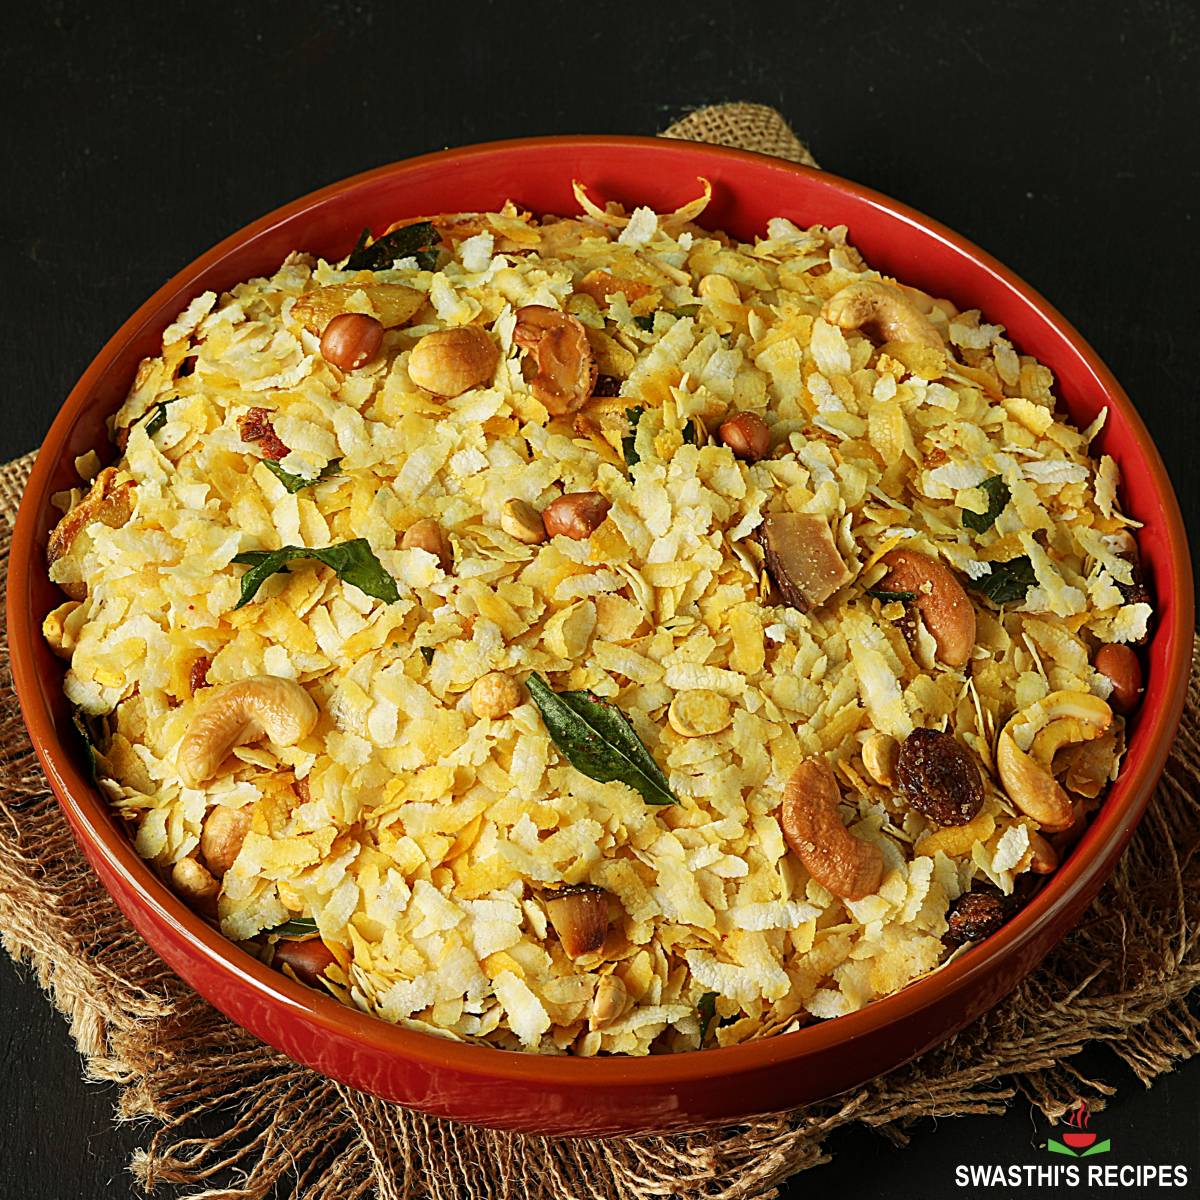
Poha Chivda, usually referred to as just Chivda, is a popular Indian Snack mix made with flattened rice (poha), spices, curry leaves and nuts. It is eaten all-round the year as a tea time snack. Chivda is also made for festivals like Diwali, Ganesh Chaturthi and Holi. It can be made with cornflakes, cereals, rolled oats or even with makhana. However Poha Chivda remains the most commonly made as it is delicious. In this post I have share 3 ways to make it – pan roasted, oven roasted & deep fried.
About Chivda
In Indian bakeries and stores you will find numerous brands selling Poha Chivda. There are different styles of making it. We don’t buy the store bought ones since we don’t know the quality of ingredients used, especially the oil. At home we have the liberty to choose the best ingredients, mostly organic and can also customize to our taste.
For healthier option, you can roast the chivda in a pan or in oven as it needs very little oil. Deep fried poha chivda turns lighter in texture and taste good. I make the deep fried one during festivals as it gets done faster compared to the roasted chivda.
There are different kinds of poha available in the stores – Thin, medium and thick. To make the pan roasted chivda, thin and medium flakes work best. On occasions I have also pan roasted the thick ones with great success. To make the deep fried chivda, thick or the medium flakes work best.
There is another kind which are paper thin and this is mostly available only in some parts of India. These are usually sun dried until crisp and then tempered. This recipe will give you half kg of poha chivda and it keeps good for 2 weeks in air tight jar.
Related posts you may want to look into
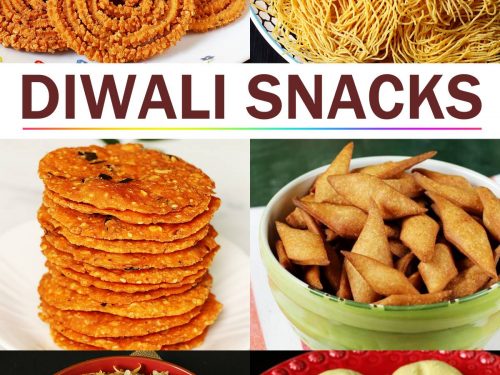
Diwali Snacks
Bhel Puri
Chakli
Shankarpali
Namak Para
Photo Guide
How to Make Poha Chivda (Stepwise Photos)
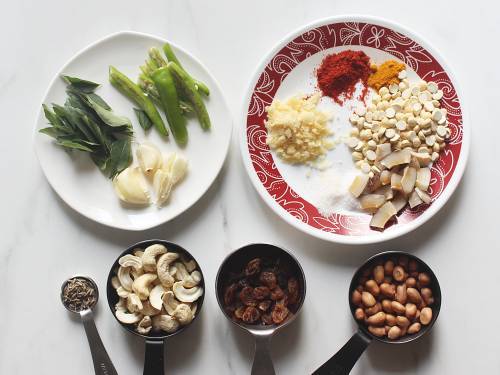
Here are the ingredients you need. Prepare them first as you won’t have time to look around for ingredients while making.
250 grams poha (3½ to 4 cups, refer notes in the recipe card below)
2 to 3 tablespoons oil (or 1 cup to deep fry)
¼ cup peanuts
¼ cup cashews (split)
2 tablespoons roasted gram (roasted chana dal /fried gram) (optional)
2 tablespoons raisins (optional)
¼ cup dried coconut (copra sliced thin to ½ inch) (optional)
4 medium garlic cloves crushed well
2 sprigs curry leaves (rinse & pat dry)
2 to 4 green chilies slit (adjust to taste, skip for kids)
¼ to ½ teaspoon red chili powder (adjust to taste)
¼ teaspoon turmeric powder
½ teaspoon salt (adjust to taste)
1 tablespoon jaggery (grated or powder) (or powdered sugar, optional)
¼ teaspoon cumin seeds jeera (optional)
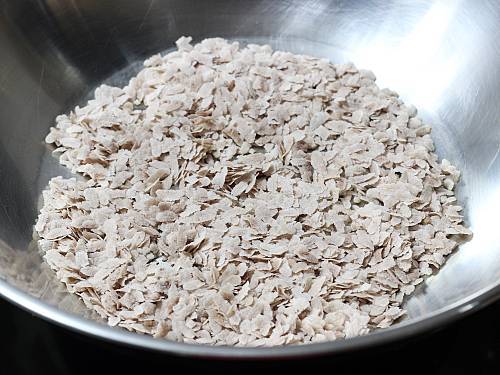
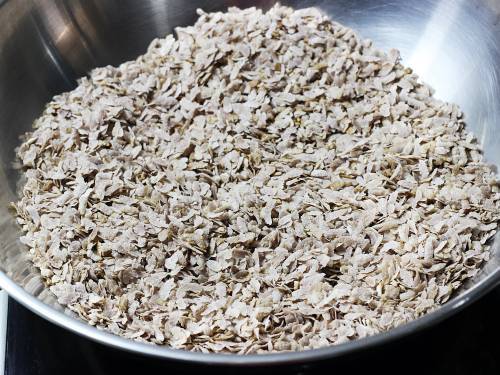
Now let us make dry roasted healthy poha chivda. I used medium brown poha here. You can use medium to thin poha for this method.
Method 1 – Pan Roasted Chivda
1. Heat a wide heavy bottom pan. Make sure the pan is hot, regulate the flame to medium and add 1½ cups poha. Spread them all over the pan. You can add more depending on the size of your pan. But do not add a lot at one time as they won’t turn crisp.
2. Stir them with a spatula and roast until they turn light and crispy. When they are done, they will also increase in volume. It takes only a few minute to become crisp. Transfer them to a large wide tray/ bowl. Roast the rest of the poha in 1 to 2 batches depending on the size of your pan.
Temper
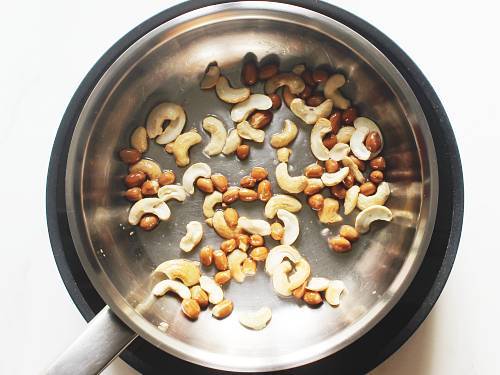
3. Pour 1 tablespoon oil to a small pan and heat it. Add peanuts and roast them on a medium heat until lightly golden. Next add cashews and fry until lightly golden. The frying time varies for peanuts and split cashews so I add them one after the other.
4. Add coconut and roasted gram. Both are optional.
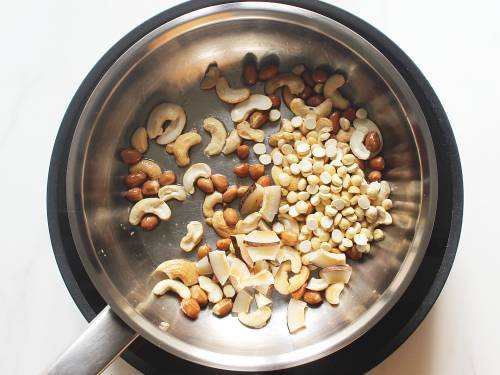
5. Fry briefly until the coconut turns light and golden.
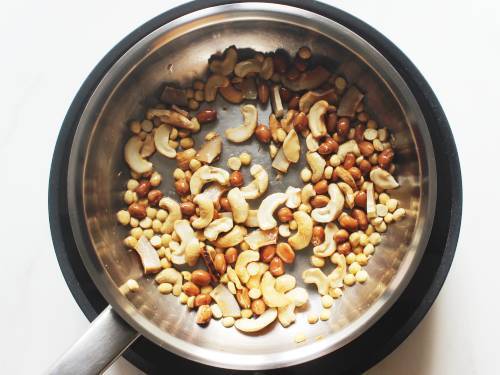
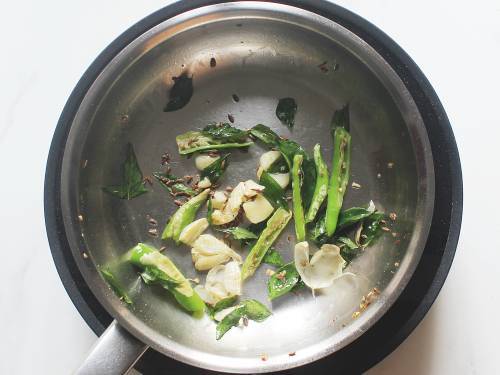
6. Remove the fried ingredients with a spoon and add to the roasted poha. Keep the excess oil in the pan. Pour another 1 to 2 tablespoons of oil to the same pan. Add slit green chilies, crushed garlic and curry leaves. Fry until the garlic turns crisp and golden. Then add cumin seeds to the hot oil (optional).
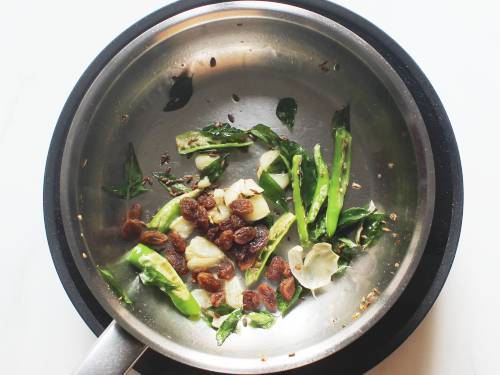
7. Next add raisins & fry. Soon the raisins will swell up.
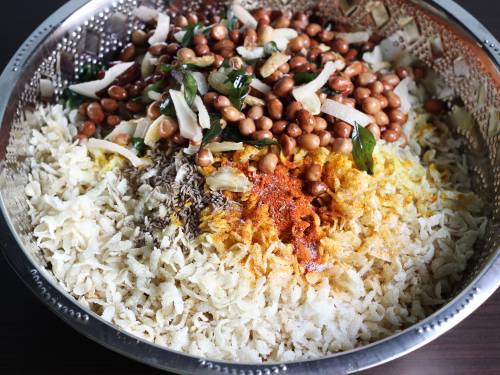
8. Turn off the stove. Immediately add hing, red chilli powder, salt, turmeric and jaggery or sugar. Give a quick stir to melt the jaggery.
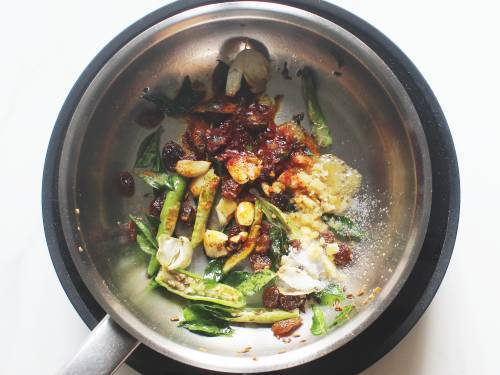
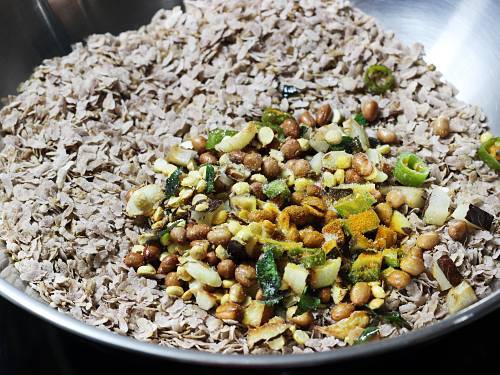
Transfer this to the roasted poha. Immediately add some roasted poha over the tempering. Begin to mix with a spatula while the tempering is still hot.
If you are looking for healthy fiber rich snacks, then do give this pan roasted brown poha chivda a try.
Method 2 – Deep Fried Poha Chivda
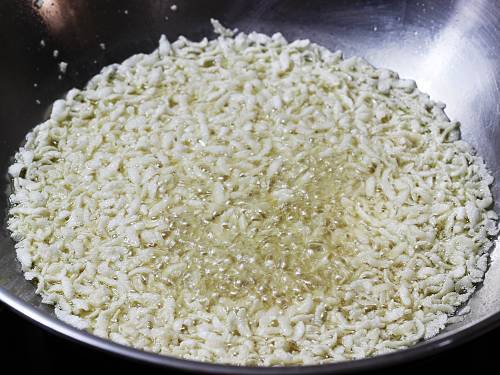
1. Sieve poha to separate fine powdery part. Heat 1 cup oil in a deep kadai. Check if the oil is hot enough by dropping a poha flake, it has to rise immediately without browning. This is the correct temperature. To the hot oil, pour poha as much as the oil holds in a slow stream. Stir constantly with a ladle. Do not use very less oil or lot of poha, otherwise the poha will not puff up well.
2. Remove them with a fine hole or mess skimmer to absorbent kitchen tissues. Repeat frying in 2 to 3 batches. You will be left with oil that is unfit to use. Just discard it, it is unhealthy to reuse it.
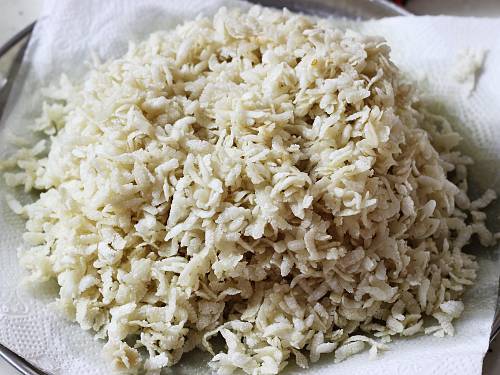
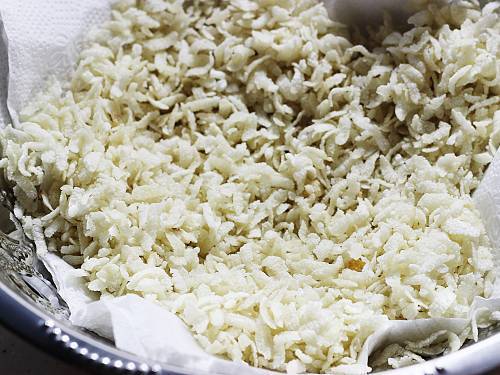
3. Once done, spread them well on kitchen tissues so the excess oil is soaked up by the tissues. This way they keep fresh for many days.
Temper Fried Chivda
Follow the same tempering as above for the deep fried chivda too. Alternately you can also add the peanuts, garlic, coconut, curry leaves, green chilies to a fine sieve or strainer.
Deep fry them in the same oil by placing the strainer in the hot oil. Fry them until crisp. Ensure the chillies are deseeded and there is no moisture on the curry leaves else they will splatter.
Transfer them to the fried chivda. Then sprinkle hing, turmeric, red chilli powder, salt and cumin immediately over the hot tempering. I followed this method here. If you add it to the tadka pan, there are chances your spices will burn.
Cool completely and store in a air tight jar.
Method 3 – Oven Roasted Poha Chivda
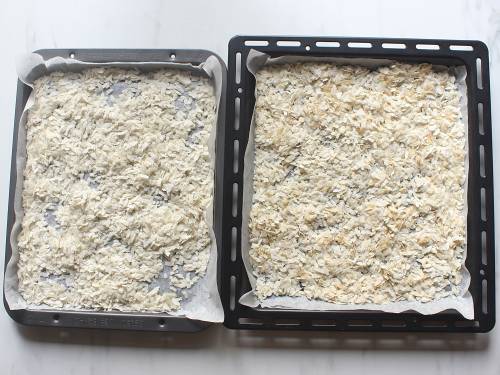
To Roast in Built-in Oven: Preheat the oven to 350 F or 175C. Spread thin poha in a single layer on a baking tray. Place in the middle rack in the oven. Bake for 14 to 15 mins, stirring them with a spatula, halfway after 7 mins. Remove them when they are crispy but not brown. Thicker poha takes a few mins longer.
To double the recipe, use 2 trays and spread in a single layer. The lower tray takes 2 to 3 mins more for thick poha and 1 min more for thin poha.
To Roast in Medium to Smaller OTG: Spread poha on a baking tray evenly. You can roast poha in 2 trays at one time. Depending on the size of your oven, use about 1.5 to 2 cups in each tray. No preheating is required. Just pop the trays in your oven. Roast thick poha for 12 to 14 mins, thin poha for 5 to 6 mins at 250 F or 120 C. Shake or stir the poha halfway.
If you are using paper thin flakes, then cut down the roasting time. Make the tempering following the same method I have shown in the above pictures for other methods.
Add the hot tempering to the roasted poha chivda.
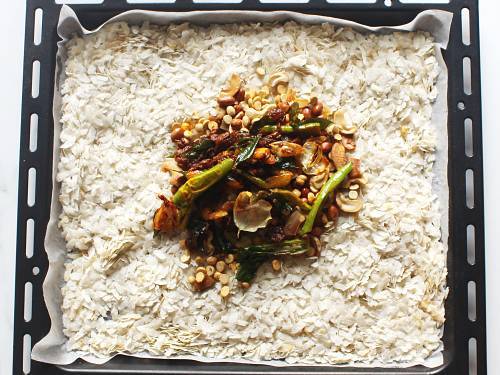
Begin to coat the poha while the tempering is still hot. This helps to coat all of the chivda well with the tempering. Mix everything well.
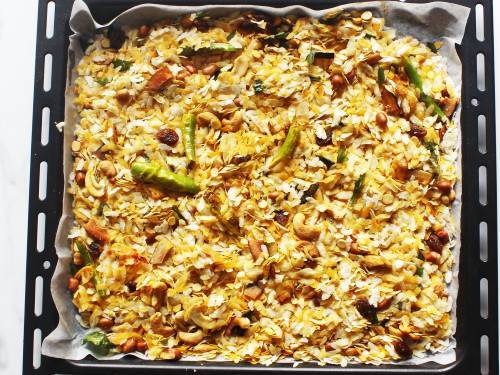
Cool completely & store poha chivda in an air tight jar.
Related Recipes

Recipe Card
Poha Chivda Recipe
Ingredients
- 250 grams poha (3½ to 4 cups, refer notes)
- 2 to 3 tablespoons oil (or 1 cup to deep fry)
- ¼ cup peanuts
- ¼ cup cashews
- 2 tablespoons roasted gram (fried gram) (optional)
- 2 tablespoons raisins (optional)
- ¼ cup dried coconut (copra sliced thinly) (optional)
- 4 medium garlic cloves crushed
- 2 sprigs curry leaves
- 2 to 4 green chilies slit (skip for kids)
- ¼ to ½ teaspoon red chili powder (adjust to taste)
- ¼ teaspoon turmeric
- ½ teaspoon salt (adjust to taste)
- 1 tablespoon jaggery (grated or powder) (or powdered sugar, optional)
- ¼ teaspoon cumin seeds jeera (optional)
Method
- Heat a wide and large heavy bottom pan.
- Add 1½ cups of poha. Do not add a lot of them at one time. You must be able to spread them evenly in the pan.
- Roast them on a medium heat stirring often & gently till they turn crunchy & light. They barely take few minutes to turn crisp. Check the step-by-step pictures above.
- Transfer them to a large wide bowl for cooling. Fry all of the poha the same way in 2 to 3 batches depending on the size of your pan. Scroll down for tempering instructions.
- Heat 1 cup oil on a medium heat in a small deep fry pan. You will need a fine hole skimmer to remove the fried poha. Keep this ready.
- When the oil is hot, test by dropping a flake of poha. It has to rise immediately without browning. This is the right temperature. Pour 1 cup poha in a stream to the oil. Fry them stirring constantly.
- They puff up immediately. Then remove them using a fine hole skimmer or a perforated ladle.
- Transfer them to a colander lined with kitchen tissues. Repeat frying the poha in batches. Ensure the oil is not extremely hot before frying the next batch. It has to be hot enough else they will soak up oil.
- This deep fried oil is not good to use, so make tempering with fresh oil. Scroll down for tempering instructions.
- To Roast in Built-in Oven: Spread thin poha in a single layer on a baking tray. Preheat the oven to 350 F or 175C. Bake for 14 to 15 mins, stirring them with a spatula, halfway after 7 mins. Remove them when they are crispy. Thicker poha takes a few mins longer.
- To Roast in Medium to Small OTG: You don't need to preheat the oven. Roast thick poha for 12 to 14 mins, thin poha for 5 to 6 mins at 250 F or 120 C. Shake or stir the poha halfway.
- If you are using paper thin flakes, then cut down the roasting time even more.
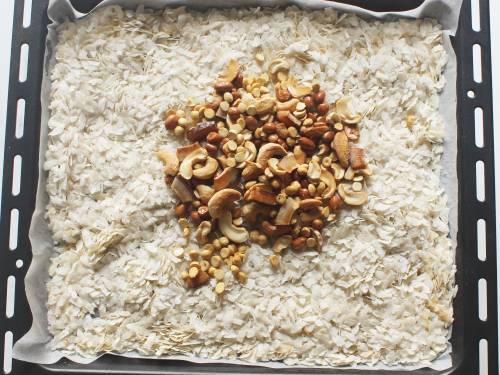
- Pour 1 tbsp oil to a small pan and heat it. Add peanuts and roast them on a medium heat until lightly golden.
- Next add cashews and fry until lightly golden. Add coconut and roasted gram. Fry briefly until the coconut turns light and golden.
- Remove the fried ingredients with a spoon and add to the roasted poha. Retain the excess oil in the pan.
- Pour another 1 to 2 tbsps of oil to the same pan. Add green chilies, garlic and curry leaves. Fry until the garlic turns crisp and golden.
- Then add cumin seeds (optional) and raisins. Soon the raisins will swell up.
- Turn off the heat and add hing, red chilli powder, salt, turmeric and jaggery. Give a quick stir to melt the jaggery.
- Transfer this to the poha. Immediately add some roasted poha over the tempering. Begin to coat the poha while the tempering is still hot. This helps to coat all of the poha well with the tempering. Mix all of the chivda well.
- Cool completely & store poha chivda in an air tight jar.
Notes
- Poha: Thin and medium poha can be used for roasting. They can be roasted in the pan, in oven or in air fryer. Medium and thick poha can be used for deep frying.
- You can also roast the peanuts, cashews and raisins in oven but they taste best when fried in little amount of oil, when you temper the spices.
- Do not add red chilli powder to very hot oil as it burns quickly.
- To double the recipe, I usually roast them in 2 trays at one time. The lower tray takes 2 to 3 mins more for thick poha and 1 min more for thin poha.
- Nutrition values only for pan roasted chivda.
Private Notes
Tried this recipe?
Mention @SwasthisRecipes or tag #swasthisrecipes!Poha Chivda Recipe first published in October 2014. Updated and republished in August 2022.
About Swasthi
I’m Swasthi Shreekanth, the recipe developer, food photographer & food writer behind Swasthi’s Recipes. My aim is to help you cook great Indian food with my time-tested recipes. After 2 decades of experience in practical Indian cooking I started this blog to help people cook better & more often at home. Whether you are a novice or an experienced cook I am sure Swasthi’s Recipes will assist you to enhance your cooking skills. More about me
Follow Swasthi’s Recipes
Comments
What is the serving size for the nutritional info or is it the entire batch?
Half a cup makes one serving and the nutrition info is per serving (for the pan roasted version)
Made a small batch of the poha chivda and was surprised with the results. So delicious and crunchy that all was gone under 30 mins. Planning to make a larger batch on the weekend. Thank you
Hi do you wash poha before frying?
Hi Lina,
No, can’t wash them
Very nice. Lovely
Thank you for posting this! It’s called Chura Bhuja in my own state
Thank you for the chivda recipe. I’m a big fan of your recipes. Can I make this in the air fryer & for how long?
Fantastic recipe. Made a large batch and my family is in love
Glad to know Namrata
Swasthi we tried method 1 and it’s good dietary one without oil?Thank you
Glad to know Anu
🙂
Hi Swasthi,
It came out well Swasthi. Thanks for the wonderful recipe.
Hello Rajitha
You are welcome! Glad to know chivda turned out well. Thank you!
By the way I prepared with thin poha from big basket royal.. it took only 2 minutes to dry roast as you have mentioned..will prepare with red poha and organic one (from big basket only) and keep you posted.
Only question is can we add chili and garlic and store for two weeks? In that case do we need to fry chilli and garlic till crisp ? Last day we consumed the whole 250gm immediately and didn’t have anything to store.
Hi Tanu,
So glad to know you all liked the pan roasted chivda. Thank you so much for the hug. We can surely meet next time in Bangalore.
🙂
You can keep the chivda for 2 weeks without any problem. Fry chilli garlic until they lose all the moisture & become crisp. Just add bit more oil if needed when you fry. In my home, garlic will be the first one to get over fast. You know how good they taste after frying them. Hope this helps.
Excellent it was… I prepared the pan roasted one… We all loved it like anything…. Till date we used to have store-bought ones… Yesterday your pan roasted chivda recipe turned out so very well… I felt like giving you a biiiig hug…no more fried chivda from store.
You deserve a big treat when you come back to Bangalore again.
Swasthi, can I use sugar. Don’t have jaggery.
Hi Teena,
Yes you can use powdered sugar. I have updated it.
Hi Swasthi,
I could only get the THIN poha. For the roasted method, how long does it take to get it crisp so I don’t overdo it. Using 1.5 cups as per your recipe. Please give me appx. both heavy pan and oven times.
Thanks!
Hi Mona,
Thin poha takes only 5 to 6 mins in oven. In the heavy pan, it depends on the flame. It takes only 2 to 3 mins.
Can I pan roast thick poha? My Indian store doesn’t carry the thin poha. Will the thick one turn out good like the thin one do. Pls advice
Hi Vaishali ,
Yes you can use thick poha. That’s what I have used here in the picture. Yes they do turn out good. I always make chivda with thicker and medium flakes as my kids complain the thin poha hurts the mouth. Hope this helps
Thank you swasthi mam,I tried it and it came out very well (onion pakora nd chivda recipes both came out good)
The only women who explains very well without any question mark! Thanks a tonne it had helped me nd many other beginners nd who are trying nd willing to cook ur an inspiration thanks again!
Hi Harsha
Sorry for the late reply! So glad to know both turned out good. Thank you so much for your kind words. Hope you enjoy more recipes
🙂
your Recipe is really awesome for almost all dishes. this dish is simple and yummy
Thank you Veena
Glad you like them!
🙂
Thank you swasthi mam,I tried it and it came out very well (onion pakora nd chivda recipes both came out good)
The only women who explains very well without any question mark! Thanks a tonne it had helped me nd many other beginners nd who are trying to cook ur an inspiration thanks again!
I find your recipies very helpful.
Pau Bhaji (Wah Reh Wah)
Thank you so much Naseema!
Glad they are helpful
It hlped me I m thankful to swati.
Welcome Meenakshi
Thanks for sharing this recipe
Welcome Seema
Thank you swathi, I tried it and it came out really well…
Welcome Shameem
🙂
The receip are very taste and easy Thankyou
Welcome Asma