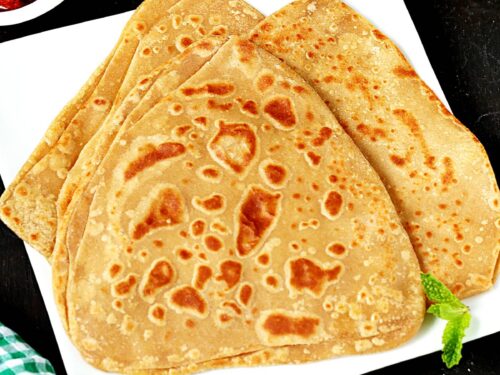
Chapati Recipe (Indian Flatbread)
Updated: September 9, 2023, By Swasthi Shreekanth
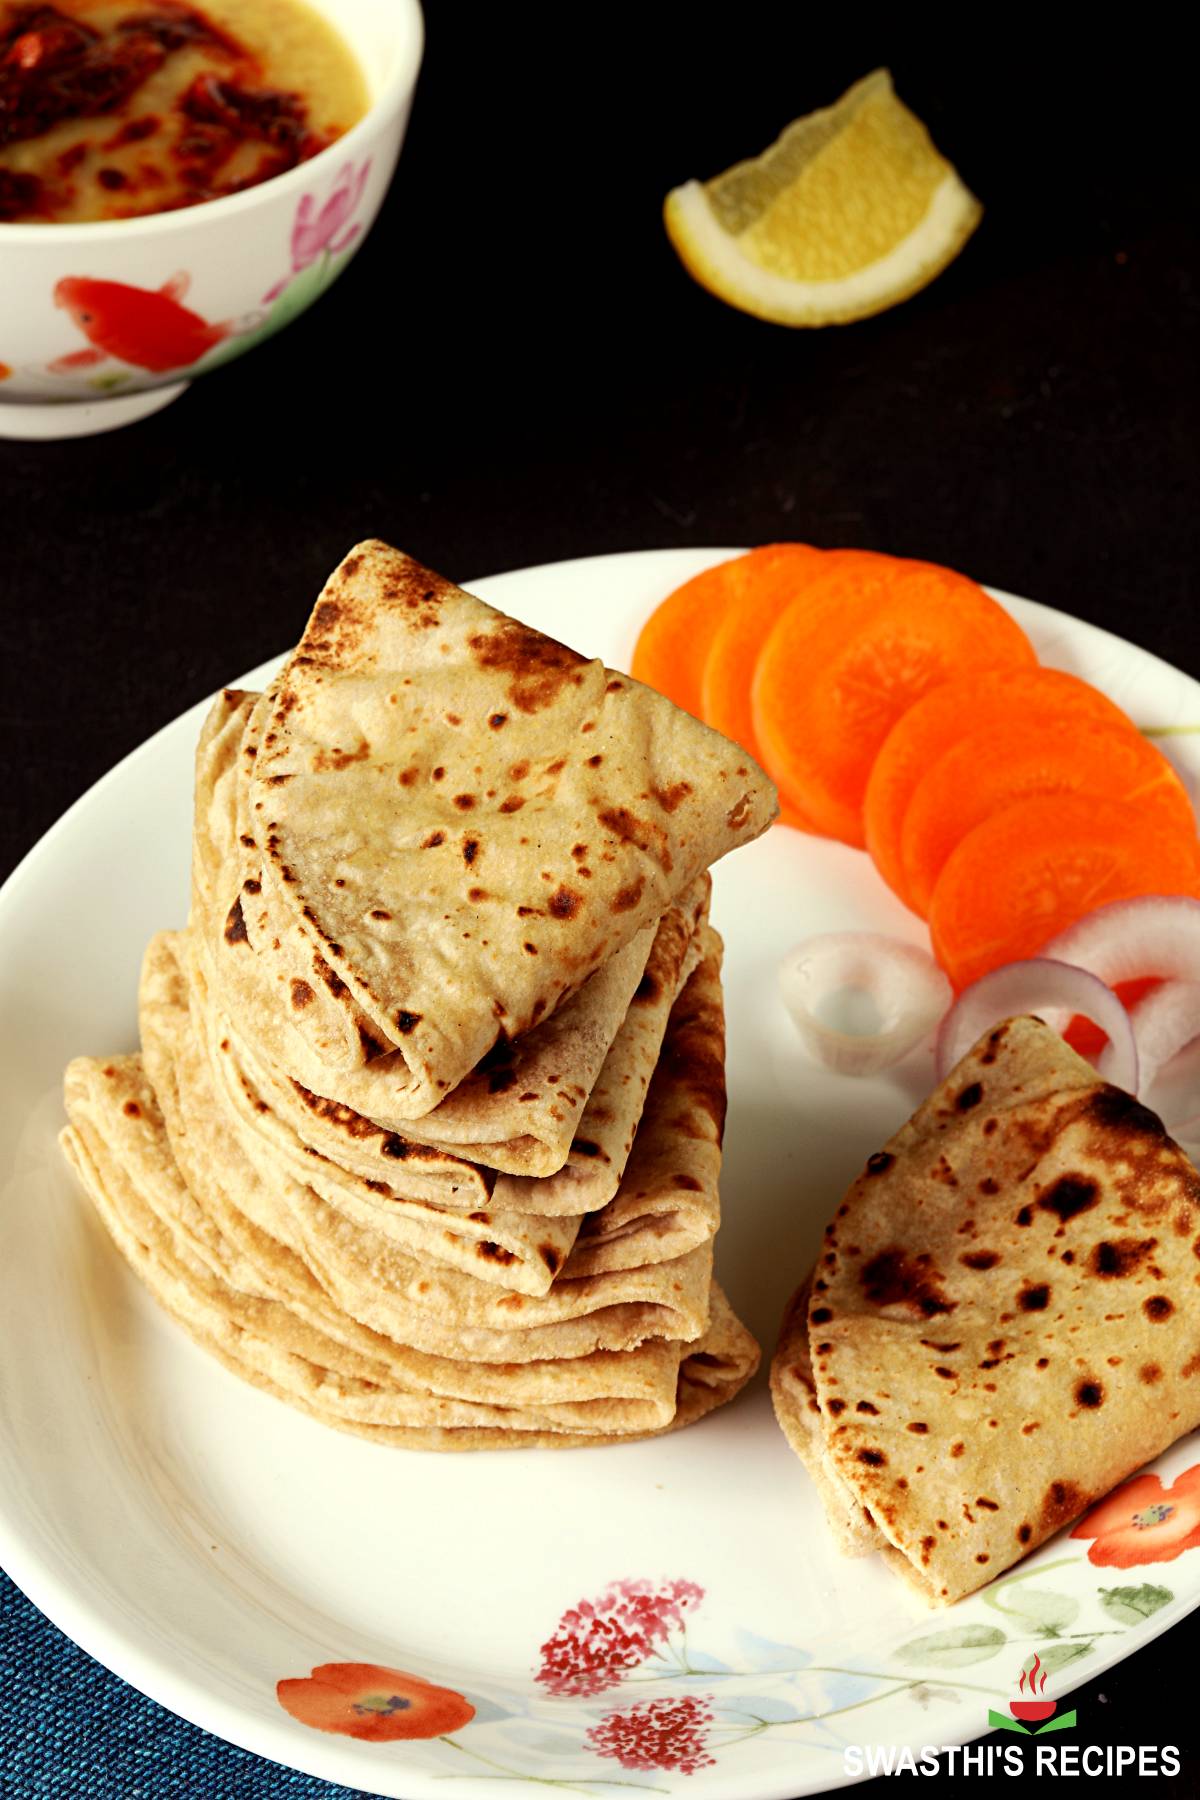
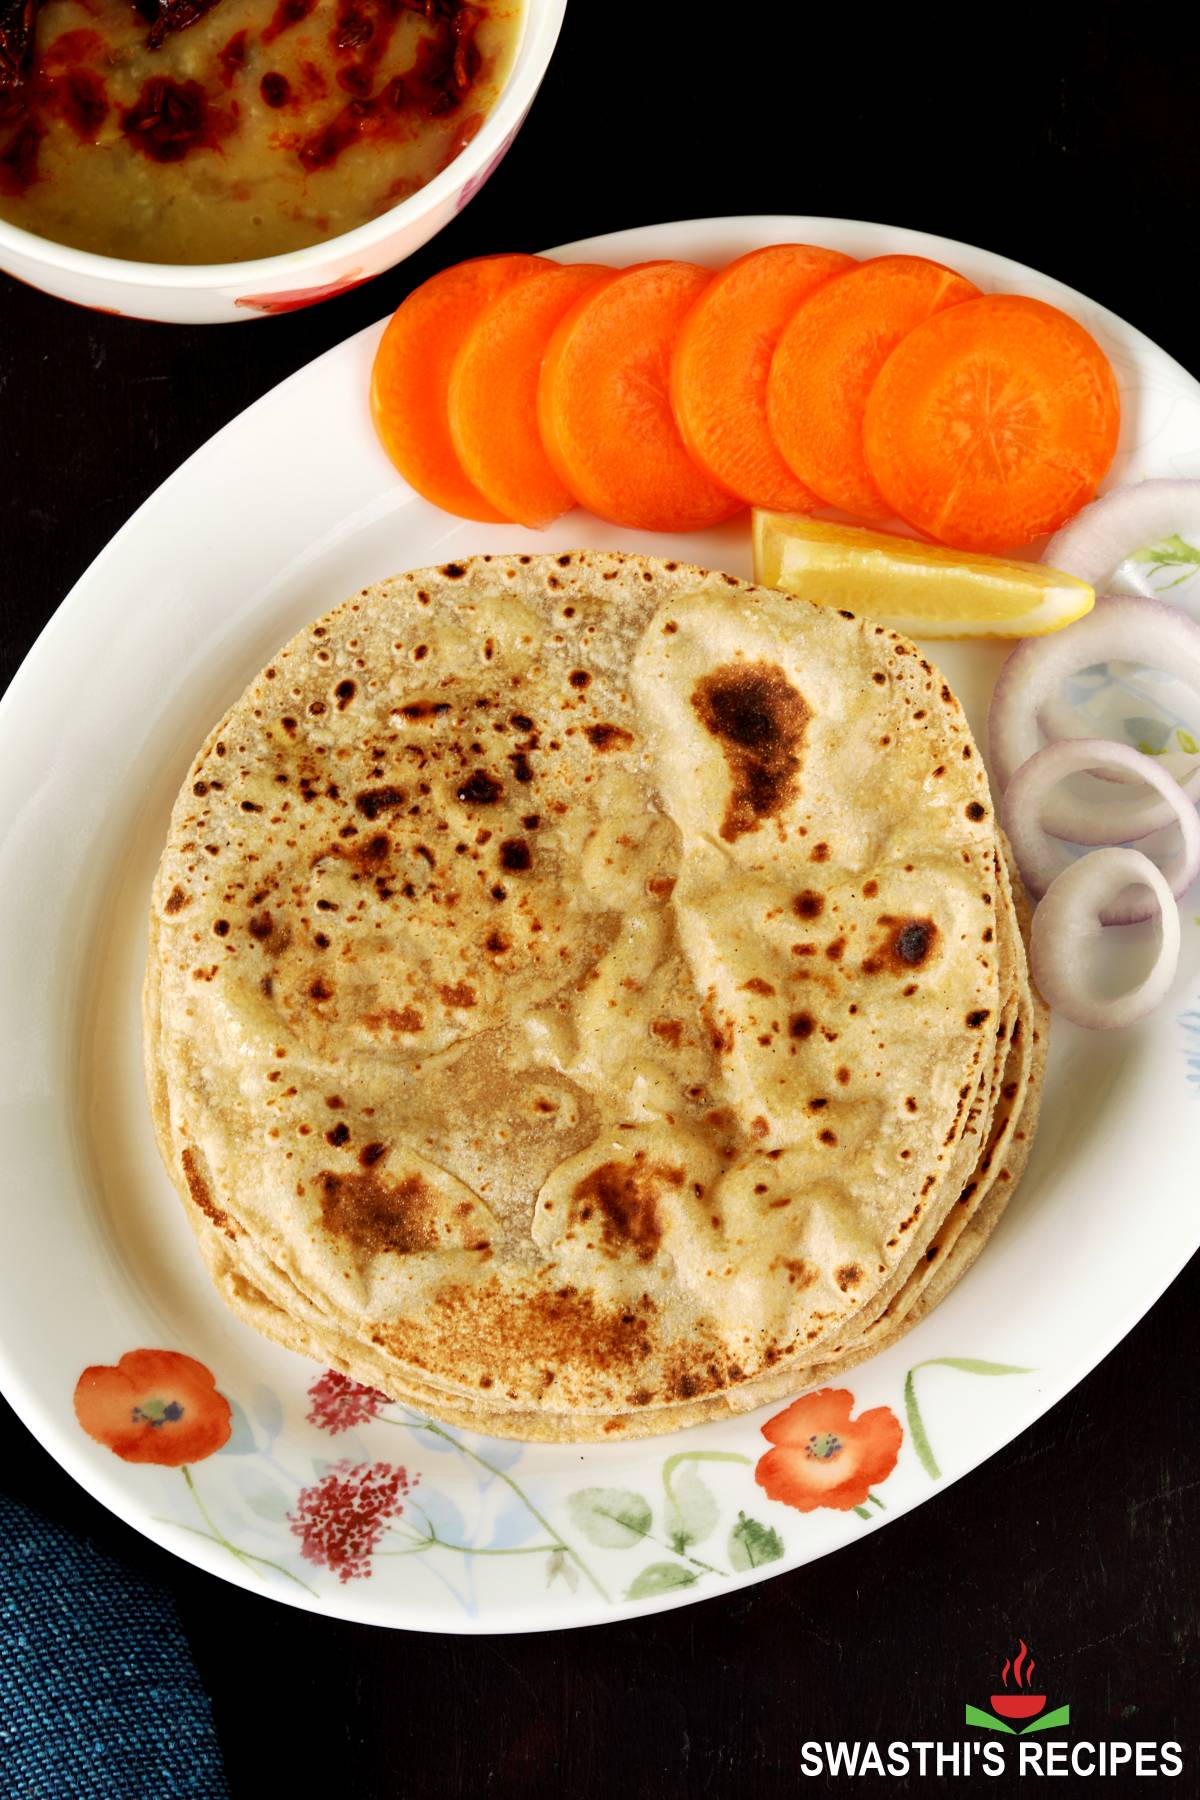
Chapati Recipe with tips & tricks to make them perfect & super soft every time! There is nothing better than a freshly made flatbread. With the freshest flavor and perfect texture, these homemade Chapati are the absolute best! Once you master the technique of making soft Chapati, you will never buy them from the stores. Serve them with dal, curries, stew or use them to make wraps, rolls, quesadillas, kothu roti or chapati noodles.
About Chapati
Chapati is a traditional unleavened Indian flatbread made with just 3 ingredients – whole wheat flour, ghee/oil & water. Optionally a little salt is added.
The term Chapati has been derived from the Hindi word “Chapat” meaning “slap” or “flat” which describes the traditional method of shaping chapati by slapping the dough in between the palms. (Source: Wikipedia). Later rolling pin has over taken this method of slapping the dough.
Though Chapati is made with the same ingredients as Roti, both are actually not the same.
Chapati Vs Roti
Roti also known as phulka is essentially puffed and is cooked without any fats like ghee or oil. Sometimes it is also cooked on a direct flame to help it puff. Once it is off the heat, ghee is smeared. Where as a chapati may or may not puff & is always cooked with fats on a tawa. It is never cooked on a direct flame.
Roti is never layered but chapati is sometimes layered. In Maharashtra and some parts of Karnataka a chapati is layered similar to Plain Paratha, but made with lesser Ghee or oil. In a few other countries, a flatbread inspired by Indian chapati and lachha paratha is made using a pleating technique.
These are actually called parotta in India and I have show such recipes in this Chicken Kathi Roll and Paneer Kathi Roll post (with wheat flour). There are many kinds of roti and this Tandoori Roti is one of them.
If you have grown up or lived in South India or Western Indian states, you will find that the terms ‘Chapati’ and ‘Roti’ are not used interchangeably. We understand a Chapati means cooked on tawa with oil or ghee, while roti means puffed & cooked on dry heat without fats.
For the same reasons, the flavor of Chapati is very different from Roti/ Phulka.
Roti is always round but a chapati can be round, triangle or even in between these two. Though the process of making the dough for both Chapati and Roti is same, some people use milk or Indian buttermilk in place of water to knead the dough.
Again Chapati means different to different people. It depends on where you have grown up or what is made as chapati in your family. A lot of people shape the dough to single layer while many make layered chapati.
In this post I share both the methods of rolling, with step by step photos.
Here are some curries that go well with chapati
Tofu Curry
Vegetable Curry
Chickpea Curry
Black Eyed Peas Curry
Photo Guide
How to Make Chapati (Stepwise Photos)
Make Dough
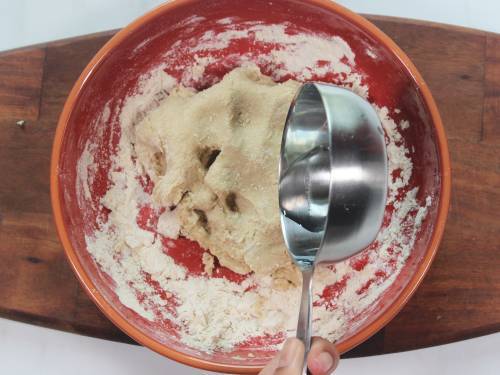
1. Add 2 cups whole wheat flour to a wide mixing bowl. Make a well in the center. Usually chapati is not salted but if you want you may add ¼ teaspoon salt and 1 to 1½ tablespoon oil (optional). Pour ¾ cup warm or hot water. I use hot water, not boiling hot. (read my pro tips section below)

2. Begin to mix to form a soft dough. If using hot water use a spoon to mix first, later use your fingers. If the dough is too dry, splash a bit of warm water and form the dough. Do not make it sticky.
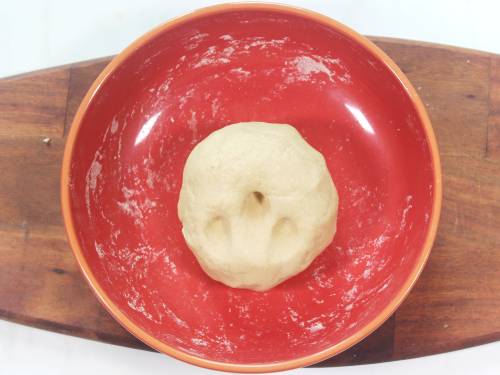
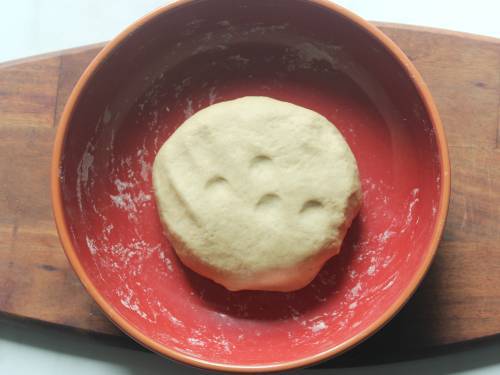
3. Knead for a minute or 2. Smoothen the dough with your palm. It should be soft, not tight & dent easily when you poke with your finger. Smear some water all over the dough. Cover and rest for a minimum of 30 minutes. (read pro tips section below)
4. After 30 mins, knead the dough well until soft and pliable. If it is dry, wet your hand and knead. You can do this a few times as required. It can easily turn sticky if you splash water at this stage. So don’t.
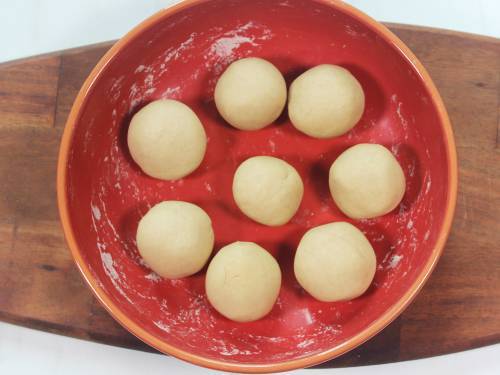
5. Divide the dough to 6 parts to make layered chapati. To make single layered, divide to 8 portions. Roll each ball in between your palms until smooth. Keep them covered until the end.
Rolling Single Layer Chapati
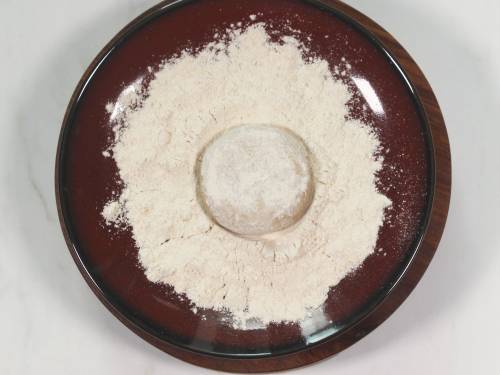
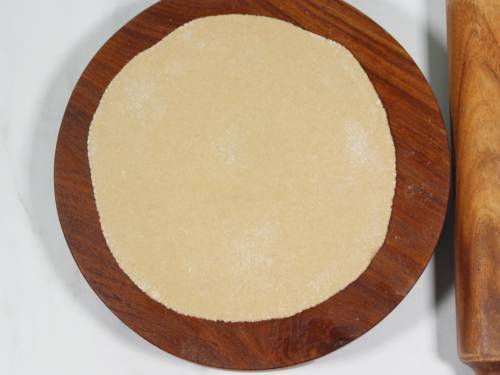
6. Flatten a dough ball and dip it in atta. Dust off the excess flour. Too much flour can make them hard.
7. Start rolling on the clean kitchen counter or on a rolling board. After rolling 2 to 3 times, lift up the dough and rotate it a little in anti-clock wise direction. Roll it again 2 to 3 times.
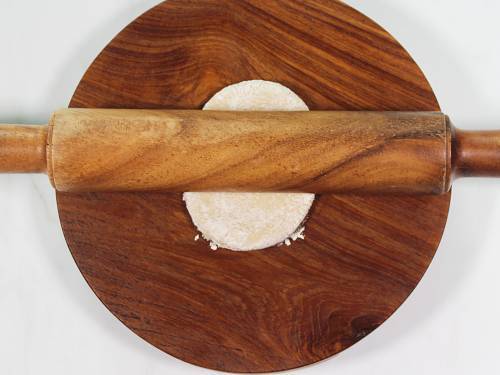
8. Roll lightly without putting too much pressure on the dough else it will get stuck at the bottom. Do not roll the chapati continuously, instead lift-up & rotate in clock-wise direction a little after every 3 to 5 rolls to ensure it does not get stuck to the board. As you roll, you may sprinkle little flour as required, if you feel it is about to stick. Roll it evenly all over, making sure you roll from one end to the other.
No Pressure, Even Rolling, Sprinkle flour only as required. If you want you may take a look at my Aloo Paratha Video, where I show the rolling part.
Cooking Chapati
9. Gently dust off each rolled chapati with your hand to remove excess flour, if any. Transfer them to a clean dry place on the counter, away from wind and heat. We don’t want them to dry out. You can roll about 3 to 4 and then start cooking, while you make the rest.
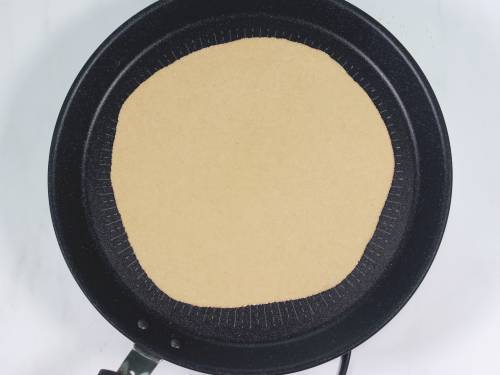
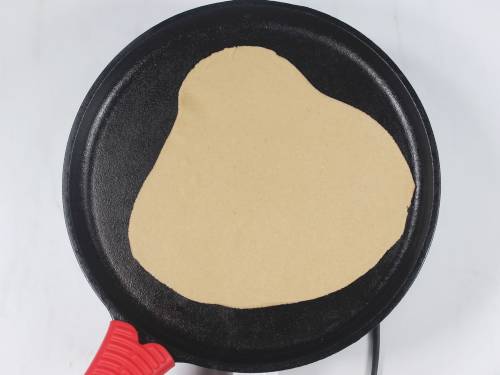
10. Heat a tawa/ pan (heavy bottom) on a medium high heat. When it is hot enough (not smoking hot), transfer the chapati to the pan. Within a few minutes, you will see bubbles over the chapati.
It is essential to regulate the heat when you are cooking the chapati. Too high will instantly burn them. Too low or even moderately low heat will make them hard and crispy/crusty. It is very important to cook them on a medium high heat, else they dry out.
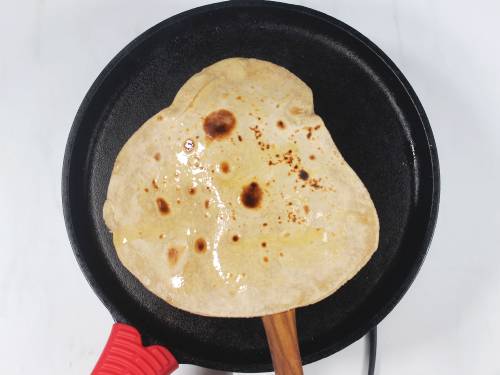
11. Quickly turn it to the other side & cook for a minute or 2. Spread little oil or ghee all over the chapati.
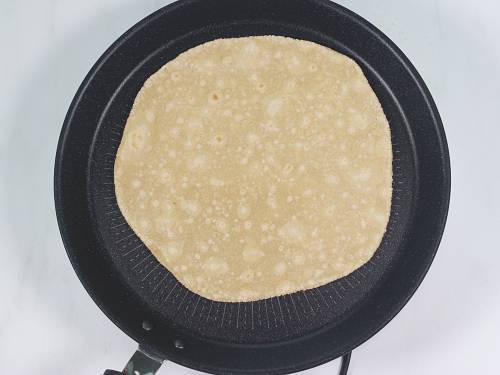
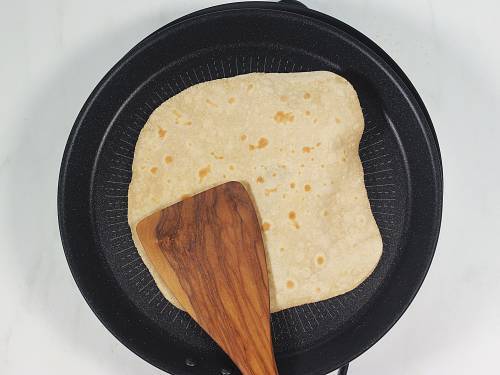
12. Turn it again to the other side, you will see it begins to puff up.
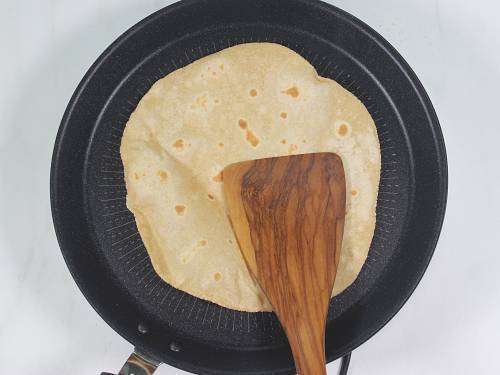
13. To make it puff evenly, press down with a wooden spatula in the places where it doesn’t puff. Do not use a sharp spatula, it can easily poke holes in them and prevent from puffing. Traditionally people use cloth or even bare hand.
Don’t worry if it doesn’t puff, it is not essential for a chapati to puff.
14. Spread a few drops or a spoon of ghee or oil on both the sides. You need to be quick at this stage. It is normal for the pan to smoke as soon as you add ghee.
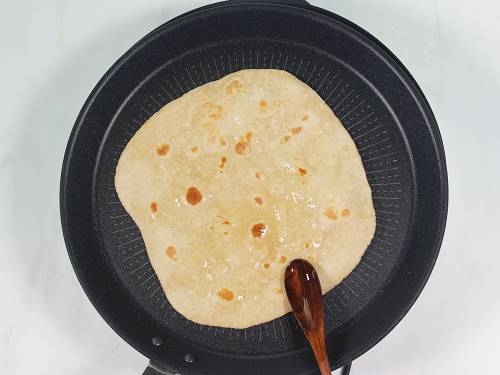
15. Cook for a few seconds or a minute to make sure your chapati is cooked all over, including the edges.
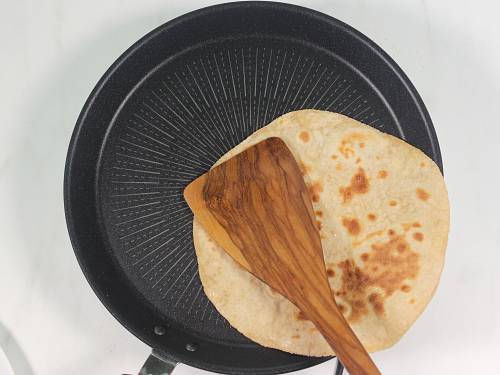
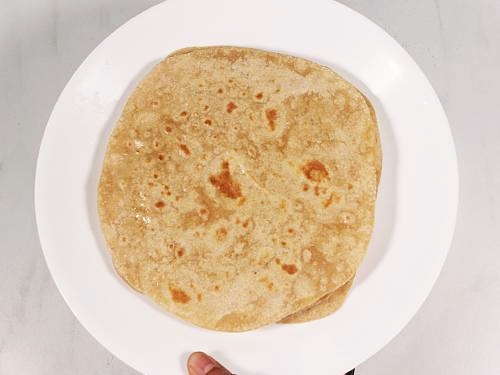
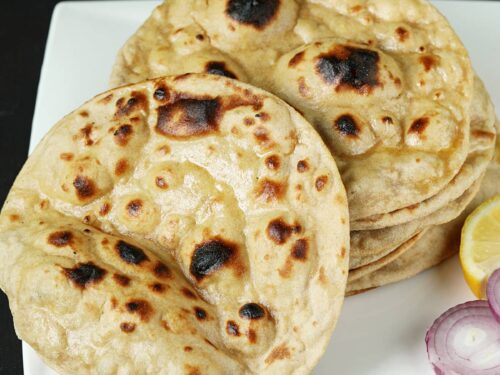
16. Remove to to a plate & stack.
Rolling Layered Chapati
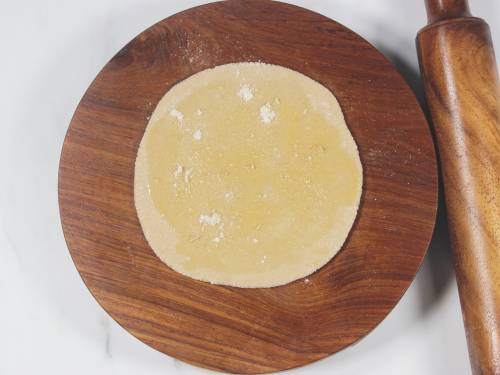
17. To make layered chapati. You will first roll it to a 4 to 5 inch disc. Smear a few drops of oil or melted ghee all over and sprinkle very little flour (2 pinches).
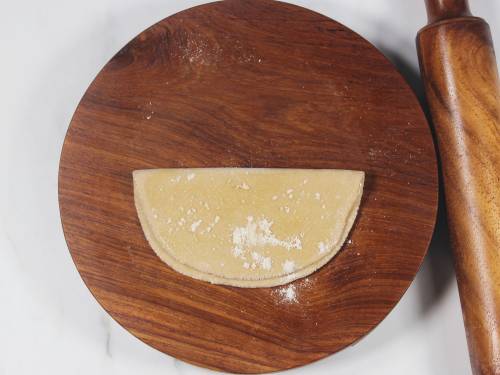
18. Fold it half way. Repeat the process of smearing ghee/oil and sprinkle flour.
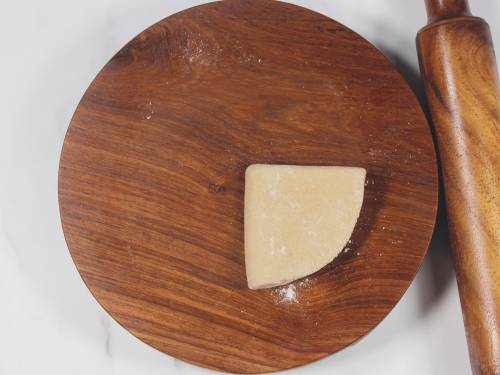
19. Fold it further. You get a triangle. Sprinkle little flour if required and begin to roll.
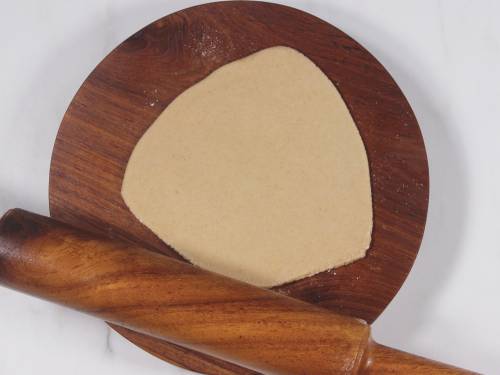
20. Roll it evenly to give a triangle /round or an imperfect round shape. Do not stress much on the shape but make sure you roll it evenly all over. Make the size according to the size of your pan. I roll mine in between 7 to 7.5 inches because I use a 10 inch pan.
21. Heat a tawa or a pan on a medium heat. When it is hot enough, transfer the chapati.
22. When you see bubbles, turn it to the other side and spread a few drops of oil or ghee. Cook pressing down lightly with a spatula. These will always puff because of the folding/layers.

23. Spread more ghee and cook on both the side turning them too & fro for a few seconds or a minute. Make sure you cook them on the edges well.
I stack them directly over a plate while cooking. If you want you may line the plate with a clean muslin cloth. Once done cooking, I fold them while still hot to retain the softness. Transfer to a container and place on a cooling rack. Loosely cover so they don’t sweat.
24. To make the next chapati, reduce the heat and wipe with a thick clean cloth or kitchen tissue & spatula. Be careful as the pan is really hot. You will be able to skip this step, if you dust off the excess flour well after rolling each chapati.
Serve chapati hot or warm with your favorite curry, dal or stew.

Pro Tips
Warm/ Hot water: Hot water works well for me, better than warm water. Hot water softens the bran in the atta so you get softer chapati. I use Chakki atta from Indian and Arab brands. So I am not sure if it works the same way with other brands. The water has to be hot but not boiling. I bring the water to a rolling boil and turn off. The temperature comes down slightly by the time I measure the flour.
Oil: I always use oil to make my dough. I feel it softens the bran, makes softer chapati & the dough is easier to roll.
Kneading Dough: I don’t knead the dough much before resting. I let it soak then knead well. If you want you can knead first and then rest. Never knead the dough without adding enough water. Kneading a dry dough will make hard flatbreads. Over kneading the dough can make hard chapati.
Choosing Atta: All chakki atta are not same. Experiment with different brands until you find one that gives you good results. You do everything right and still you get hard, rubbery and dry chapatis, then a lot of times it is due to the kind of wheat or the extra bran that is added to the atta.
Rolling Chapati: Making perfectly shaped chapati requires lots of practice which can be acquired only with consistent trials & practice.
Regulating heat: You can use a good quality non-stick or a cast iron tawa to cook your chapati. But regulating the heat is very important. You need to constantly keep adjusting the heat especially if using Cast iron pan.
Tawa/Pan: Please note that once you begin to cook your chapati in the tawa, it won’t work anymore to cook dosas. So always have one separately for all your flatbreads.
Related Recipes
Recipe Card
Chapati Recipe (Indian Flatbread)
Ingredients
- 2 cups chakki atta (stone ground whole wheat flour)
- ¾ cup warm water (or hot water, 2 to 4 tbsps more as required read notes)
- ¼ teaspoon salt (optional)
- 1 to 1½ tablespoons oil (optional, read notes)
- 2 to 2½ tablespoons ghee or oil
Method
- Add atta to a wide mixing bowl & make a well in the center. Add oil and salt if using. Pour warm or hot water and begin to mix. If using hot water use a spoon first and then your hand.
- Mix well to form a soft dough, splashing more water only as required. Knead the dough for a minute or 2. It has to be soft and not sticky or crumbly.
- Wet your hands and smear water all over the dough ball. Cover and rest for a minimum of 30 mins. You can leave up to 2 hours at room temperature.
- When you are ready to make the chapati, knead the dough until soft and pliable. If the dough looks dry, moisten your palm and knead. It should not be sticky.
- Divide the dough to 6 portions to make layered chapati or to 8 portions to make single layer chapati. Gently roll the balls in between your palms to smoothen them. Cover until you use up.
- Slightly flatten a ball and dip in flour to coat it with flour all over. Shake it gently to dust off the excess flour.
- Begin to roll the dough evenly without putting pressure. After 2 to 3 rolls, lift it and move it in clock-wise direction a little. Continue to roll it and then move it in clock-wise direction. If the dough begins to stick to the rolling pin or to the kitchen counter, sprinkle little flour. (not too much)
- Single Layer Chapati: Repeat these steps until you make a 7 to 8 inch chapati.
- Layered Chapati: After rolling the dough to 4 to 5 inches disc, smear melted ghee or a few drops of oil and then sprinkle 2 pinches of flour. Fold it to half, to make a half circle. Smear oil and flour and fold again to make a triangle. (Check the pictures). Sprinkle a bit of flour and roll to a 7 inch chapati.
- After rolling the chapati, take it to one of your hands & dust the excess flour with the other hand. Transfer to a dry place, away from wind and heat. After rolling 3 to 4 begin to cook.
- Heat a tawa/ pan on a medium high heat. It should be hot enough but not smoking.
- Gently transfer the chapati to the hot tawa and wait until you see a few bubbles. Using a spatula, turn it to the other side. Spread little oil or ghee all over the chapati. Let cook for a minute or 2. (If required regulate the flame to medium. This depends on the kind of stove & pan.)
- Turn back to the other side. It will ideally begin to puff. Press down with a spatula gently in place where it doesn't puff up. This helps the chapati to cook and puff. Keep rotating it and cook on the edges too.
- Spread some ghee or oil all over and turn it to the other side. Spread ghee here as well. You will begin to see some smoke from the pan. It is normal. Remove to a plate.
- Before cooking the next chapati, reduce the heat and wipe your tawa with a thick clean cloth or tissues. Be careful while you do this. To avoid this step, make sure you dust off the excess flour from the chapati after rolling.
- Stack the hot chapatis on a plate. Once done cooking all of them, fold each to a triangle, while still hot. Transfer to a container & place over a cooling rack. Cover partially so they don't sweat. This keep them soft.
- Serve chapati with curries, stew, dal or use them to make wraps, rolls etc.
Notes
- If you are in India, use warm water to make the dough. I use hot water, not boiling hot.
- Oil makes the dough softer & makes rolling easier. I use 1½ tablespoons for 2 cups atta. While this is optional, you may try out both the ways to check the difference.
- The amount of water to use depends on the kind of flour. Some soak up more, while some don’t.
Private Notes
Tried this recipe?
Mention @SwasthisRecipes or tag #swasthisrecipes!About Swasthi
I’m Swasthi Shreekanth, the recipe developer, food photographer & food writer behind Swasthi’s Recipes. My aim is to help you cook great Indian food with my time-tested recipes. After 2 decades of experience in practical Indian cooking I started this blog to help people cook better & more often at home. Whether you are a novice or an experienced cook I am sure Swasthi’s Recipes will assist you to enhance your cooking skills. More about me
Follow Swasthi’s Recipes
Comments
What material of pan is good to use? We don’t use non stick in our house and I can’t find something that cooks the chapattis well without sticking
Hi Anjali,
I use hard anodised tawa or lodge cast iron which are the best for all kinds of flatbreads. Other options are traditional iron pan, any bare cast iron (without enamel) or triply steel pans (new). All non-stick pans are not same. Some are safe if you use on a medium heat. Avoid teflon coating and look for something with ceramic or titanium but these need to be changed every year or so depending on the usage. Hope this helps
Can I store extra chapati in the freezer? If yes, for how long? How to warm them for consumption?
Hi Lina,
Yes you can freeze them. Reheat on a medium heat on a tawa directly without thawing. Microwave or steaming also works
Thanks, the recipe worked out well. First time my chapatis are soft and wrapping them in a kitchen cloth retained their softness for the whole day
Never thought I’ll be successful in making soft chapatis. Thank you so much and using hot water is a golden trick. It softens the bran in the atta and makes softest chapatis. Thank you for the amazing recipes
You are welcome Sherry. I’m very happy to know you could make soft chapatis. Thanks for sharing back
Thank you! This’s a complete guide to make softest chapatis at home. Tried it and got them right at the second attempt. Bookmarking it for future
Happy to know Leah. Thanks for trying
Perfect and fluffy. I will never buy chapati again😁
Glad to know Thea. Thank you
I am in France and I used bio semi complet farine T110 and let the dough rest 45 min before rolling. I used the layered method with oil because I am vegan in a cast iron skillet – it was fabulous ! Best home made chapatis I have ever done. Thank you !
Worked like a charm. It was lovely.
Thanks Julie. Glad to know!
Love the explanations and step by step recipe.
Thanks Linda
I’m a vegetarian I like
Just perfect
Thanks Robin
Tried making these 3 times now. First with the recipe on the back of the flour, then another websites. both epic fails. These were INCREDIBLE, so proud they were exactly what I hoped for. Thanks 🙂
That’s nice to know Ella. Thank you so much for sharing back
Clear recipe, well explained
Thanks Brian
For the first time, my chapatis came out really well !
Glad to know Najwa. Thank you for sharing back
Thank you so much for your sharing.
Can I use bread flour or all purpose flour since I don’t have wheat flour at the present?
Yes you can use.
Thankyou for your recipes. can you tell me what type of tawa pan you use. Can’t wait to try your recipes.
Hi Deborah,
I use a lodge bare cast iron pan but in the pictures I have used a Tefal titanium pro non-stick pan. Not all non-sticks are good for toasting chapati or roti. Some don’t cook well. Cast iron or iron pans are best. You can take a look at my cast iron pan in this kathi rolls recipe. I also use hawkins futura hard anodised roti tava. I love this one but it is hard to cleanup
Thank you for sharing so many good recipes and cooking videos that were easy to use at my home.
Glad to know Chan. Thank you
Thank you for these directions. I have often seen chapati transferred to a second (hotter?) surface for the final “puff”- why is that done?
Hi Kathy,
Chapati is never cooked on a second surface. It is cooked and finished on a tawa/ pan. A roti is often puffed on fire or over a rack placed on direct fire. Chapati and roti are different
Thank you very much I love your teaching this is powerful
Glad you like it
Thank you for this recipe!
How long can freshly made chapatis keep warm in Indian stainless steel box? I am thinking of making some for a dinner of 12 people and I will need to make them a little in advance. I dont use a microwave, so any tricks with that won’t be possible. Thank you for your help.
Hi Farah,
I would suggest storing them in the refrigerator and reheating in a Instant pot if you have one. This way you can also make them 2 to 3 days ahead. This method keeps my chapatis very soft. Alternately you may wrap them in a cotton cloth and then in a foil. Keep them in a preheated oven at 60 C/ 140 F. Hope this helps.