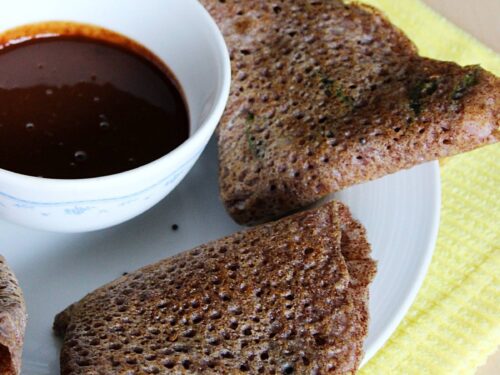
Ragi Roti (Nachni Roti)
Updated: April 1, 2024, By Swasthi Shreekanth
Ragi Roti aka Nachni Roti are healthy and nutritious gluten-free flatbreads made with finger millet flour. These are a popular staple from the Karnataka cuisine and are eaten with a side of chutney or curry. In this post I am sharing how to make Ragi Roti in 2 ways – Basic Ragi Roti that’s puffed on a tawa without fire and Masala Ragi Rotti.

“Ragi” is the Kannada word for “finger millet” and “Roti” or Rotti means flatbread in Kannada & Hindi. Finger millet is considered a super grain in South India and goes by the names Ragi and Nachani. It’s high Iron, calcium and fiber content makes it one of the most preferred gluten-free grain by South Indians. With increasing health-awareness now ragi is used across India and in many other countries.
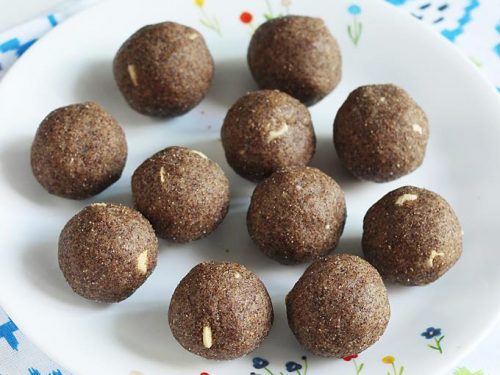
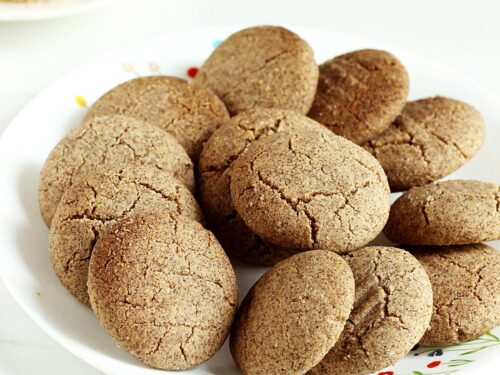
Ragi are tiny brown colored millets that are sustainable to drought conditions and are grown without any pesticides and fertilizers. They are cheaper, more economical than other grains and comes with tons of health benefits from the antioxidants. The whole grains are milled to flour before using in many dishes like these ragi roti, dosa, upma, porridge, mudde, ladoo and halwa. It is also used to make baby food and kids snacks like Ragi Cookies and Biscuits.
This recipe will help you make the softest Ragi Roti that will keep them the same for hours. They are toddler friendly, senior friendly and are suitable to anyone trying to eat healthy.
Want to strengthen the bones, want to gain weight, lose weight or beat anemia, these make a perfect food. The high fiber keeps you full for longer keeping hunger pangs away & help you keep away from junk. If you are trying to gain weight, eat these with sides consisting of healthy high fats & protein.
About Ragi Roti
Traditionally Ragi Roti is made in 2 ways. The basic Ragi Rotti is made much like the jowar roti and it requires only 2 ingredients – ragi flour and boiling hot water. A pinch of salt can be added to taste and a little oil may help prevent constipation.
The second recipe is to make Masala Ragi Roti, where you include onions, carrots, coriander, chilies and ginger to the same dough. Portions of this is spread to a roti on a banana leaf or cloth, which is transferred to the hot tawa and cooked. In the absence of banana leaf or cloth, you can also use a parchment paper.
If you are a beginner, reading my expert tips below may help you achieve the best results.
More Ragi Recipes
Ragi Cookies / Biscuits
3 ways Ragi Dosa
Ragi Laddu
Ragi Mudde
Easy Ragi Malt

Photo Guide
How to make Ragi Roti (Stepwise photos)
Make Dough
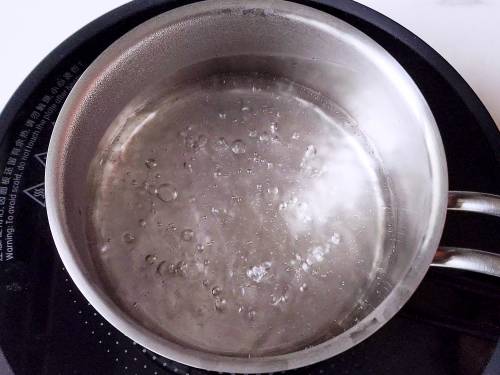
1. Add ¼ teaspoon salt (optional), 1 teaspoon oil and ½ cup water to a pot. Bring to a rolling boil.
2. Add ½ cup (70 grams) fine ragi flour. Turn off the heat and begin to incorporate the flour into the water using a sturdy spoon or a silicon spatula.
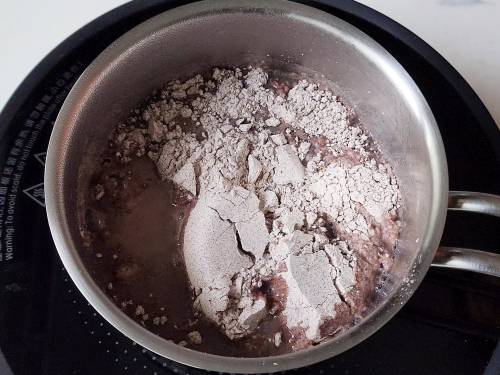
3. Mix well until no streaks of dry flour appear. If it is too dry, splash 1 to 2 tablespoons of water while you mix.

4. Scrape off the dough from the spoon and keep the pot covered until the temperature cools down to a slightly hot or warm temperature (not cold). Add 2 tablespoons flour to a wide small plate and keep aside.
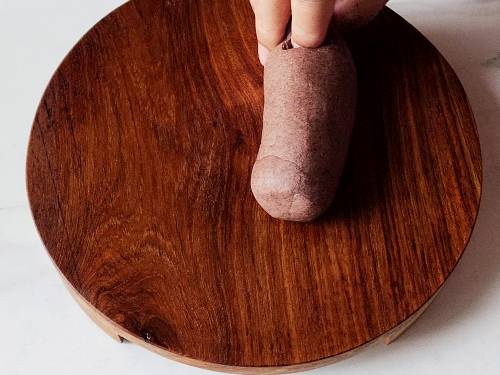
5. Remove to a rolling board and mix well until the dough looks very smooth and moist but not sticky. If it is sticky, fix it with little flour and if it is dry, mix with wet hand.
6. Divide to 4 equal portions and keep them covered in the same pot.
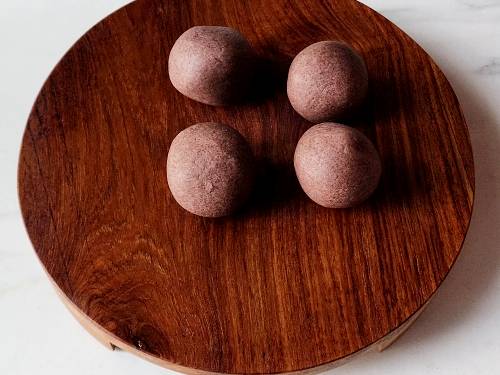
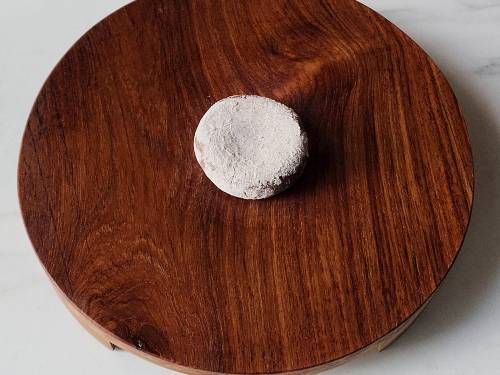
7. Take a portion and roll to a smooth ball in between your palms. Flatten it a bit and dip it in the flour on both the sides. Shake off the excess and place it on the rolling board.
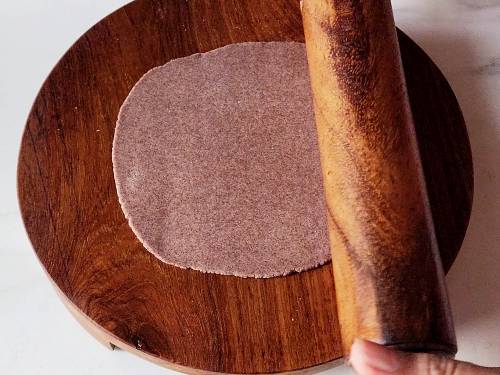
8. Begin to roll (light-handedly) using a rolling pin to a 6” ragi roti.
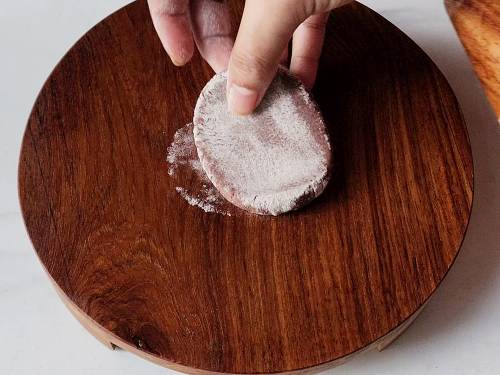
9. If the dough sticks, sprinkle some flour lightly as you roll. Using a lot of flour while rolling dries out the roti and makes them hard after cooking. So lesser the better.
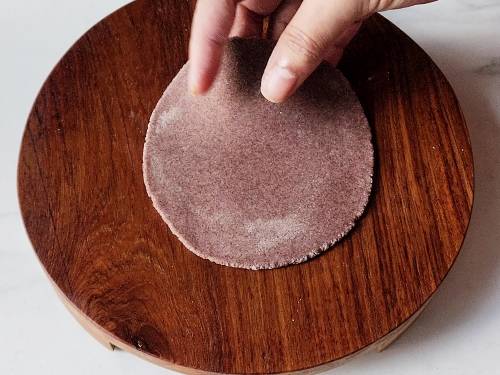
10. It is moderately thick. (check video)
11. Transfer to the counter and make the rest.

Cook the Rotti
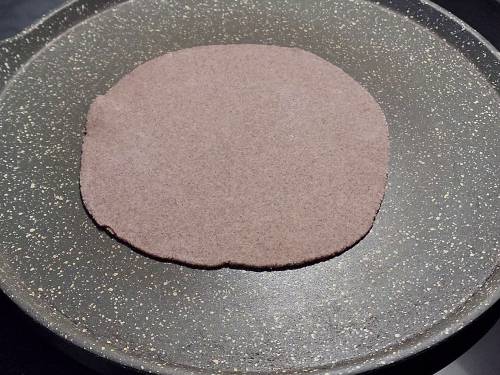
12. Heat a tawa/griddle on a medium high heat. When the pan is hot enough dust off the excess flour if any and transfer to the pan.
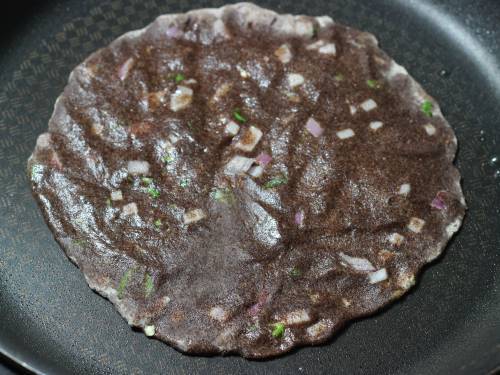
13. Let cook for 30 to 35 seconds, turn/flip it to the other side & cook for 15 to 20 seconds.
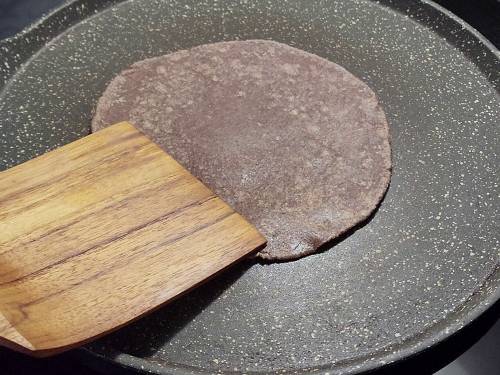
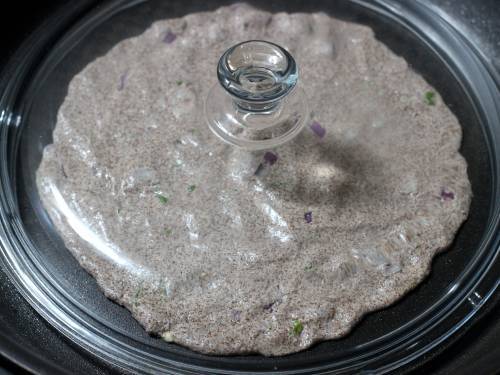
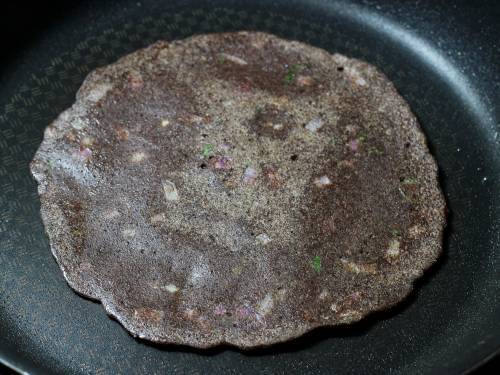
14. Turn it again and cook, pressing down with a spatula all over until it begins to puff.
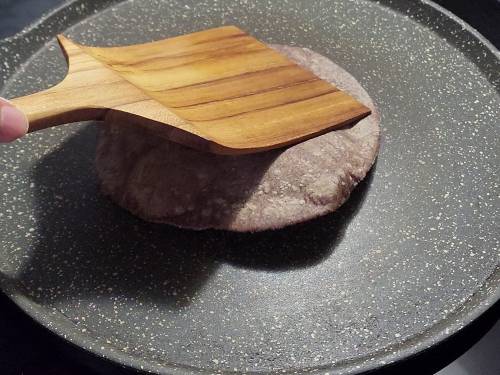
15. If you see portions of the roti not puffing, try pressing it down at that place to puff. These actually puff easily even without pressing down due to the high moisture in the dough. Remove to a wired rack and spread ghee if you want. Repeat toasting the ragi roti the same way.
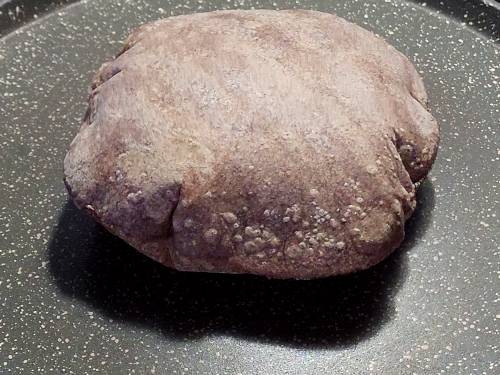
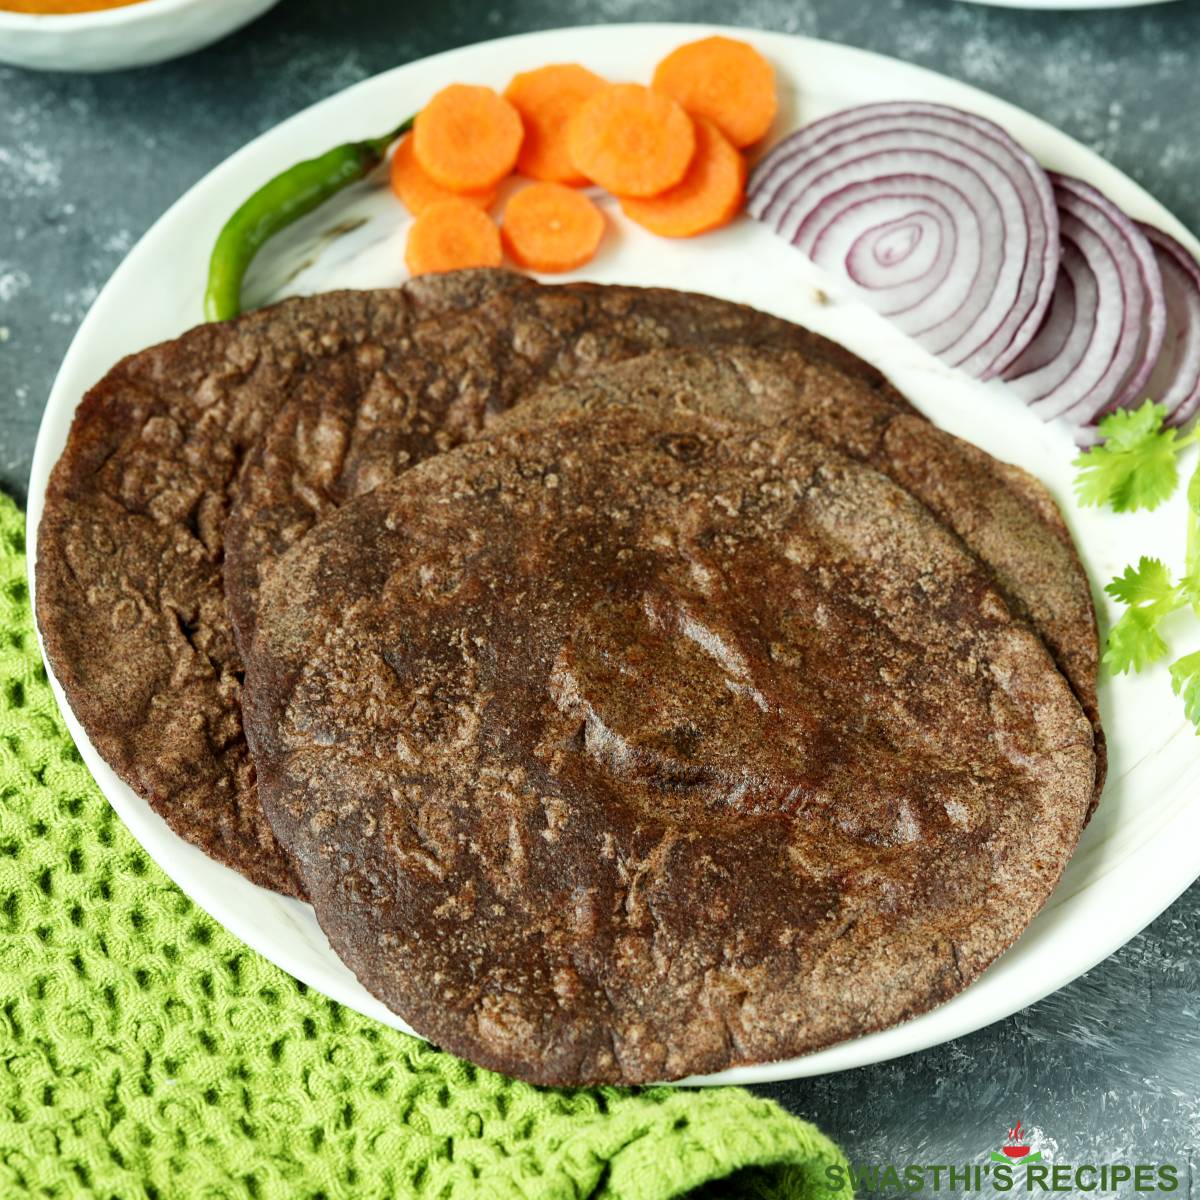
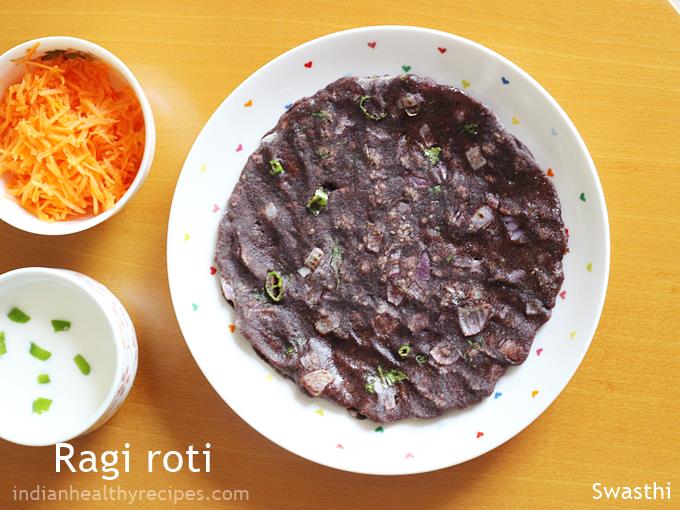
Serve them hot or cold with a vegetable curry or a meat curry accompanied by plenty of veggies.
Masala Ragi Roti
There are 2 ways to make Masala roti. First way is to make the dough with hot water as shown above and mix the following ingredients. The second way is the traditional way where a dough is formed with raw flour, other ingredients and water. I have shown that below in the stepwise pictures. Cooked dough produces better softer rotis.
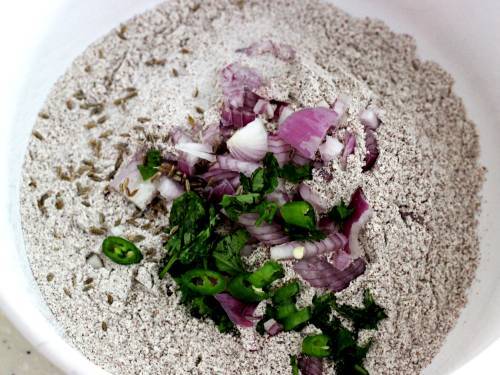
16. Make the dough as above or add half cup ragi flour and the following ingredients to a bowl
- ¼ cup onions fine chopped
- 2 tablespoons carrots grated
- 1 green chili fine chopped
- 2 tablespoons coriander leaves
- 1 sprig curry leaves
- 1 teaspoon ginger grated/minced
- water as needed, only if using dry ragi flour
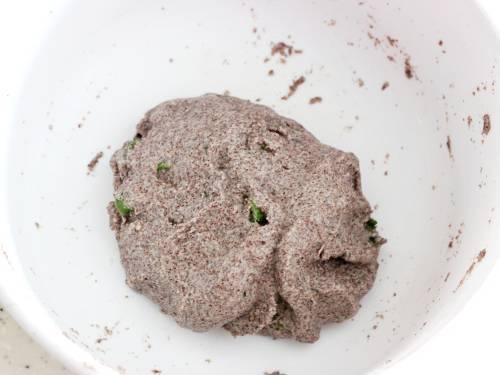
17. Mix well to form a soft dough and divide to 3 portions. Take a parchment paper or banana leaf and grease it generously.
18. Place a dough ball over it and begin to spread it with your hand to a thin roti of 6 to 7 inches. If you want you may make 3 holes around the center. Heat a pan and invert the ragi roti over it (parchment paper up). Press down gently with your hand and pull off the parchment carefully.

19. Pour ghee or oil into the wholes and around. Cover and cook for 2 mins on a medium heat.
20. Open the lid and spread ghee or oil generously if you want.
21. Turn it to the other side and cook again for 2 to 3 mins, until golden spots begin to appear. Remove and repeat making the roti and toasting them.
Serve hot or cold with a chutney.
Pro Tips
- Using fine ragi flour makes your ragi roti super soft. If the flour is not fine, sieve it first. I had little success in puffing with home sprouted & milled ragi flour. But you may try out.
- You can also boil the water separately and pour over the flour to make the dough. Both work the same way. But make sure the water is boiling hot.
- It is not essential to work with the hot dough if you mix it well at the time of incorporating. If you want you may grease your rolling board.
- 1:1 proportion of water and flour works but adding a bit more – 1 to 2 tablespoons more water works the best for me. This additional water helps the rotis puff very well without the need to press down while toasting.
- You may need to adjust this 1:1 ratio depending on the kind of flour. If the dough turns too sticky, add a teaspoon of flour, if some dry streaks of flour are visible it is good to splash little water.
- It is very important to roll & smoothen each dough ball before rolling to minimize cracks on the edges.
- You can also puff the rotis on fire with or without a rack.
Related Recipes
Recipe Card
This Ragi Roti Recipe was first published in October 2014, Updated in April 2024.
Ragi Roti Recipe (Ragi Rotti)
Ingredients
- ½ cup (70 grams) fine ragi flour (finger millet flour)
- ½ cup (120 ml) water (1 to 2 tablespoons more as needed)
- ¼ teaspoon salt (adjust to taste, more if making masala roti)
- 1 teaspoon (5 ml) oil (+ 2 tsps more to toast)
- ¼ teaspoon cumin seeds (jeera)
- 2 tablespoons onion fine chopped
- 1 small green chili fine chopped, deseed if needed
- 2 tablespoons carrot grated or coconut (optional)
- 2 tablespoons coriander leaves finely chopped
Method
- Pour water to a pot and add salt & oil. Bring to a rolling boil and add the flour.
- Turn off the heat and using a sturdy spoon or a silicon spatula begin to incorporate the flour into the water until no more dry flour is visible. If it is too dry, splash 1 to 2 tablespoons of water.
- Scrape off all the dough from the spoon and add to the bowl. Cover and let rest until the temperature cools down to a slightly hot or warm temperature (not cold). Add little flour to a wide small plate and keep aside.
- Remove the dough to the rolling board and mix well with your hand until it looks very smooth. Divide to 4 equal portions and keep them covered in the same pot.
- Smoothen each portion & roll to a ball, flatten it and dip in flour. Shake off the excess and roll to a 6 inch moderately thick ragi roti, moving it often to prevent sticking. (check pics or video)
- If the dough sticks, sprinkle some flour lightly as you roll. Transfer to the counter and make the rest.
- Heat a tawa/griddle on a medium high heat. Dust up the excess flour if any from the surface of the roti and transfer to the pan.
- Let cook for 30 to 35 seconds, turn/flip it to the other side and press down gently all over with a spatula. Turn it again and cook until puffed. If it does not puff, press down again all over until it begins to puff.
- Remove to a wired rack and spread ghee if you want. Repeat toasting the ragi roti the same way. Serve them hot or cold with a vegetable curry or a meat curry accompanied by plenty of veggies.
- To make Masala roti, make the dough as mentioned above and add the other ingredients and mix well.
- Divide the dough to 3 portions. Place a dough ball over a greased parchment paper or banana leaf. Begin to spread with your fingers to a thin roti of 6 to 7 inches. If you want make 3 holes across the center.
- Heat a pan and invert the ragi roti over it (parchment paper up). Press down gently with your hand and pull off the parchment carefully.
- Pour 1 teaspoon ghee or oil all over including into the wholes. On a medium heat cook covered for 4 to 5 mins, turning to the other side after 3 mins. Remove when they have golden spots.
Notes
- The nutrition values are for each plain ragi roti without the extra oil that is smeared after cooking. If you make these without salt, the sodium in each roti comes down to 32 mg.
Private Notes
Tried this recipe?
Mention @SwasthisRecipes or tag #swasthisrecipes!About Swasthi
I’m Swasthi Shreekanth, the recipe developer, food photographer & food writer behind Swasthi’s Recipes. My aim is to help you cook great Indian food with my time-tested recipes. After 2 decades of experience in practical Indian cooking I started this blog to help people cook better & more often at home. Whether you are a novice or an experienced cook I am sure Swasthi’s Recipes will assist you to enhance your cooking skills. More about me
Follow Swasthi’s Recipes
Comments
For the first attempt I poured boiling directly on the ragi flour, but I couldn’t get the right consistency.
For the second attempt I poured the flour in the boiling water, and it worked.
Thank you for this recipe, it taste very good!
Glad you could make them Youri. Actually both ways work if the flour is fresh. You need to sprinkle some water if you don’t get the right consistency. Thanks for leaving a comment
Hello Swasthi, I tried these today, and the instructions are very clear — easy to follow.
The dough was quite wet / sticky, so I was adding more and more flour. And it was still sticky. Was I doing something wrong?
Hello Radha,
As mentioned in the recipe, 1:1 is the correct ratio – 1/2 cup flour to 1/2 cup water. Were you trying to make the plain ragi roti or masala ragi rotti with vegetables?
Always enjoy your simple recipes
My question is can this ragi dough be made in advance like 3-4 hrs then cook it?
Thanks Kiran. No you can’t unless you add atta/wheat flour you can’t rest the dough
Tawa
Hi from Canada. I want to make this tomorrow, what is a good side? How do you serve ragi dosa?
Hi Subha,
Ragi roti is best served with any curry or dal or leafy green dishes along side a vegetable salad. Ragi dosa can be eaten with any chutney.
Hello Mam. Can we make dough at night and make roti in the morning
Hi Divya,
I assume you are asking about recipe 1 – plain ragi roti. I don’t suggest making the dough ahead. It won’t work even if the dough cools down completely. It should be atleast a little warm or at room temperature when you roll. Making the dough ahead works only if some other flour has been added – like sabudana, rice, wheat etc. Hope this helps
Wonderful and clear! Thank you!
Glad you like it
Thanks for sharing the recipe
You are welcome Usha
I have tried both the ways and loved the first method. I don’t like to cook on open fire on gas so tried cooking the second method on the tawa. Some did not puff and some did like you said. However I like the easier way, the first method. Thank you.
Glad the recipe helped Parvathi. Thank you for letting me know
These sound so good. I have a problem with gluten, so these sound like a great alternative, if I can find the finger millet. Is millet and finger millet the same? There is something called einkorn that I can eat without much issue, but it is a sticky flour and I’m. ot sure how to substitute it for regular wheat flour in your recipes, as you don’t knead it like regular flour.
Hi Cathy,
Thank you! Finger miller is not the same. You can use any millet flour to make these. You can use 50/50 einkorn and millet flour in this recipe. For the other recipes, it depends some don’t work. You can leave a comment on the post if you choose to make any. Hope this helps.
The Ragi Roti just came out perfect.
Thank you Swasthi.
Welcome Elina
Glad to know!
Hi Swasthi, I tried to use method 1 but the ragi rotti turned all white (probably my fingers were not enough greased) and it became very very dry, I cooked it for 15/20 min approx.
The dogh was wet and very lumpy.
Any suggestion?
Thank you
Hi Elena,
Yes the white color is due to not enough greasing. It guess the dough needed more moisture. You can dip your fingers alternately in water and oil while spreading. It only takes a few minutes to cook on each side. Less than 2 to 3 mins on each side. The dough is supposed to be wet but not lumpy. I hope you did spread the dough on a cool pan. Next time try spreading it on a foil as it will be easy for you to spread. Hope this helps. If you need any further help, pls let me know.
Hi Swasthi, Can you tell me why the ragi roti breaks, during the patting and on the tava while turning? Thanks for your help
Hi Anuradha,
To make good ragi roti or jowar roti the grains have to be freshly milled and use up within 5 to 6 weeks. Beyond that the flour doesn’t give good rotis. They begin to break up as these are gluten free grains & do not have any stickiness in them. So you can add little wheat flour to avoid that.
Very good ragi recipies I enjoy cooking n now I hee ragi dishes
Thanks Helen
mushroom fried rice very nice
Thank you
I tried ragi roti recipe, its very nice
Thanks krishna veni
Nice and easy thanks
Welcome Anu
Excellent! The trick was the hot pan = unable to spread. I read so many recipes today, but only yours mentioned the cold pan trick. It worked!
Thanks Purnima. The dough just sticks up on the hot pan and simply doesn’t let it spread.
Very good
Ur recipe is very simple and tasty also
Very nice .super
🙂