Ragi Dosa Recipe
Updated: September 7, 2022, By Swasthi
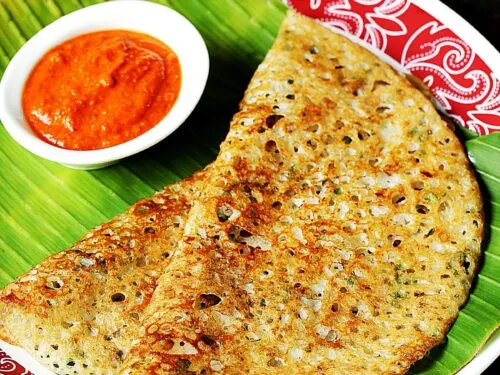
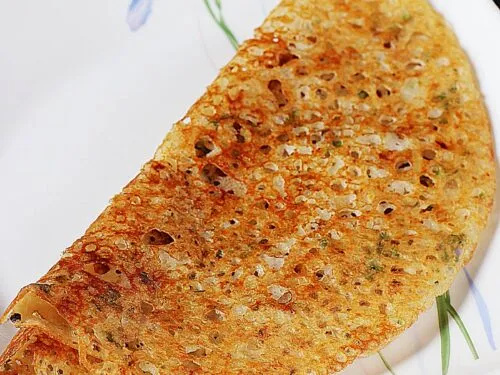
Ragi Dosa is a South Indian crepe made with finger millet also known as red millet. These iron and fiber rich dosas are healthy and are made often in South Indian homes. For the uninitiated, dosa is a traditional crepe made with rice and lentil batter. These ragi dosa are a variant of the traditional dosas but ragi is the main ingredient used here. In this post I share 3 ways to make ragi dosa – instant dosa using flour, using left over dosa batter and fermented dosa.
About Ragi Dosa
Ragi is a staple in our parts of India and I have grown up eating ragi in many different forms. My Mom would make ragi mudde, ragi malt, ladoos, dosas, idli, rotti, chapatti, halwa and many more using ragi. For every dish she had numerous ways and recipes to make.
Finger millet is considered a super grain due to its high nutritional profile, especially iron and calcium. It is believed that regular consumption of this whole grain is going to keep us healthy and strong. We were encouraged to consume this regularly at least in small quantities to boost our calcium and iron levels.
Ragi dosa is not a traditional dish and this grain was not even known to a lot of Indians few decades ago. Health awareness may have led to the invention of making finger millet dosa. There is no one way to make them. Here are my tried and tested ways.
3 Ways To Make
1. First one is the Instant dosa that can be made without much planning. We just mix up ragi flour with other ingredients and sometimes curd or buttermilk is added for a unique flavor. This method is good if you are a small family of 2 to 3 because cooking these takes time. Each dosa takes a minimum of 5 mins to cook, so plan accordingly. It is similar to the Oats dosa.
2. Second one is to soak the whole grain ragi, blend it and then ferment it. This method has several health benefits as the ragi is soaked, ground and fermented. It is good if you are focusing into healthy whole grain diet or have elderly folks at home.
3. The third method is to just mix some ragi flour to the premade dosa batter. This one is good to make when you have people with different choices at home. Plain dosa VS Ragi dosas.
Whichever method you make, the dosas will taste good if you like the earthy flavor of this grain. Serve them with any chutney or sambar.
More Ragi Recipes here,
Ragi Ladoo
Easy Ragi Roti
Ragi Idli
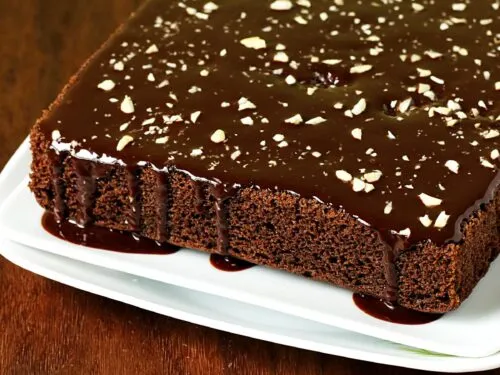
Chocolate Ragi Cake
Photo Guide
I have shared the first and the third method below. You can find one more in the recipe card below.
How to Make Instant Ragi Dosa (Stepwise Photos)
This recipe makes 6 dosas (serves 2 people). They are not filling so serve them with a good heavy chutney like peanut chutney, aloo masala or a vegetable kurma.
Preparation
1. Here are the ingredients you need:
- ½ cup ragi flour
- ¼ cup rice flour or wheat flour (can double if you want less ragi flavor)
- 2 tablespoons fine semolina (optional or use rice flour)
- 2 cups water (¼ to ½ cup more if required)
- 2 tablespoons minced onions (make sure you chop them really fine)
- 1 green chili minced (or black pepper for kids)
- 2 tablespoons coriander leaves minced
- 5 to 6 curry leaves minced
- 1 teaspoon ginger minced
- 1/3 teaspoon sea salt (adjust to taste, start with lesser)
- ½ teaspoon cumin seeds (crushed)
- 2 tablespoons ghee or oil to toast
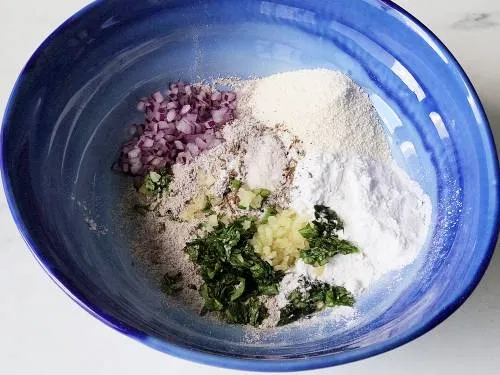
2. All all the dry ingredients except oil/ghee to a mixing bowl and pour half of the water.
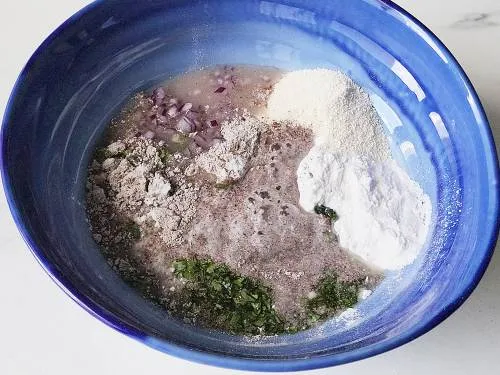
3. Mix well to make a lump free batter and pour the remaining water in batches and mix well.
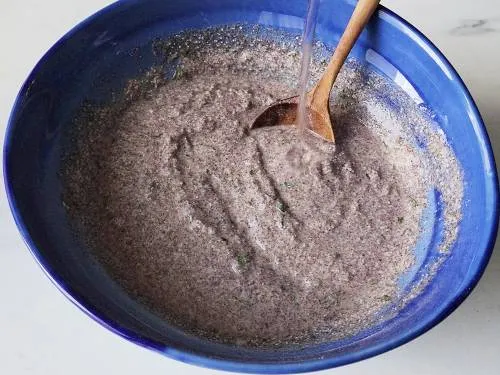
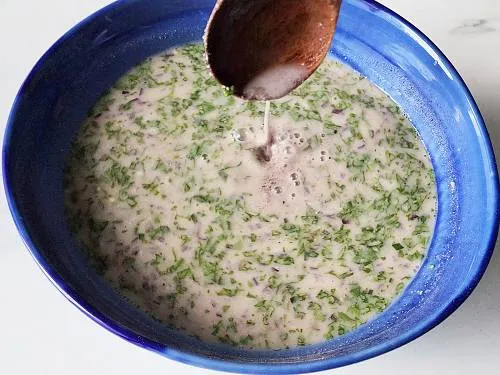
4. The consistency of the batter should be very runny for a thin crisp dosa, and slightly thicker for a thicker dosa. Rest aside for 10 to 15 mins while you make the chutney.
Make the Dosas
5. Grease your pan and heat it on a medium high flame until really hot. A few drops of water sprinkled on the pan should sizzle and evaporate. Stir the batter very well as the solids settle at the bottom. Regulate the flame to medium high and begin to pour the batter, moving forward – starting from the edges in a circular pattern to cover the entire pan.
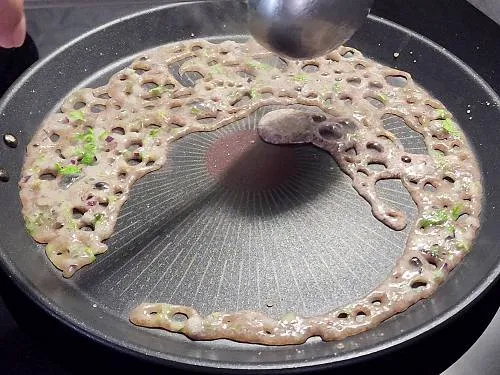
6. You will have some unfilled pockets, fill them up with the batter.
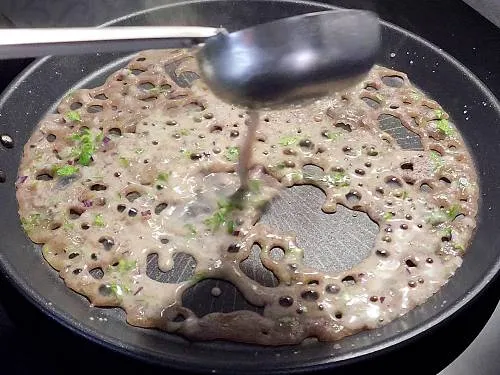
7. Drizzle 1 teaspoon ghee or oil across the edges & over the dry spots. Let cook for 3 mins on a medium high until the edges begin to leave the pan.
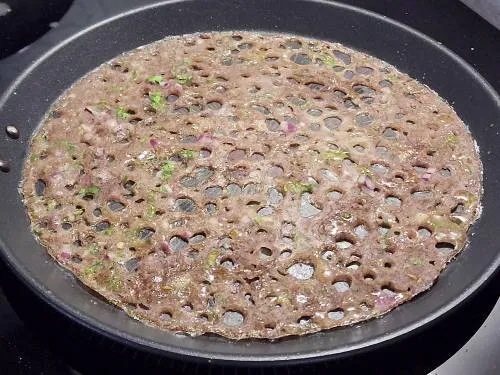
8. Gently turn with a spatula to the other side and cook for another 1 min.
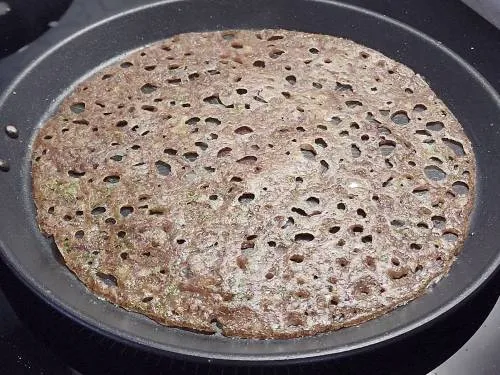
9. Lastly turn it again and cook until the base is crisp, for another minute. This is just a guideline for timing, it may vary depending on the kind of stove and cookware used. But it always takes me a minimum of 5 minutes (total time) or even longer.
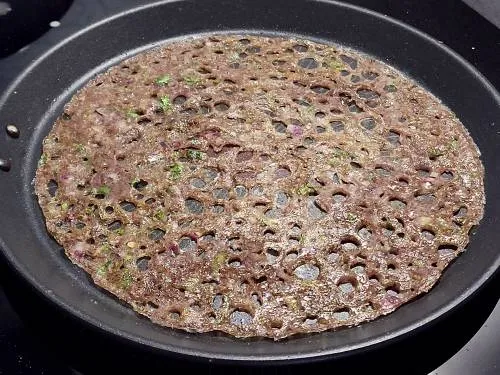
10. Remove to a serving plate. Before you make the next ragi dosa, make sure the pan is really hot (not smoking) and give the batter a good stir else the solids settle at the bottom with only the water on top. If you pour the very watery batter without enough flour, it will have larger holes.
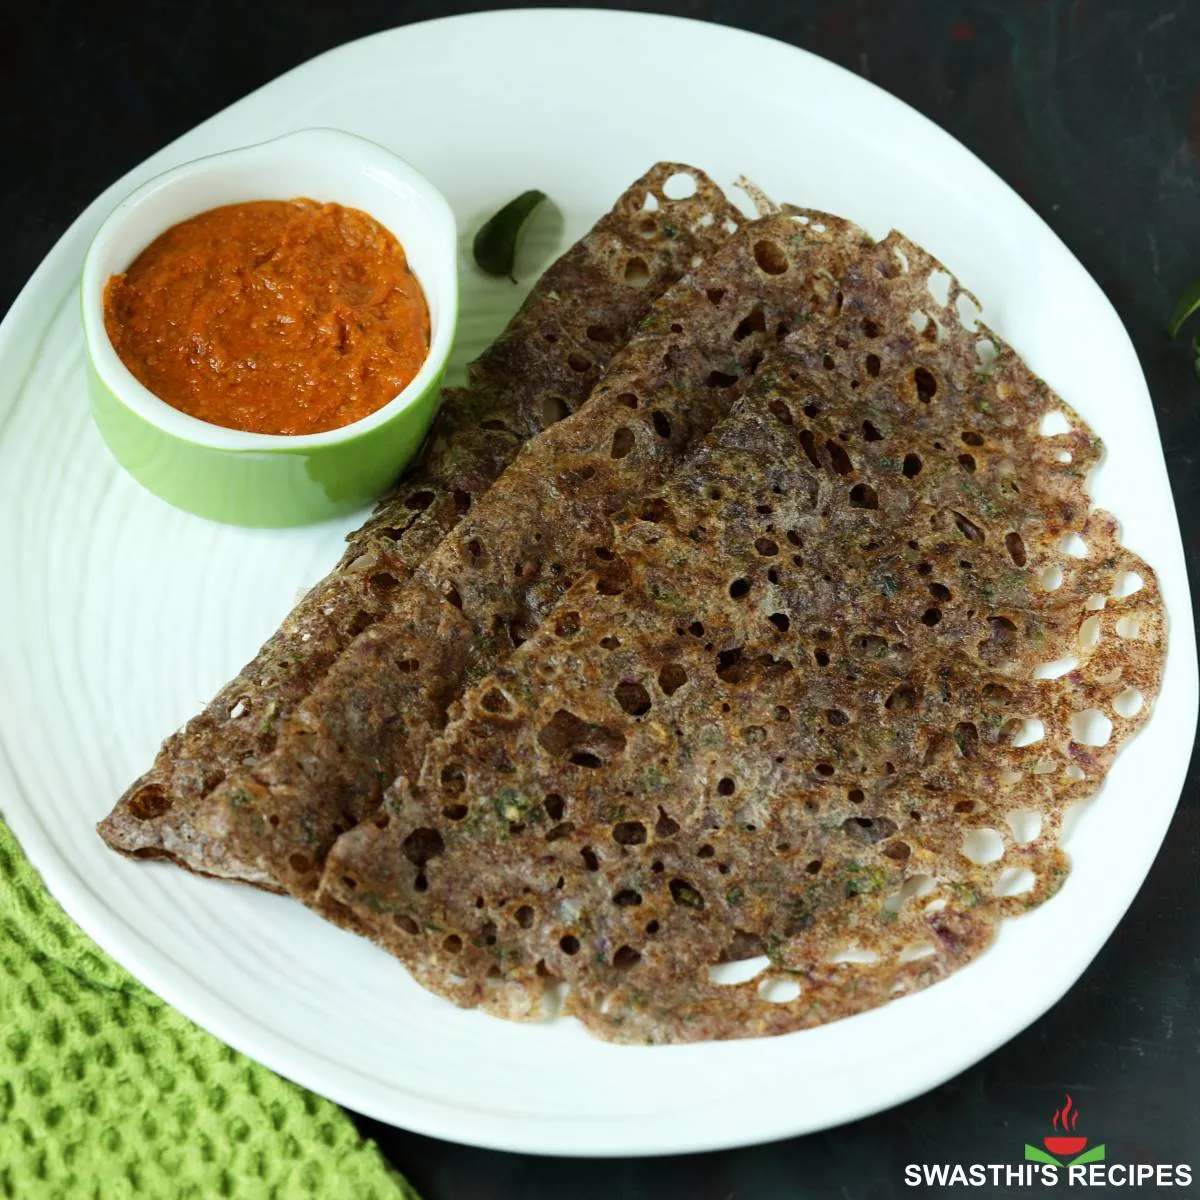
You can also make softer and thicker dosas which are actually very filling and these are great for babies above 10 months. I had made these thicker ones for my toddler with double the amount of semolina for a thicker texture and 2 to 4 tablespoons plain yogurt for a flavor (don’t use sour yogurt). These also keep good in the lunch box.
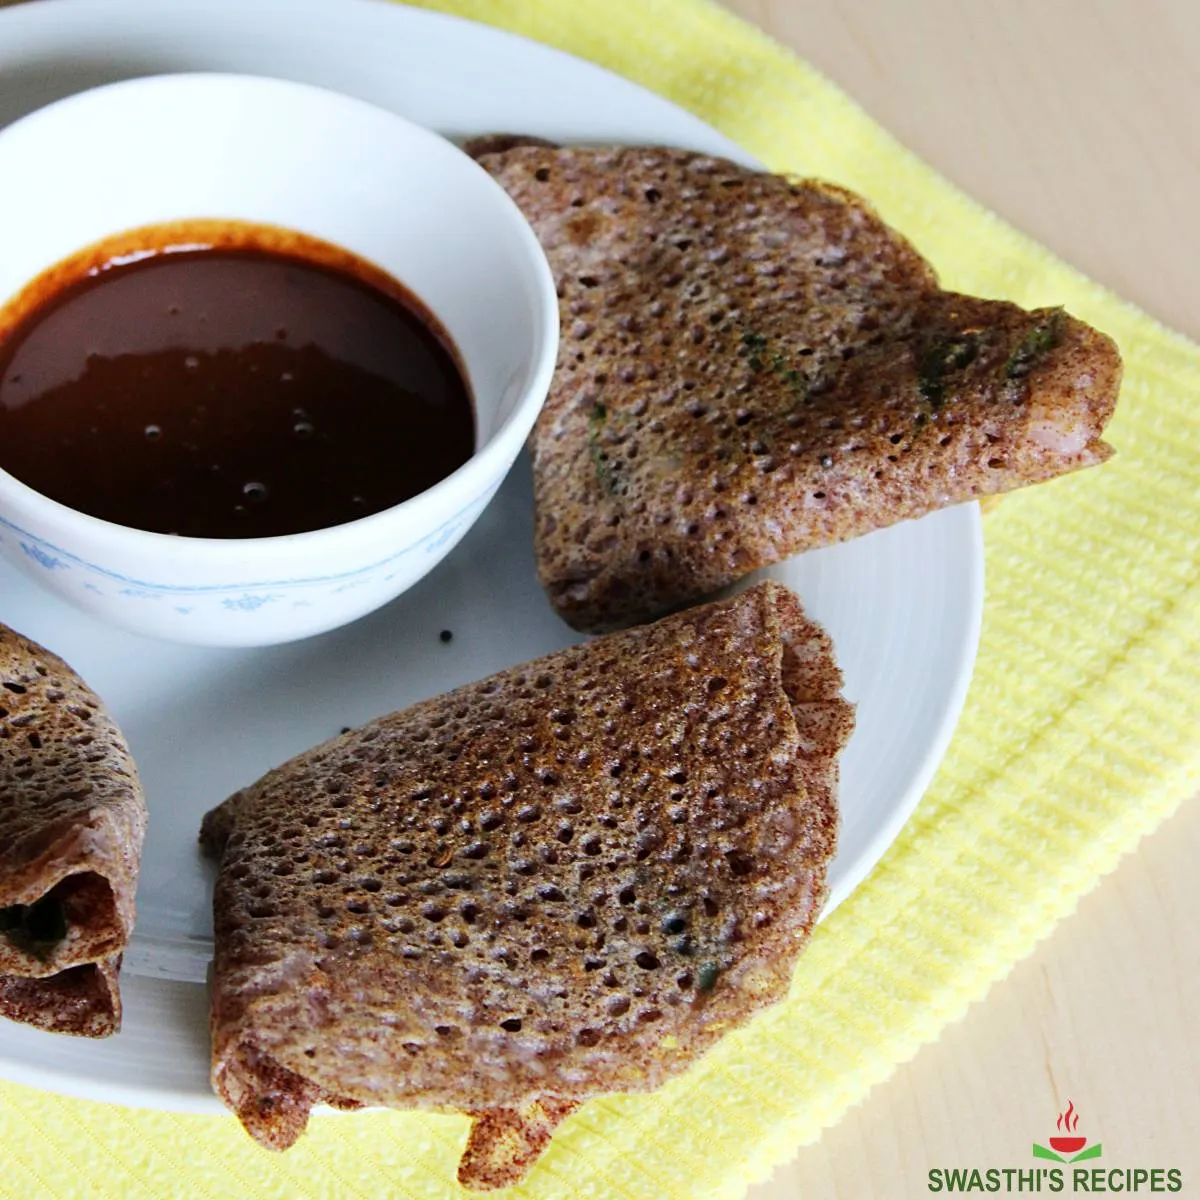
Ragi Dosa with leftover Dosa Batter
1. We will need fermented dosa batter. I used 1 cup batter. My dosa batter was made in the ratio of 1:3 (dal:rice). For more details you can check this post on Dosa batter.
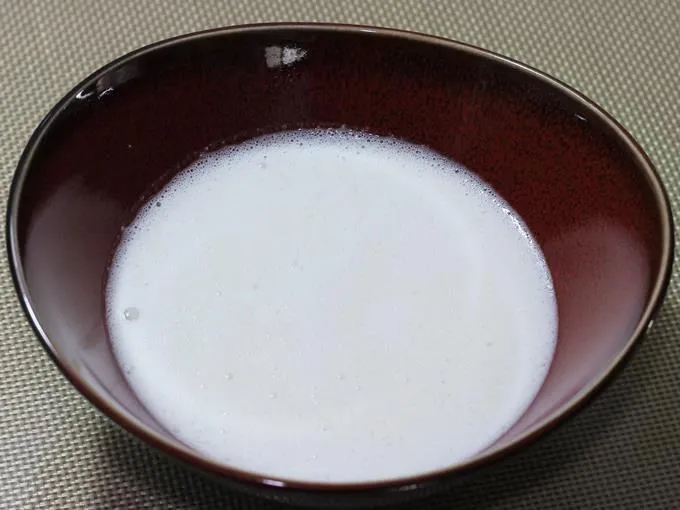
2. Add 4 tbsp of ragi flour and little salt. You can also mix ragi flour and salt together with some water and then stir in with the dosa batter. My dosa batter was already runny so I added directly to the batter.
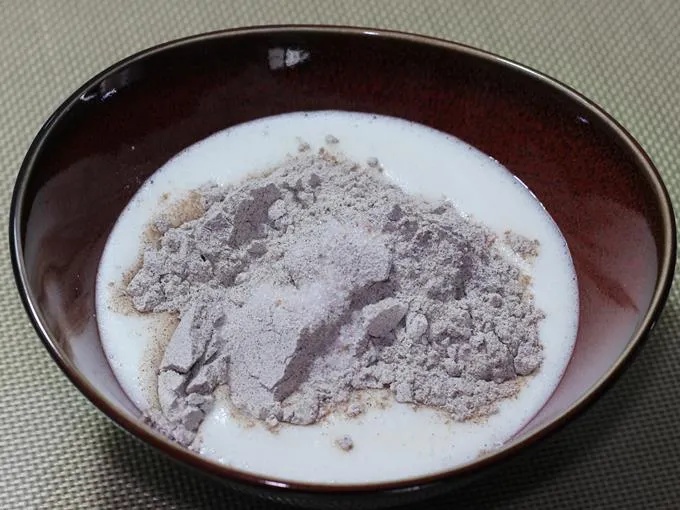
3. Mix them up together.
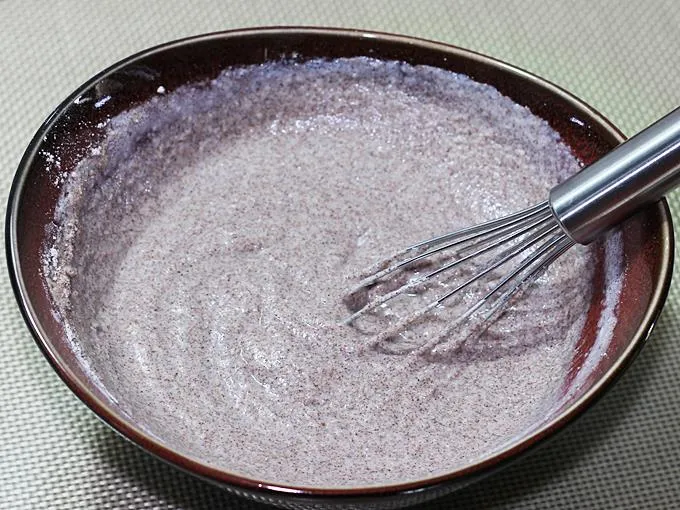
4. Pour water to bring to the consistency.
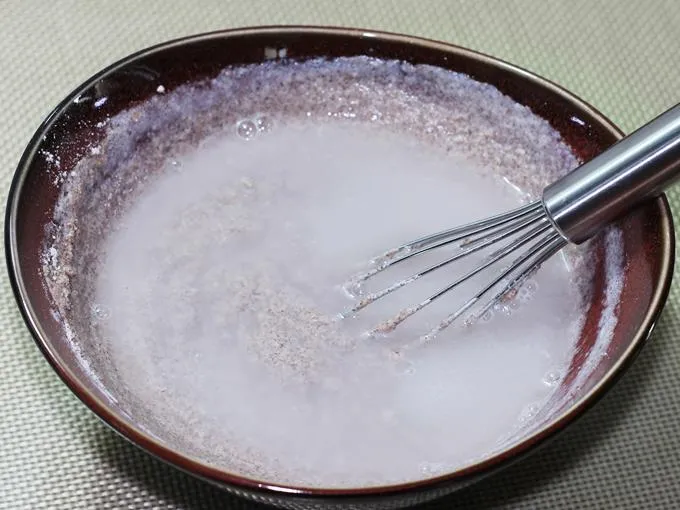
5. The batter must be of pouring consistency. To make crisp dosas make the batter slightly thick. For soft dosas make the batter slightly runny like mine. We feel the soft dosas taste better than the crisp ones.
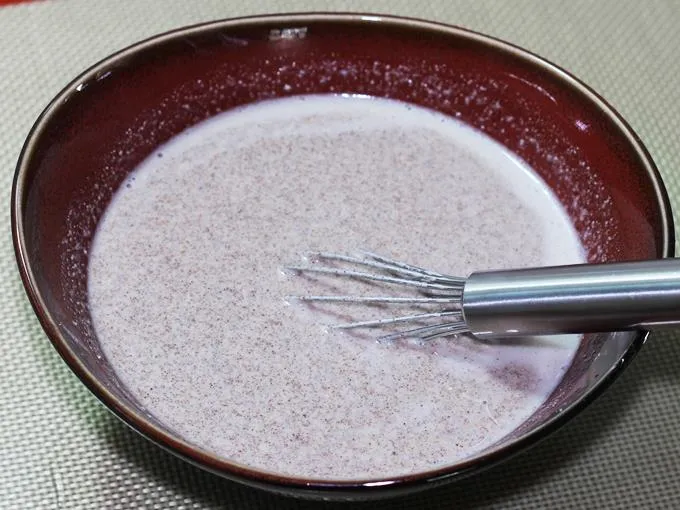
6. Grease and heat a pan well as you do for normal dosa. Pour the batter in the center of the pan.
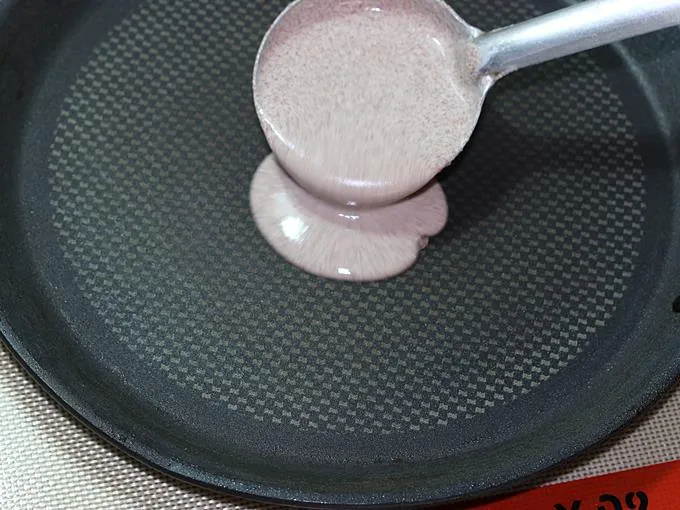
7. Spread batter to a thin dosa.
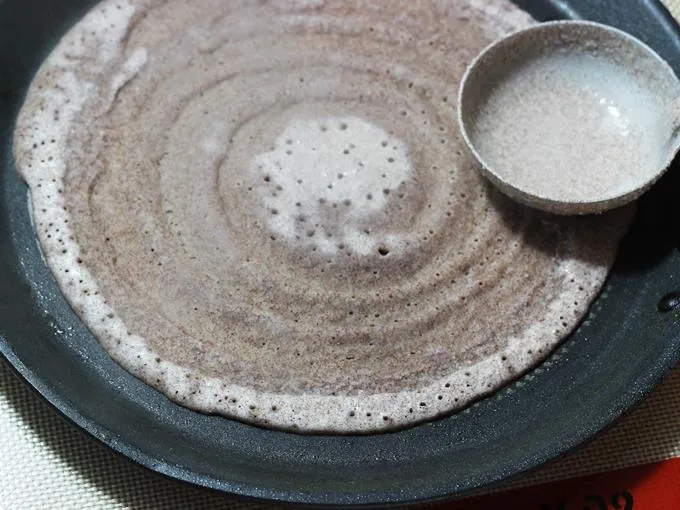
8. Drizzle some oil.
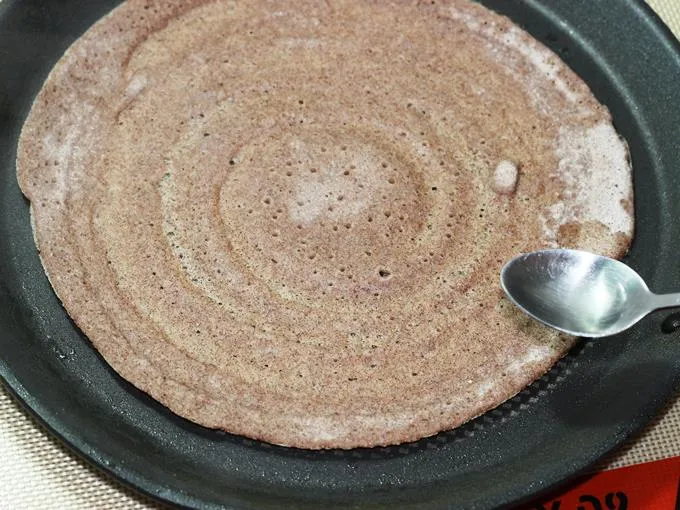
9. The edges of the ragi dosa will begin to leave the pan.
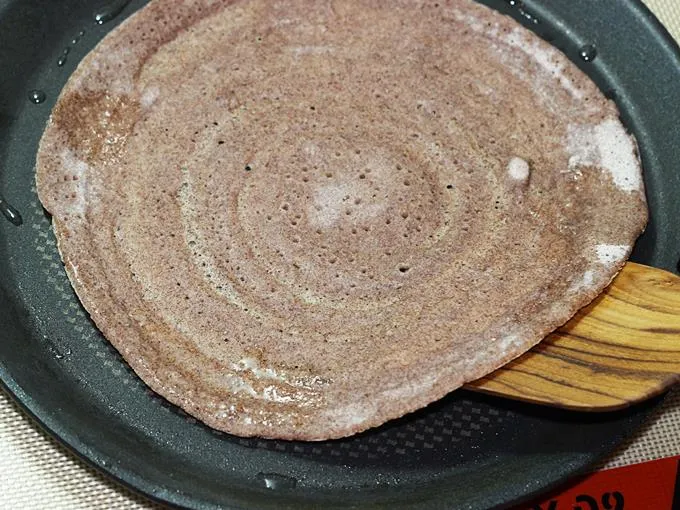
10. Flip it and cook.
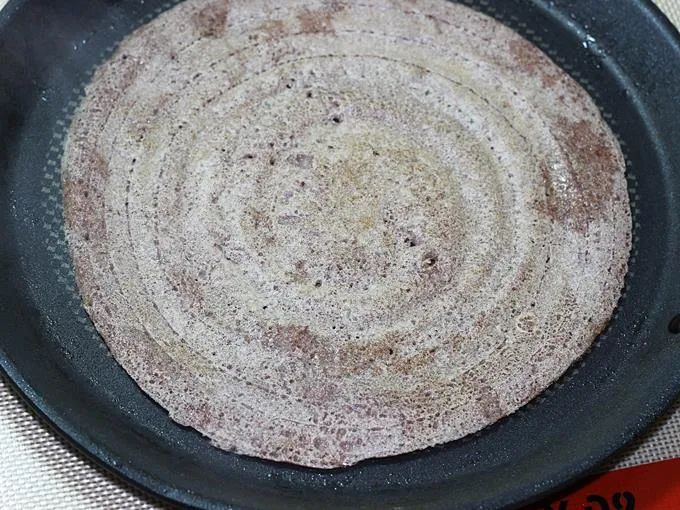
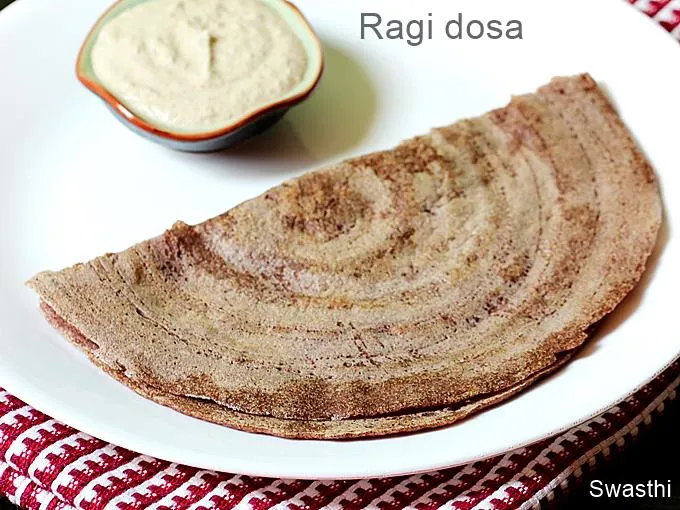
Serve ragi dosa with chutney.
Related Recipes
Recipe Card
Ragi Dosa Recipe
For best results follow the step-by-step photos above the recipe card
Ingredients (US cup = 240ml )
Method 1
- ½ cup ragi flour (fine ground)
- ¼ cup rice flour or wheat flour (fine ground)
- 2 tablespoons semolina (fine rava, optional)
- 2 cups water (¼ to ½ cup more if required)
- ¼ to ⅓ teaspoon salt (adjust to taste)
- ½ teaspoon cumin seeds (crushed)
- 1 green chili (minced, use black pepper for kids)
- 1 teaspoon ginger (grated or chopped)
- 5 to 6 curry leaves (fine chopped or coriander leaves)
- 2 tablespoons onions minced/ very fine chopped
- 2 tablespoons coriander leaves very fine chopped
- 2 tablespoons ghee/oil to cook
Method 2 – Ragi dosa
- ½ cup rice (any rice)
- ½ cup ragi (100 grams whole grain or ragi flour (¾ cup))
- ½ cup urad dal (or skinned black gram)
- ¼ teaspoon methi seeds (or fenugreek seeds or 2 tbsp poha)
- salt as needed
- 2 tablespoon oil (for drizzling)
Instructions
How to make Instant Ragi Dosa (method 1)
- In a mixing bowl, stir together ragi flour, semolina, rice flour, onions, chilies, curry leaves, coriander leaves, cumin, salt and ginger. Pour half of the water and begin to mix to a batter. Pour the remaining water in batches and mix to a lump free batter.
- The consistency of the batter should be very runny for a thin dosa, slightly thicker for a thicker dosa. Rest aside for 10 to 15 mins while you make your chutney.
- Grease your pan and heat it on a medium high flame until really hot. A few drops of water sprinkled on the pan should sizzle and evaporate.
- Stir the batter very well as the solids settle at the bottom. Regulate the flame to medium high and begin to pour the batter, moving forward – starting from the edges in a circular pattern to cover the entire pan.
- You will have some unfilled pockets, fill them up with the batter. (Check the pictures)
- Drizzle 1 teaspoon ghee or oil across the edges & over the dry spots. Let cook for 3 mins on a medium high until the edges begin to leave the pan.
- Gently turn with a spatula to the other side and cook for another 1 min. Lastly turn it again and cook until the base is crisp, for another minute. This is just a guideline for timing, it may vary depending on the kind of stove and cookware used.
- Remove to a serving plate. Before you make the next ragi dosa, make sure the pan is really hot (not smoking) and give the batter a good stir else the solids settle at the bottom.
Method 2 – How to Make Fermented Ragi Dosa
- Rinse ragi and rice together and soak them for 8 hours. Later wash urad dal & methi seeds thoroughly and soak for at least 4 to 5 hours.
- Drain them and rinse well. Blend the urad dal with water as needed until frothy and thick. Transfer this to a bowl.
- To the same jar, add ragi (or ragi flour) and rice. Blend well with water to a slightly coarse medium batter (not too thick or too runny). Mix this well with little salt. You can avoid salt now and add after fermenting.
- Ferment this batter for 6 to 8 hours depending on the climate. The batter must rise at least slightly.
- Pour water and bring to a desired consistency. To make crisp dosas keep the batter slightly thick. For thin dosas make the batter slightly thin.
- Grease the pan and heat up. The pan must turn hot enough.
- Pour 1 ladle of ragi dosa batter and spread it as you like thick or thin. Drizzle some oil or ghee. When the sides leave the pan, flip it and cook on the other side.
Notes
NUTRITION INFO (estimation only)
© Swasthi’s Recipes
Ragi Dosa Recipe first published in April 2014. Updated and republished in July 2022.
About Swasthi
I’m Swasthi Shreekanth, the recipe developer, food photographer & food writer behind Swasthi’s Recipes. My aim is to help you cook great Indian food with my time-tested recipes. After 2 decades of experience in practical Indian cooking I started this blog to help people cook better & more often at home. Whether you are a novice or an experienced cook I am sure Swasthi’s Recipes will assist you to enhance your cooking skills. More about me
Follow Swasthi’s Recipes




Comments
Your recipes are easy to understand for beginners
Love this recipe. I always come to your site when I fail with a recipe for tips and suggestions as your attention to detail with recipes is remarkable. I have a quick question – can we remove rice flour from Recipe 1 and still be able to make the ragi dosa? Thanks!
Thank you so much Manisha. Yes you can omit rice flour if your ragi is very fine. The extra fiber (ragi skin) is usually coarse and the dosas can break while flipping so soak the ragi flour for 25 to 30 mins. It will soften and won’t break. Alternately you may use wheat flour.
Ur recipes are awesome! They are very practical with clear descriptions that one can make the item confidently. Many many thanks to share and teach us.
RR
You are welcome! I am very happy to read that Rukmini.
Easy and tasty
Hi, for method 2 what is the ratio of the ingredients?
Hi Sunanda,
Method 2 in the stepwise instructions – To make with leftover plain dosa batter – mix 1 cup dosa batter with 4 tablespoons of ragi flour.
method 2 in the recipe card – half cup each of urad dal, rice and whole ragi or 3/4 cup ragi flour. You can find more details in the recipe card.
Hi, for method 3, what is the ratio of ingredients ? Thanks!
Hi Devi,
It is 1 cup fermented batter with 4 tbsps ragi flour. I use dosa batter made with 1:3 ratio of rice to dal. It also works with 1:2 dosa batter.
Thank you for this recipe! I am using the method of adding ragi flour to ready idli dosa batter. Can this be used to make Idlis as well or any modifications required?
Hi,
This recipe works best for ragi dosa. I have another recipe for ragi idli here
great recipe….superb
use full recipe for person having medical problems
nice
Thank you
I tried your hack of mixing ragi flour into the fermented dosa batter and it worked like a charm. They tastes delicious too with coconut chutney. For a longtime I have been trying to get my family like ragi dosas but they never. But this one they all seem to like. But they must be eaten while still hot. Thank you for the recipes.
Glad to know Revati. I think they will like even the first recipe (instant) in the recipe card. They turn out more or less like rava dosa but with ragi flavor. Give that a try! Thank you
Hi Swathi, I tried the Ragi dosas as per your receipe using Ragi flour and it turned out very good. Everyone in the family liked it. I added vegetables like grated zucchini, onion, spring onion and some finely chopped cabbage. Thanks for the receipe.
Thanks for trying Savita. Glad you all liked the ragi dosas.
Hello Swasthi.. Thank you for sharing the recipes. For the method 2 with raagi flour, do we also soak it along with the rice?
Hello Ramadevi,
No it does not require soaking. I add it directly first to the blender & then rice & water. I have updated the recipe. Use 100 grams flour. Hope this helps
Thank you for the perfect recipe. Tried it first time.. and it’s tastier than I thought. ??
Welcome Gangka
Glad you liked it.
🙂
Loved it… Simple and to the point instructions.
Secondly love the recepie, i laways thought what to do with ragi millet. Thank you for such a tasty recepie.
Welcome!
Liked the recipe of instant ragi dosa
I first look for your recipes for any fish. Thanks for the awesome posts. I love following your recipes!
Thanks Ranjini
Glad to know!
🙂
Very easy and healthy with excellent taste. Tried with red rice and brown rice.
Glad to know!
Thank you!
Hi could you also share the recipe of the chutney served along with it. Much thanks !
Hi Shruti,
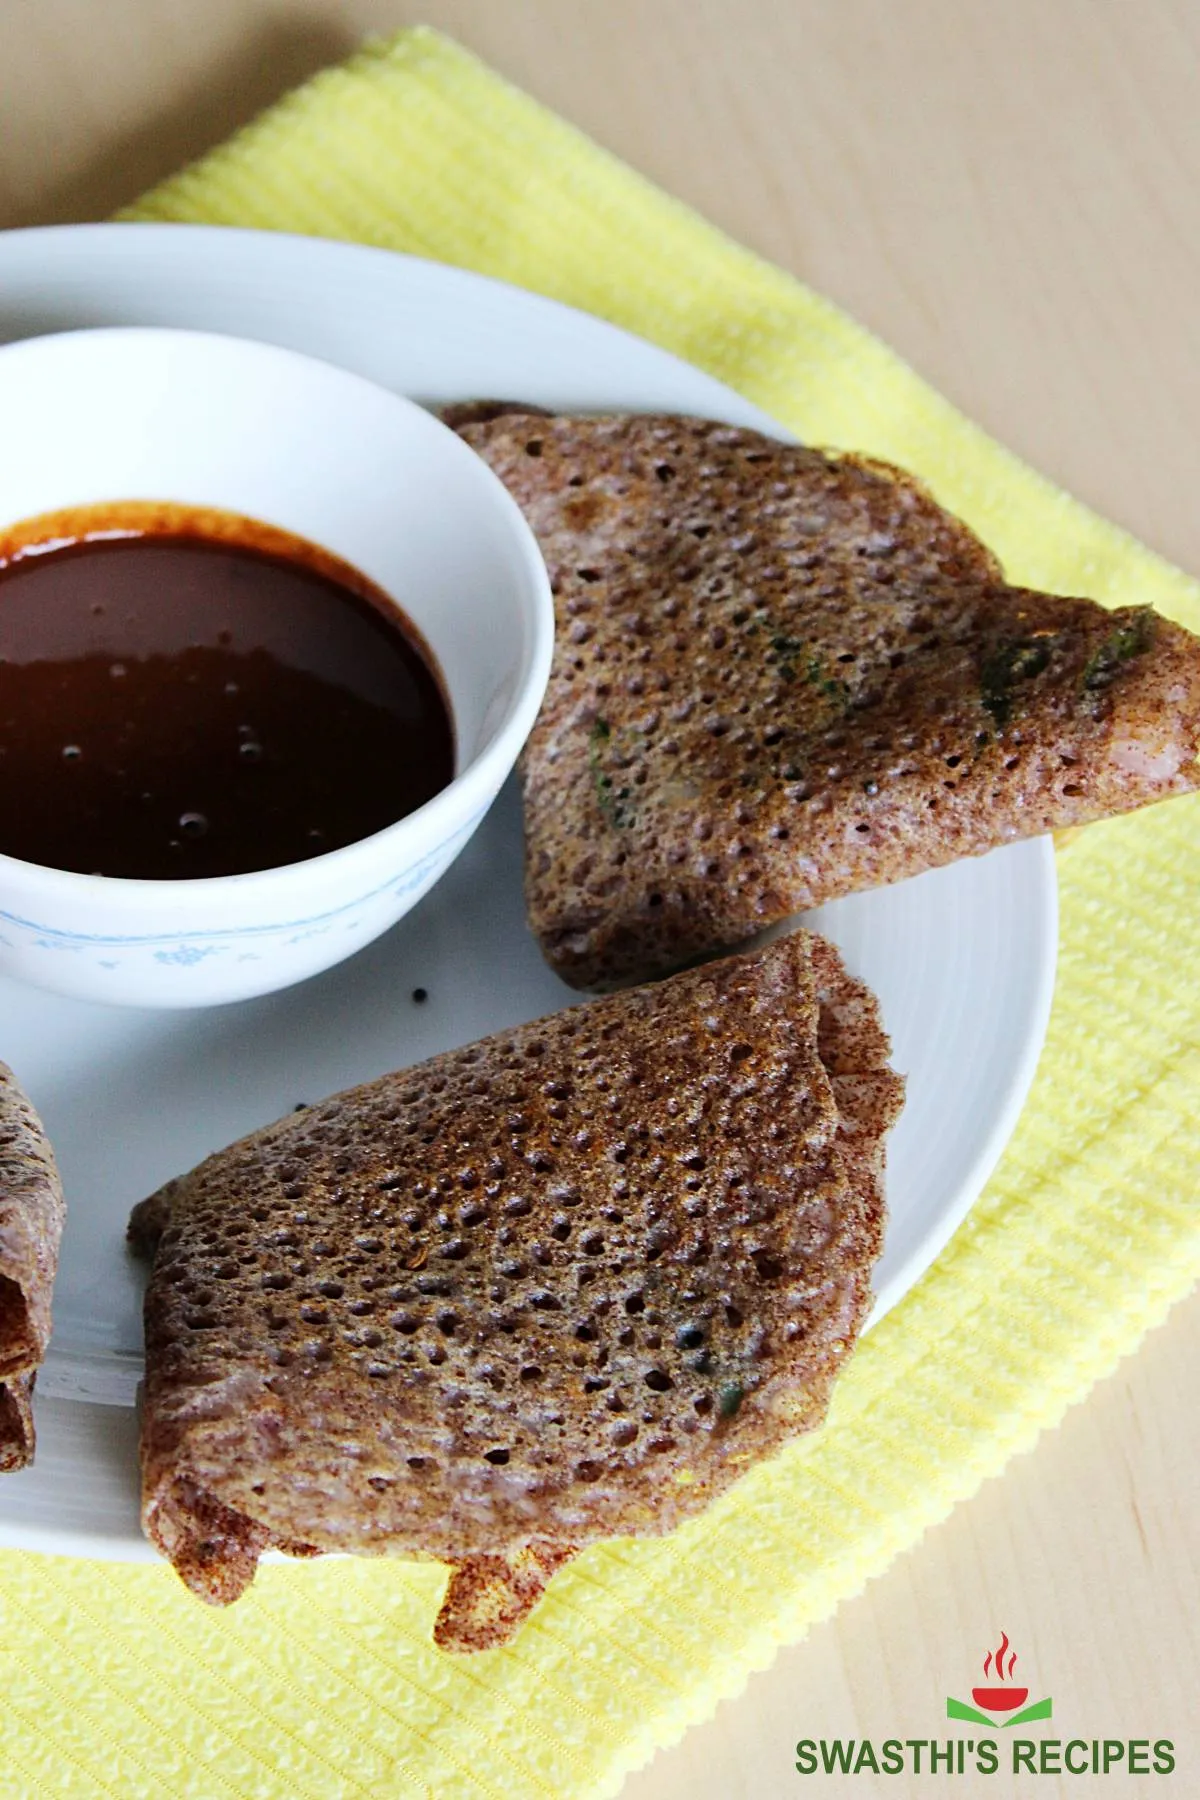
You can check this coconut chutney here. The side in the other picture is not chutney it is a slow cooked horsegram soup (ulavacharu). I don’t have the recipe on the blog.
I loved reading your recipes. I don’t know much about cooking but after reading your recipes which are so well spelt out, I am definitely going to try them out with my husband’s help ofcourse. Thank you very very much. Keep putting in some more recipes.
Welcome!
Thank you so much!
Yes do try them out and enjoy!
🙂
I tried the instant version with rava and curd. Turned out pretty good and we all liked it. Thanks for the instant recipe 🙂
But am afraid whether the calorie info u mentioned (436KJ) is for a single dosa?
Hi Abinaya
It is for 1 serving. The nutrition info is for the number of dosas you made divided by 2. I will look into it again
Abinaya
Hi
I tried the second method of making ragi dosa with whole ragi.The ragi was not soft after soaking for 4..5 hours.So it didn’t blend in mixer and also it had a chewy texture while eating.Should I soak it for more time ?
Please help !
Hi Aparna,
Yes try soaking for longer next time, may be 8 hours or so. I use a high speed grinder, mine gets done to very fine & smooth texture with 4 hours of soaking. Chewy texture – is it because the batter was coarse? I guess so. Soaking longer should help.