Semiya Payasam Recipe (Vermicelli Payasam)
Updated: March 7, 2023, By Swasthi Shreekanth
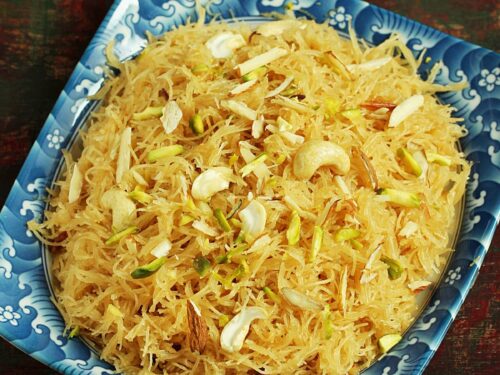
Semiya Payasam Recipe with stovetop, instant pot instructions & videos. Semiya payasam is a South Indian sweet made with vermicelli, milk, ghee, sugar/ jaggery, raisins and nuts. It is one of those easiest dessert that gets done under 20 minutes. So you can make this any time to fulfil your sweet cravings and don’t really need an occasion. This cardamom flavoured dessert is made across India and is known by different names as seviyan kheer, vermicelli kheer or vermicelli payasam.
Most people make this during festivals and celebrations as it a crowd pleaser and is super quick to make. If you are wondering what is it?
About Semiya Payasam
Semiya Payasam is a South Indian pudding made with vermicelli, whole milk, sweetener and cardamoms. Semiya is a Telugu, Tamil & Malayalam word for ‘Vermicelli’ and Payasam is a South Indian milk pudding.
There are various kinds of vermicelli available in the market made with different grains. Rice vermicelli, maida vermicelli, ragi, whole wheat & millet semiya are some kinds easily available.
To make Semiya Payasam, generally whole wheat vermicelli is used. Since it is meant to be a quick dessert, most commonly sugar is used. So I have shown the same in the video as well in the stepwise pictures.
But we prefer using jaggery since it a healthier choice. But making this with jaggery takes a little more time as the jaggery syrup has to cool completely before adding to the cooked milk semiya. I have shared the instructions below on how I do it.
In this post, I have shared the methods to make semiya paysam in a regular pot and in instant pot along with steps to use jaggery.
Are semiya payasam, vermicelli kheer and seviyan kheer same?
Yes all are same. They are made the same way with the same ingredients. Semiya payasam is the South Indian term and seviyan kheer & vermicelli kheer are the North Indian words for the same vermicelli pudding.
Usually paysam is made with ghee and kheer recipes most often do not use it. But seviyan kheer is an exception as ghee is used to roast the seviyan. Whatever you name it, this tastes delicious & creamy.
More payasam recipes
Rice payasam
Aval payasam
Rava payasam
Sheer khurma
Rice kheer
Moong dal payasam
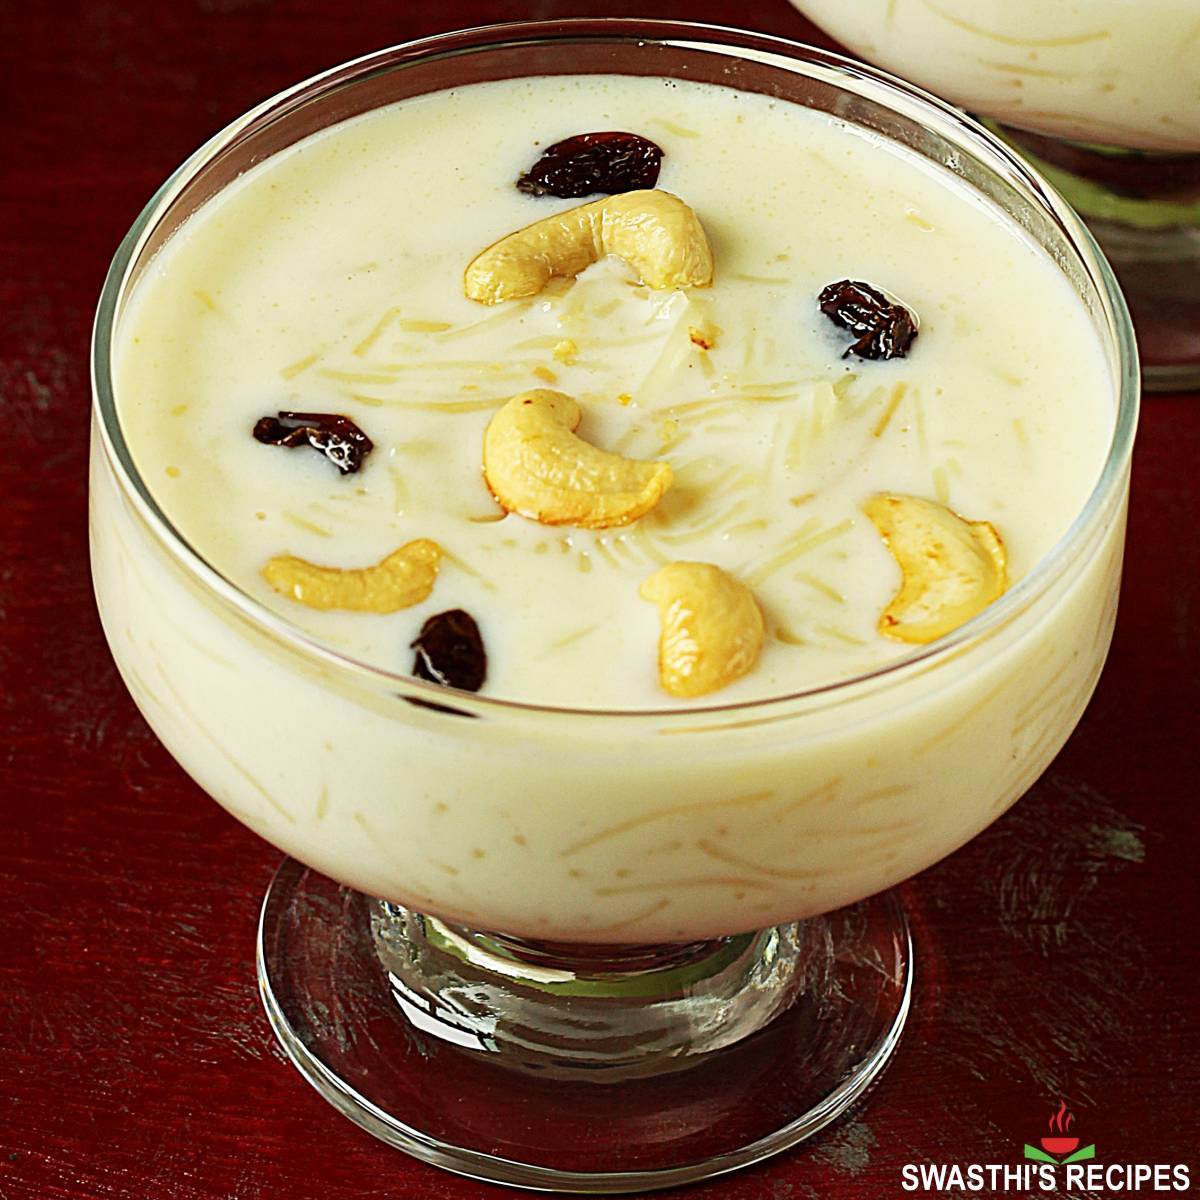
Photo Guide
How to Make Semiya Payasam (Stepwise Photos)
Roast Nuts & Semiya
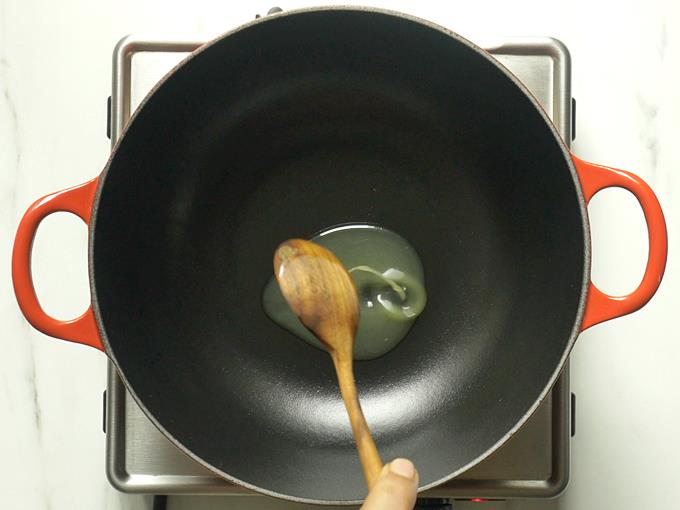
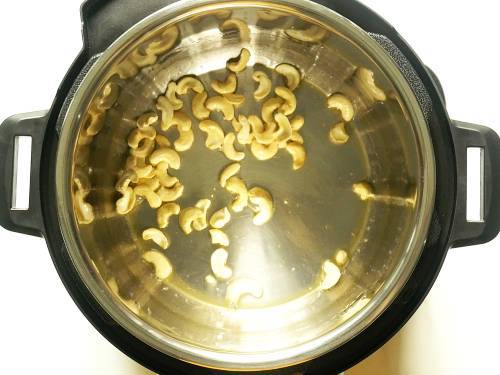
1. Heat a heavy bottom pan with 1 tablespoon ghee.
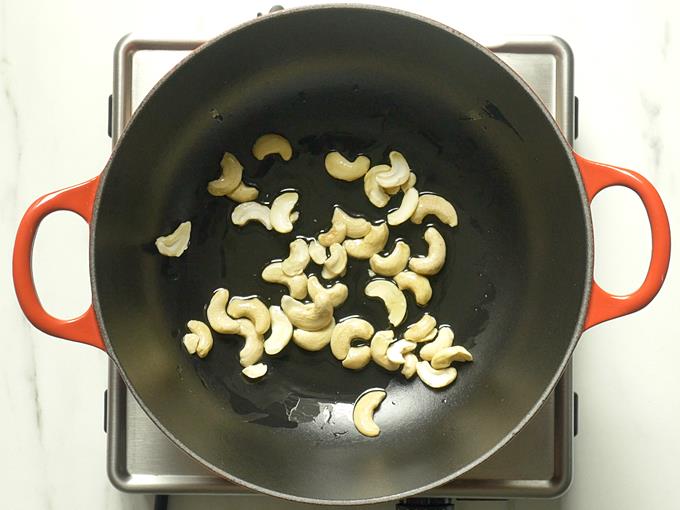
2. Add 12 to 15 cashew nuts and fry till lightly golden. I split the cashews and check before using.
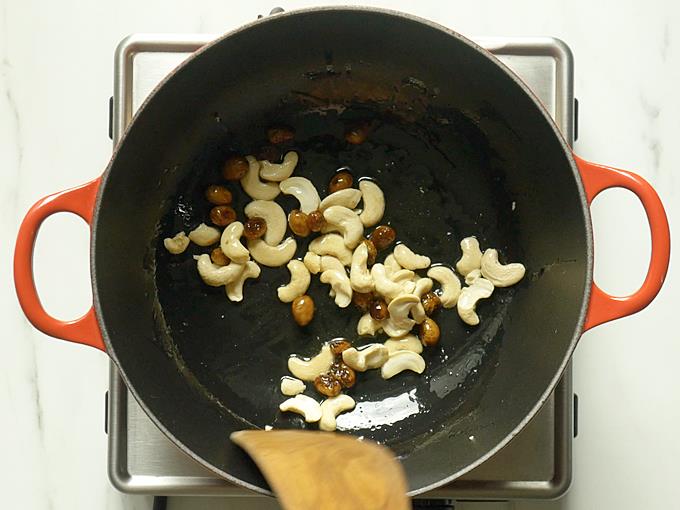
3. Next add 1 to 2 tablespoons sweet raisins. We don’t prefer a lot of raisins in payasam so I just add 1 tablespoon raisins.
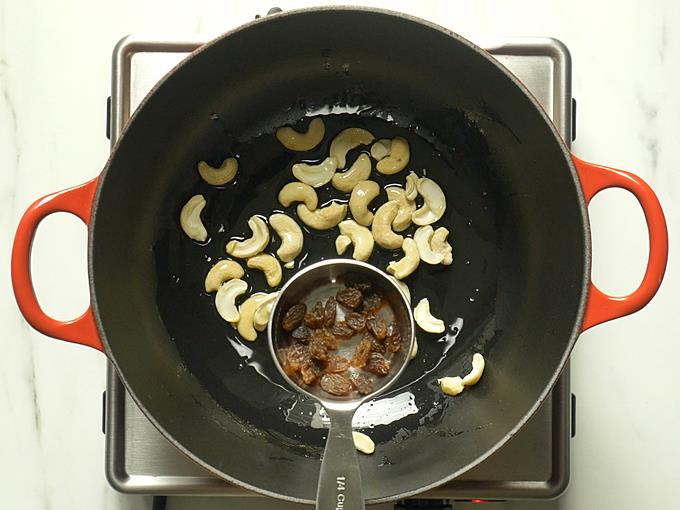
4. Saute till they turn plump.
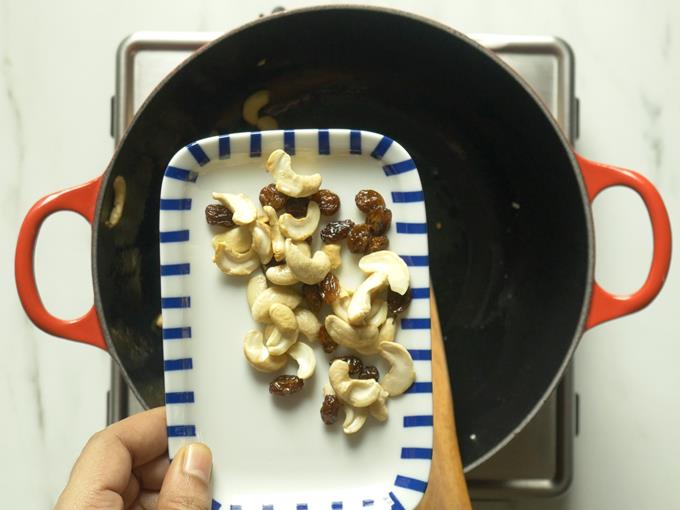
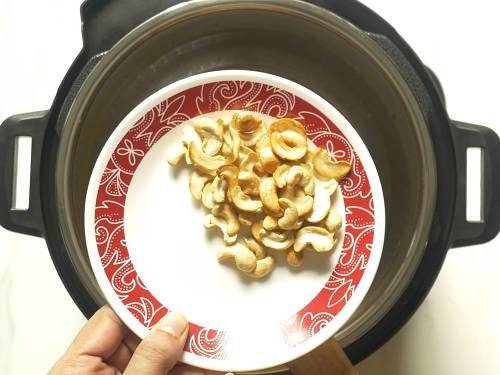
5. Remove these to a plate and keep them aside.
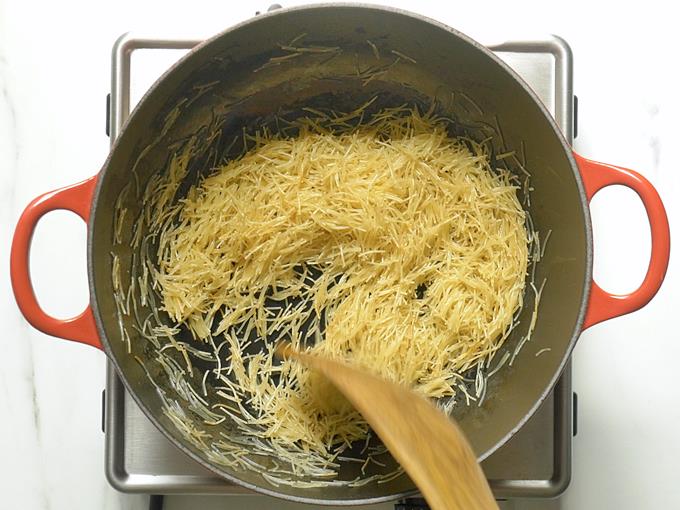
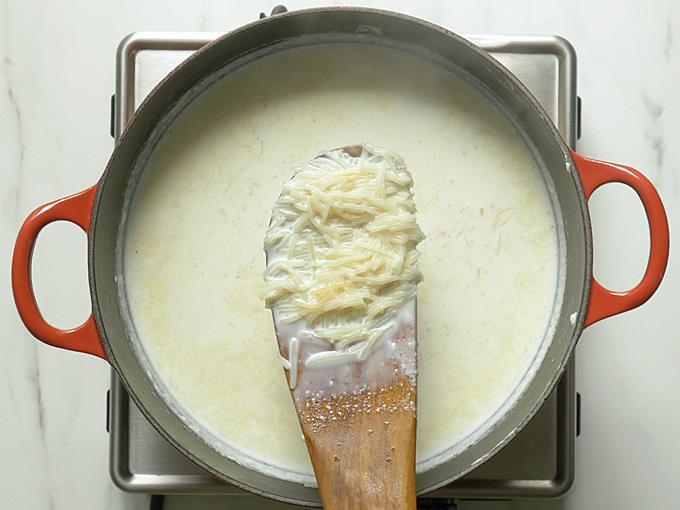
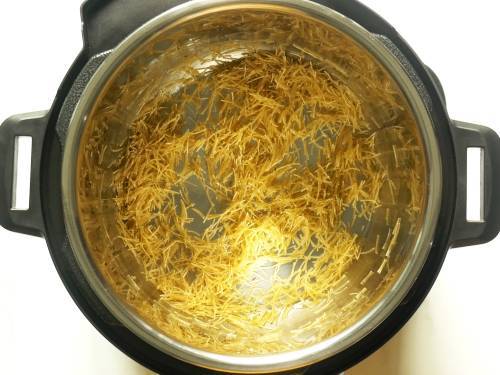
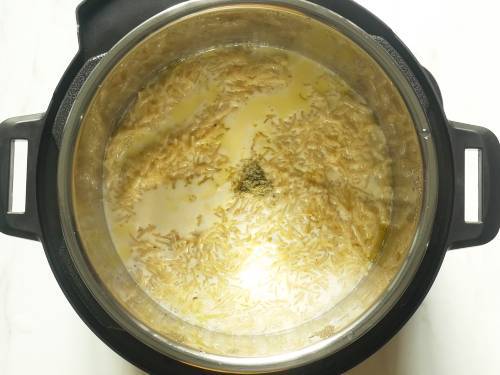
6. Add another tablespoon ghee (optional) and add ¾ cup semiya to the same pan or pot.
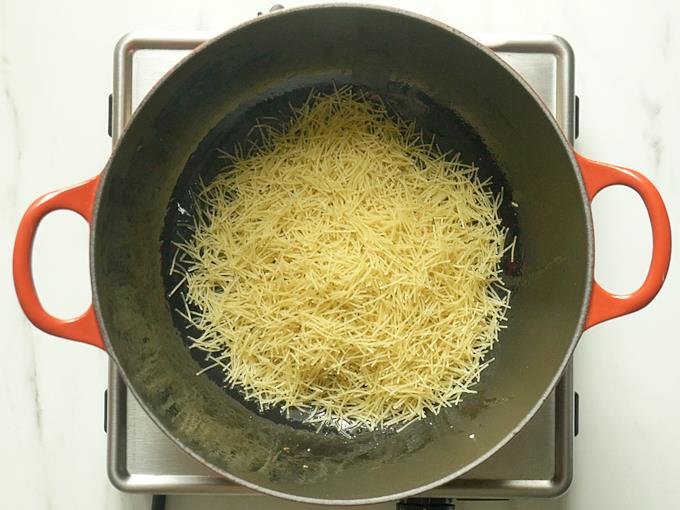
7. Roast the semiya till slightly golden on a medium flame. You can skip roasting if using pre-roasted semiya. Do not brown them.
Cook Semiya Payasam
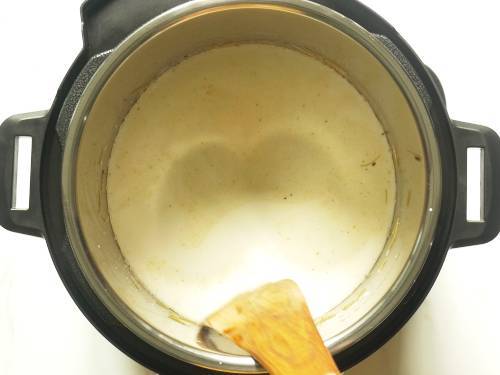
8. Pour 4 cups milk to the pot. You can also dilute the milk and use. (3 cups milk & 1 cup water).
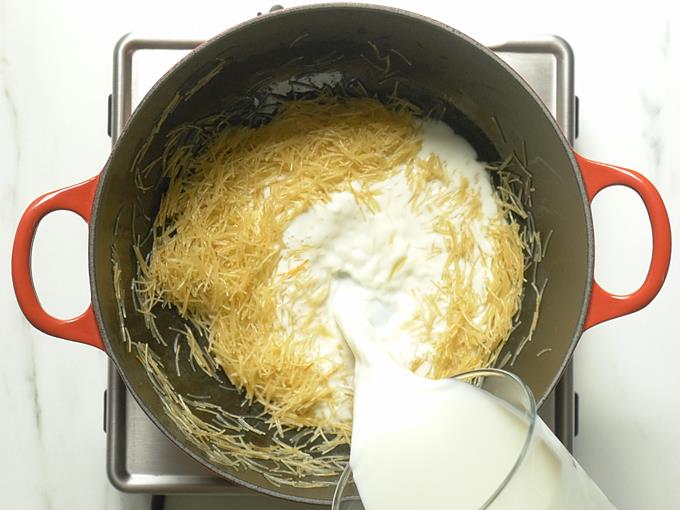
9. Bring the milk to a boil on a low to medium flame. Stir and make sure there are no lumps. If you like to add sago/ sabudana/ saggubiyam you can add them pre-soaked at this stage. More in the tips notes below.
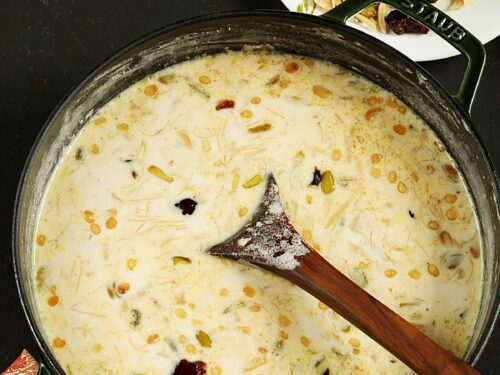
10. Keep stirring and cook on a medium heat to prevent burning.
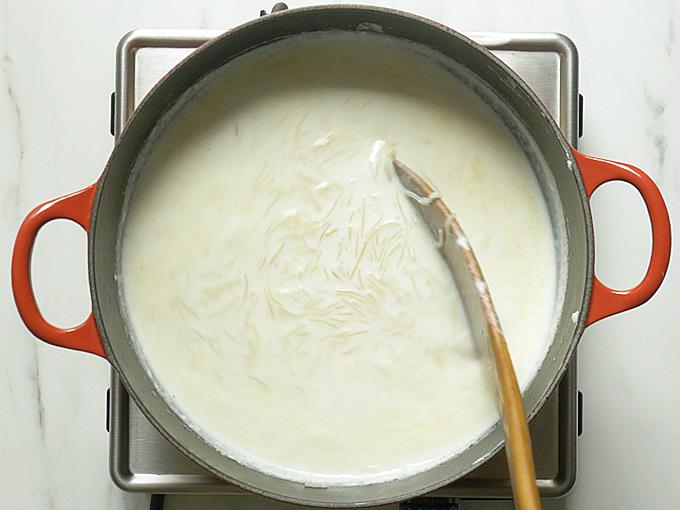
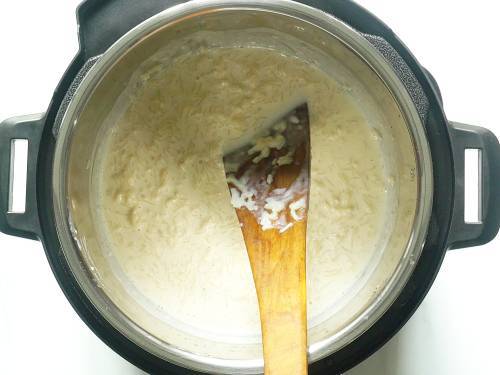
11. Cook till the vermicelli is fully soft cooked. Keep stirring to prevent burning.
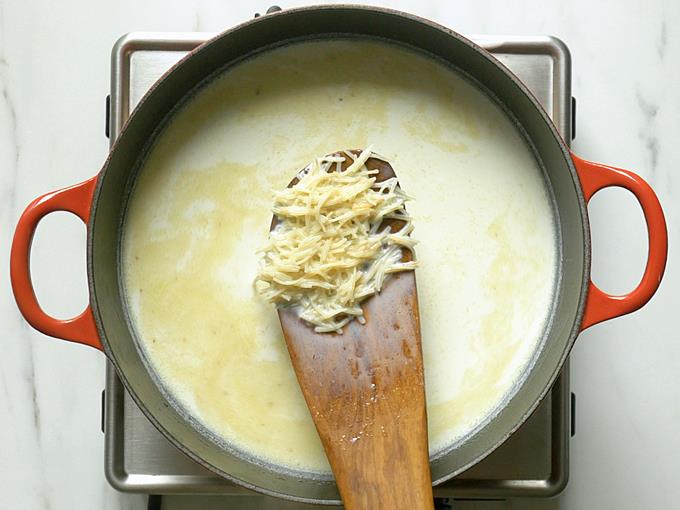
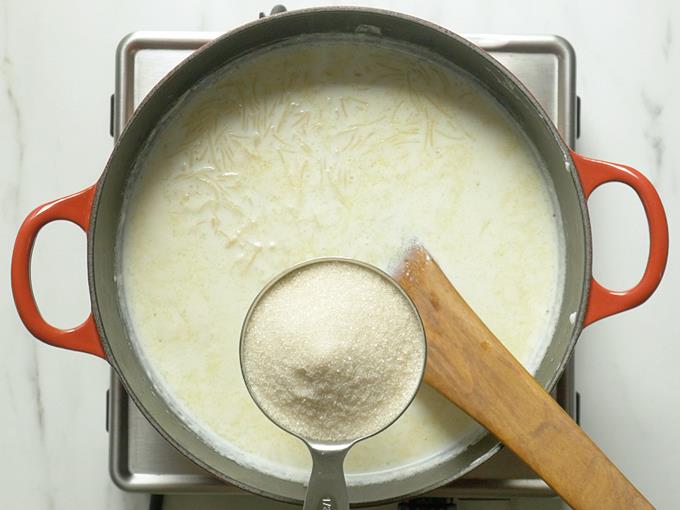
12. Add ½ cup sugar and cook on a low heat until the semiya payasam turns thick. This may take about 3 to 5 mins. To use jaggery, check making jaggery syrup section below.
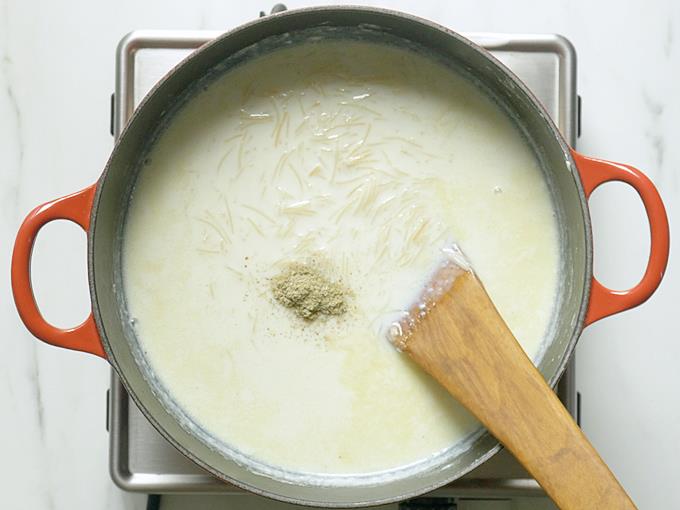
13. Next add ½ teaspoon cardamom powder. Remove from heat when it is of a thick pouring consistency.
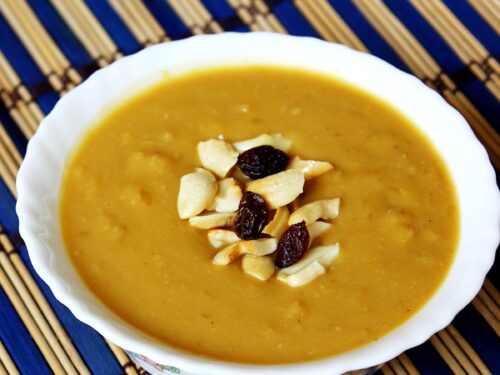
14. Semiya payasam will thicken upon cooling.
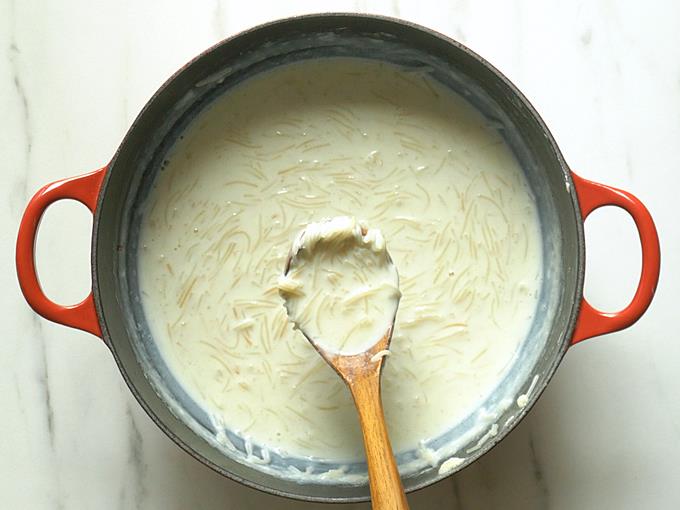
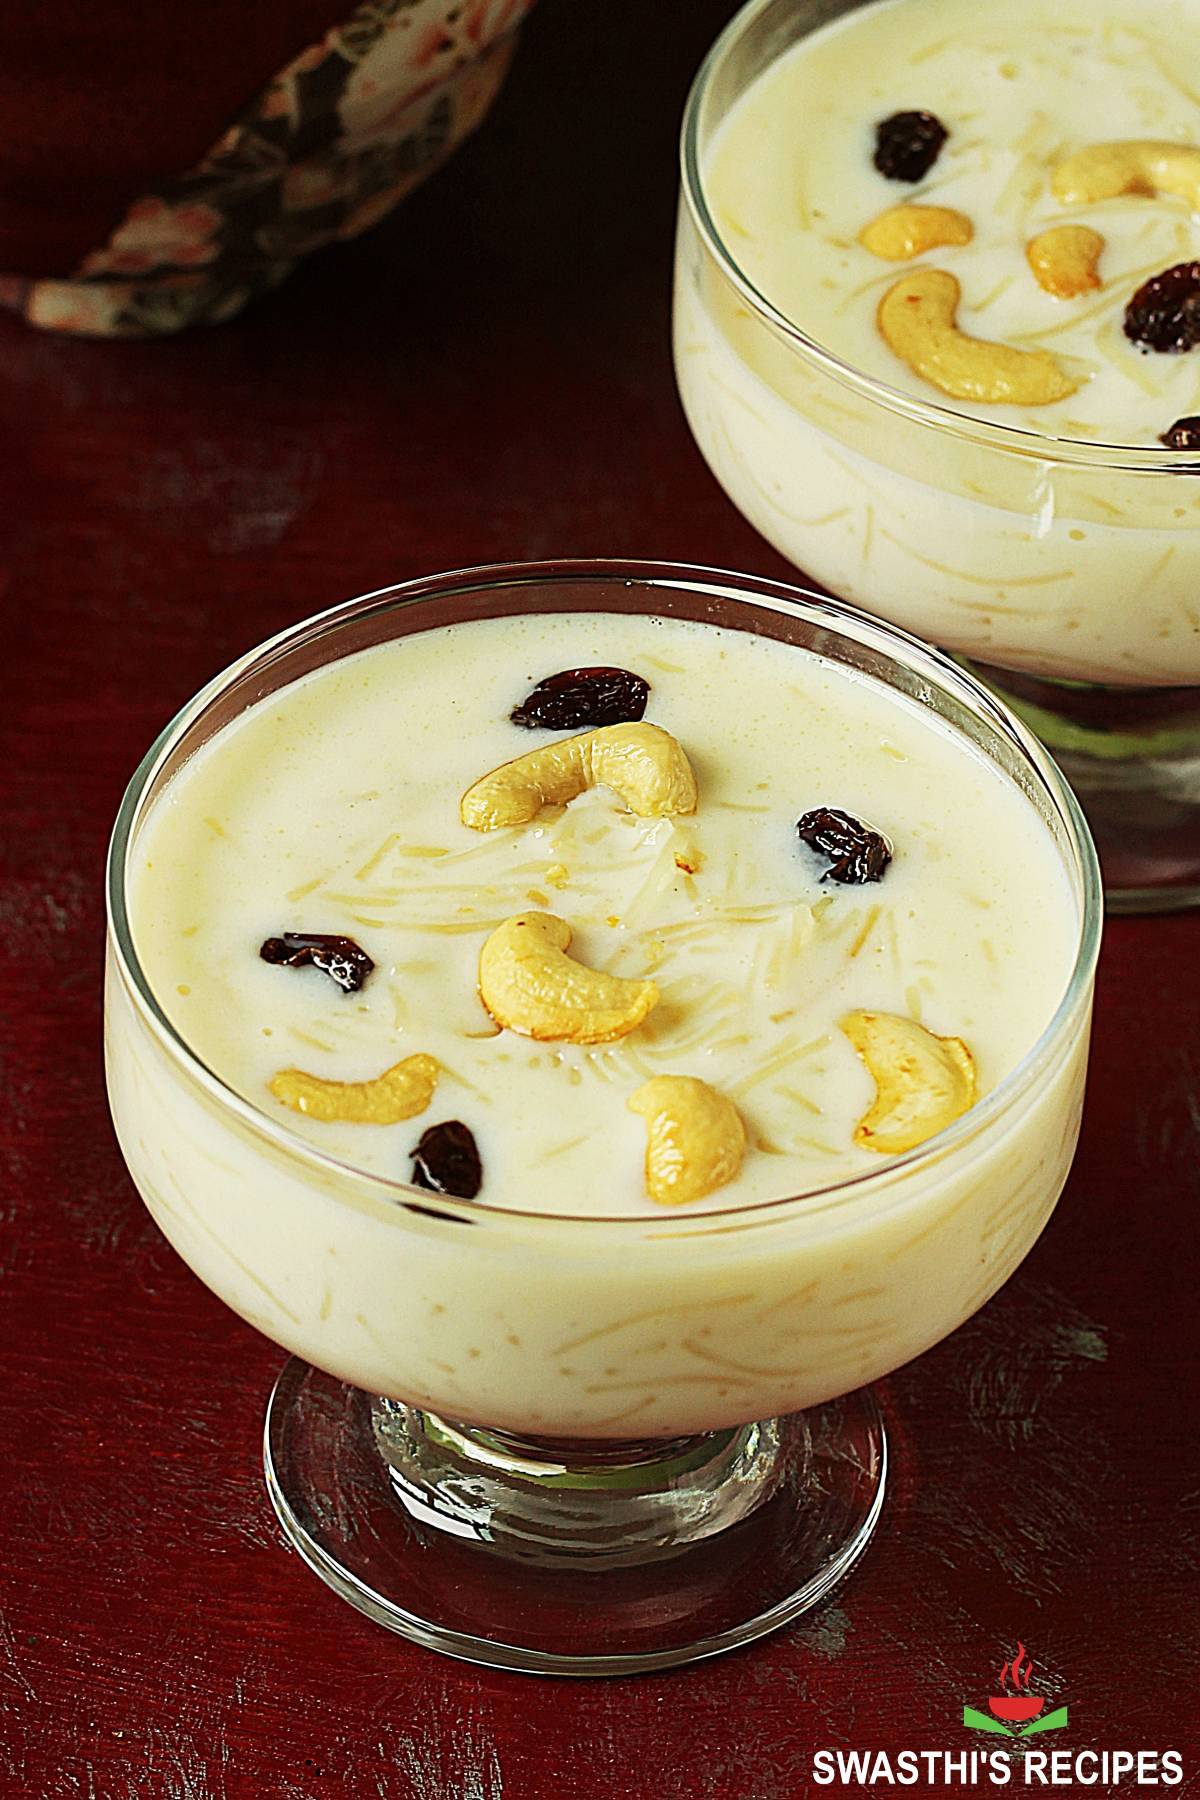
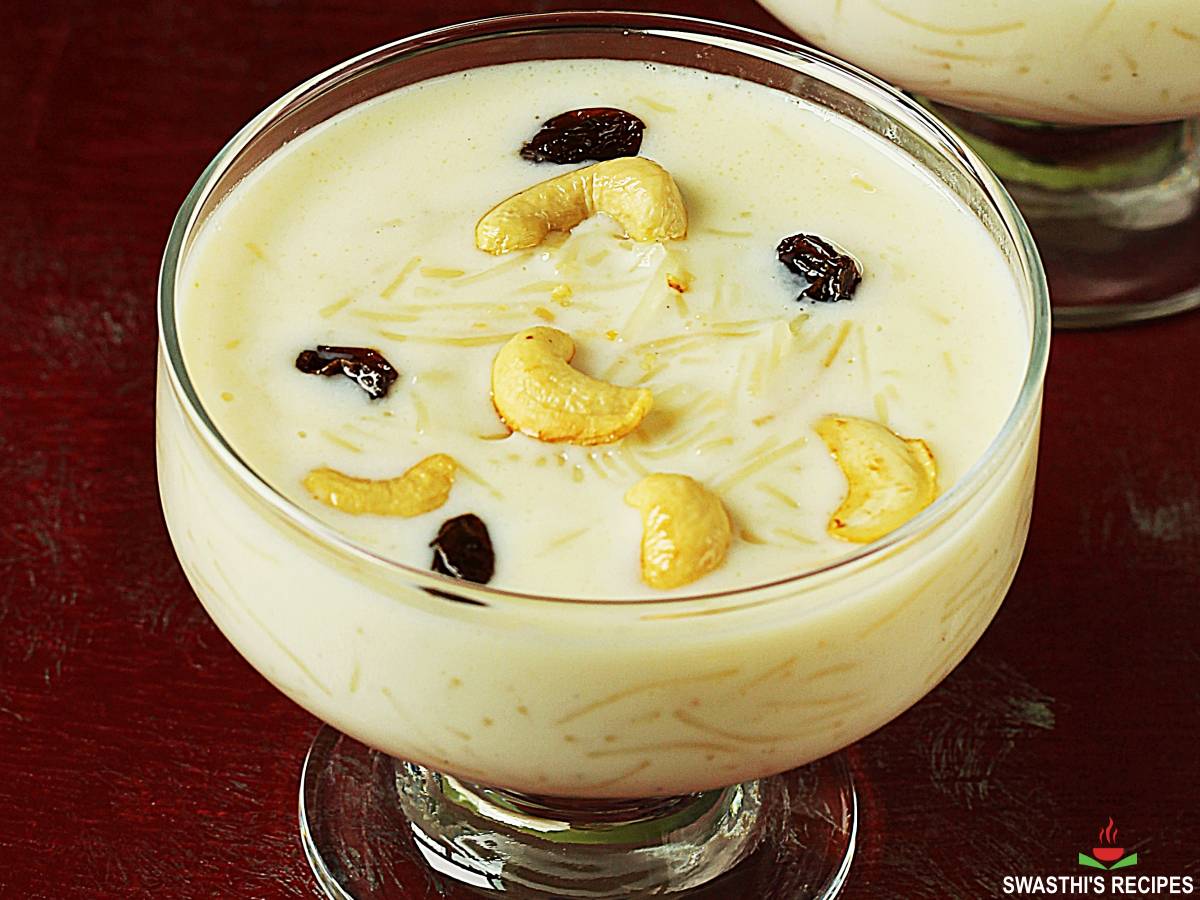
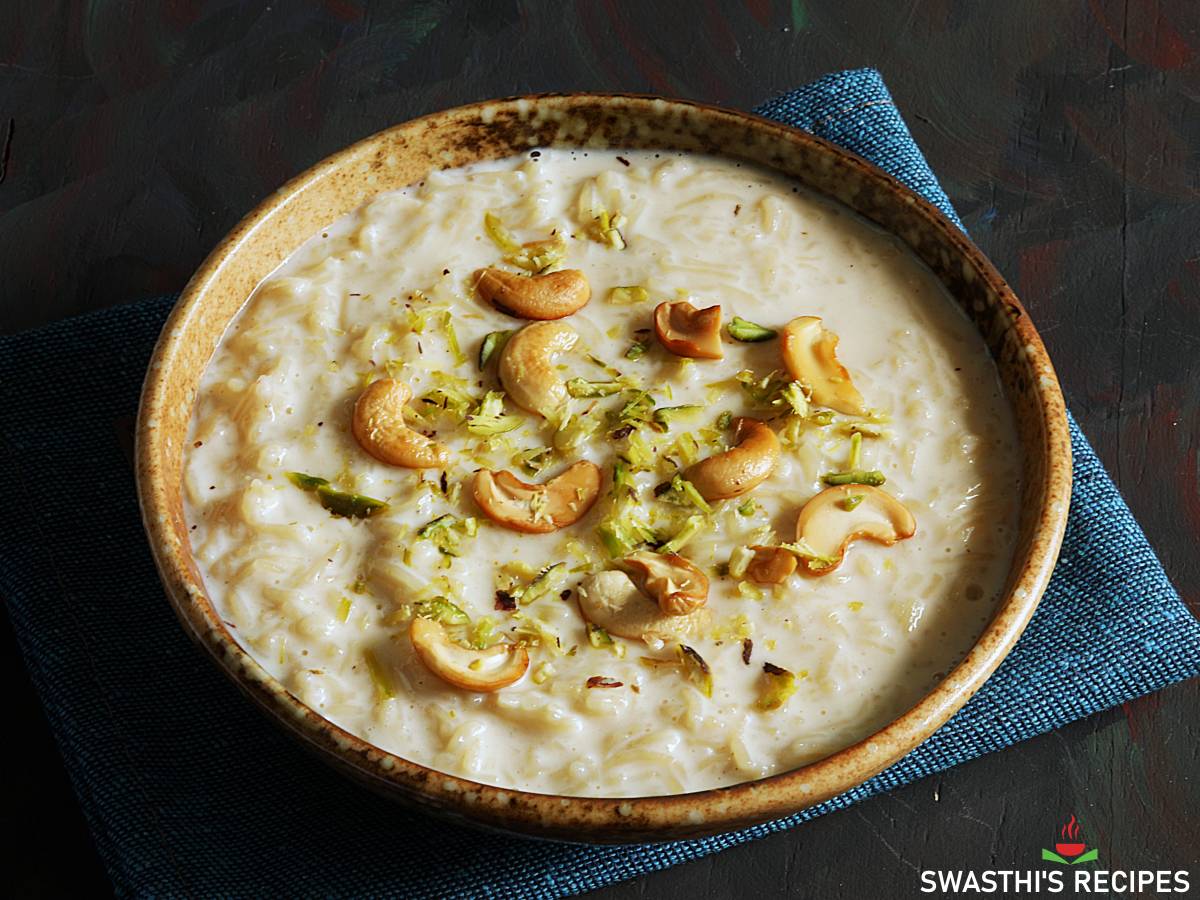
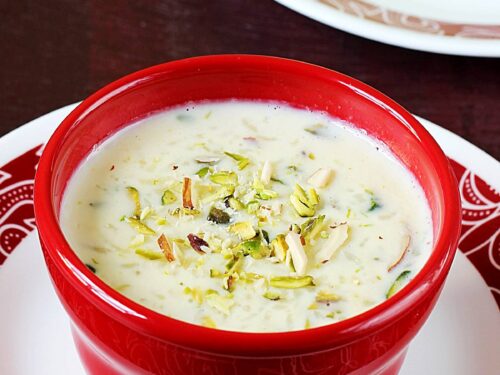
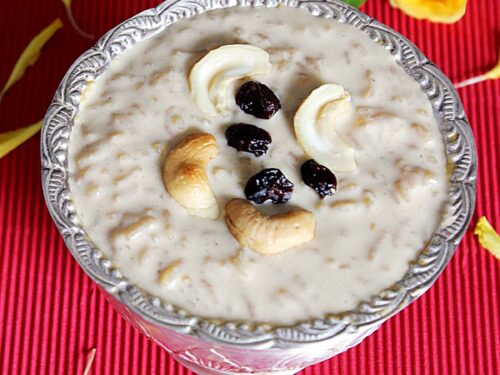
Garnish with nuts and raisins. Serve semiya payasam warm or chilled.
How to Make Vermicelli Kheer in Instant Pot
1. Press saute button on the instant pot. Pour 1 tablespoon ghee to the steel insert. When the ghee melts add, cashews and fry them until golden.
2. Remove them to a plate. I have not used raisins here as I did not have. If you want you may stir them in the ghee at this stage. They will become plump soon. Remove them.
3. Pour another tablespoon ghee (optional). Add semiya and roast them stirring continuously until light golden. If using roasted vermicelli, just fry for 30 seconds.
4. Pour milk and 3½ cups milk and ½ cup sugar. If you want to use jaggery read making jaggery syrup section below.

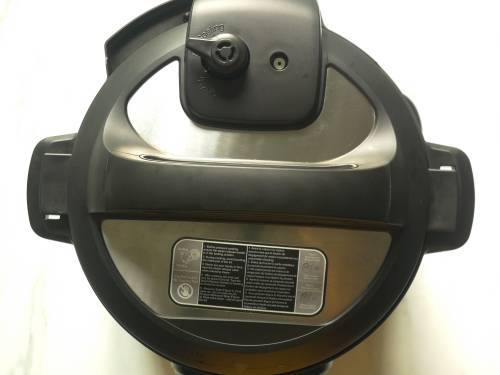
5. Press cancel and stir well. Secure the Instant pot with the lid and position the steam release handle to sealing.
6. Press porridge button and set the timer to 6 minutes. Once the Instant pot is done, it beeps wait for the pressure to release naturally for 6 minutes.
7. Then gently release the rest manually by moving the vent from sealing to venting. You will see the semiya is clumped up slightly. Add cardamom powder and give a gentle stir.
8. Add the nuts and more ghee as you prefer. Serve semiya payasam hot or chilled. If you double the recipe, let the pressure release naturally. Do not do a manual release as the milk can come out from the vent.
Garnish semiya payasam with more ghee and fried nuts.
How to use Jaggery
Jaggery is unrefined sweetener and most times it has some debris so it has to be dissolved in water. Then strained and boiled to a thicker consistency. Or vice versa, boiled and then strained.
If using jaggery powder, it can be added directly to the payasam without making a syrup. However the taste and flavour is not the same.
When jaggery is boiled in water it begins to release a great aroma and turns super flavorful. So payasam tastes much superior when made with syrup. Adding jaggery directly won’t give the same taste.
Here are some key tips and pointers if you want to use jaggery.
- Grate ¾ cup jaggery and add it to a small pot. Pour 3 tablespoons water. Boil this until sticky & slightly thick. The jaggery syrup will become bubbly and begin to froth, just give a good stir often.
- Turn off when it is slightly sticky. No string consistency is required. Cool this completely.
- Once the semiya is soft cooked with the milk. Turn off the stove and cool it for 5 to 6 minutes on the counter.
- Then fiter the cooled jaggery syrup into the semiya paysam. Add only as much as required. The amount to add depends on the kind of jaggery. So add as needed. I use up the entire syrup.
- Adding hot jaggery to hot payasam will curdle it instantly. So 2 things worth to note here: Cool the jaggery syrup completely. Bring down the temperature of paysam slightly before adding the cooled syrup. This way your semiya payasam will turn out perfect.
Pro Tips & notes
- Sabudana: You can add about 2 tablespoons of sagu / sabudana in semiya payasam. Soak them in enough water for a few hours until soft. Add ½ water along with milk. Using only milk will make the semiya payasam super thick.
- Vermicelli: The quantities and cook time are for thick whole wheat vermicelli. If using any other kind, please adjust them depending on the kind you are using.
- Milk: To make creamy and thick vermicelli kheer use full fat/ whole milk. But low fat milk also works well.
- To make the recipe vegan, use soya/ almond or thin coconut milk (homemade). If using store bought coconut milk, use one from the cartons. Canned coconut milk is too thick for this payasam recipe.
Related Recipes
Recipe Card
Semiya Payasam Recipe (Vermicelli Kheer)
Ingredients
- ¾ cup semiya (thick vermicelli)
- ½ cup sugar (adjust to taste)
- ½ teaspoon green cardamom powder (elaichi) or few strands of saffron
- 4 cups milk (1x – 3½ cups for instant pot)
- 2 tablespoons ghee
- 12 to 15 cashew nuts or as needed
- 8 to 10 sweet raisins or as needed
Method
- Firstly add half of the ghee to a heavy bottom pot and heat up.
- Add cashews and fry till golden.
- Then add sweet raisins and fry just until they plump up. Remove these to a plate and keep aside for garnish.
- Next add the rest of the ghee and add semiya to the same pan. Roast till slightly golden on a low to medium flame. (skip this step if using pre-roasted semiya)
- Pour milk to the pot. Let the milk boil on a low to medium flame.
- Boil till the vermicelli is fully soft cooked. Keep stirring to avoid burning.
- Add sugar. Cook for 3 to 5 mins on a low flame until the semiya payasam becomes thick.
- Add cardamom powder. Turn off when the it reaches a thick pouring consistency. It will thicken further after cooling.
- Garnish semiya payasam with fried nuts and raisins. Serve hot or chilled as desired.
- Find video above the recipe card. Press saute button and add half of the ghee to the inner pot of the Instant pot.
- When the ghee melts, add cashews and fry until golden.
- Remove them to a plate. If using raisins fry them just for 30 seconds and remove to the plate.
- Add the rest of the ghee (optional) and semiya. Fry until lightly golden stirring often. If using roasted vermicelli then just fry for 30 seconds.
- Pour milk and add sugar.
- Press cancel and stir well. Close the lid and then press porridge button.
- Set the timer to 6 mins and position the steam release handle to sealing.
- The ip will beep when the semiya payasam is done. Wait for the pressure to release naturally for 6 minutes.
- Add cardamom powder and gently stir it. If the payasam is runny you can cook on saute mode for 2 mins.
- Garnish with cashews and raisins. Serve semiya payasam chilled or warm.
Notes
- For a runny payasam, use up to 5 cups milk.
- To use sago in this recipe, soak 2 tbsps sabudana in hot water until completely soft. Add them to the milk along with ½ cup water. Using only milk will make the semiya payasam very very thick. If the sago is not soaked well then first they need to be cooked in water until transparent.
- Vermicelli: The quantities and cook time are for thick whole wheat vermicelli. If using any other kind, you need to adjust depending on what kind you are using.
- Milk: To make it creamy and thick use whole milk. But low fat milk also works well.
- Jaggery: To use jiggery in the recipe, dissolve ¾ cup jiggery with 3 to 4 tbsps of water. Boil until the syrup bubbles well and turns sticky & slightly thick. Cool this completely. Cool the payasam for 5 to 6 minutes and then filter the jiggery syrup to the payasam. Pour ¾ of the prepared syrup and mix. Taste test and then add the rest.
- To make the recipe vegan, use the same amount of soya/ almond or thin coconut milk. If using store bought coconut milk, use one from the cartons. Canned coconut milk is too thick for this recipe.
- The quantities and cook time are for thick semiya. I use MTR and Bambino brands.
- If using thin wheat vermicelli like the one use in this sheer khurma, reduce the cook time to 1 minute & let the pressure release naturally. Use 50 grams of thin vermicelli, the same amount of milk and sugar.
- To use ragi semiya (anil brand), pressure cook for 2 minutes and let pressure release naturally.
- If you double the recipe, let the pressure release naturally. Do not do a manual release as the milk can come out from the vent.
Private Notes
Tried this recipe?
Mention @SwasthisRecipes or tag #swasthisrecipes!This recipe was first published in August 2014. Updated & republished in January 2021.
About Swasthi
I’m Swasthi Shreekanth, the recipe developer, food photographer & food writer behind Swasthi’s Recipes. My aim is to help you cook great Indian food with my time-tested recipes. After 2 decades of experience in practical Indian cooking I started this blog to help people cook better & more often at home. Whether you are a novice or an experienced cook I am sure Swasthi’s Recipes will assist you to enhance your cooking skills. More about me
Follow Swasthi’s Recipes
Comments
Hello, Is regular cooking oil okay to substitute for ghee?
Hi,
You may use coconut oil. I don’t think others will go well
I made payasam. Very tasty and easy. Thank you!
I’m excited to try these new directions in healthy and tasty dishes.
I’m excited to try these healthy dishes!
good
The recipe is very clear and well explained. Bravo. Thanks for the additional tips.
I made it in the instant pot and doubled the recipe. Came out perfect! Thank you very much!
This is my first attempt at making Kheer. Followed your recipe and it is perfect
Amazing it tastes. Entire family loved it. Thank You!
Glad you all like it Candy
Made it. It was awesome ??
Thank you for the recipe ?
Glad to know Fazeela
Great
HI Swasthi as usual excellent recipe from you. I know you are not in the business of recommending commercial products, but I am wondering what is the best brand of vermicelli you would use for making this payasam. I tried a couple of brands that are available here in USA but I am not very happy with those products. Thanks for your help.
HI Rom garu, You can try MTR, Bambino or Anil Semiya. I have tried all of these and they work well. Hope this helps
Swasthi, thanks for your suggestions. I will try one of the products you mentioned. Keep up the great work. Happy Ugadi to you and your family.
Happu Ugadi Rom garu
I used jaggery and it turned out perfect! Thanks so much for the tip on when and how to add the jaggery to the kheer!
Welcome Sam
Glad it turned out good. Thanks for leaving a comment
So nice?????
Hi…. Can I add chironji seeds in this
Hi Srivani,
Yes you can.
Thanks Swathi. All your dishes are coming out well. Thanks for the perfect measurement.
Welcome Priya
Do you know a recipe for a side dish with cabbage, carrots and coconut? I had it once in Tamilnadu, but can’t find the recipe…
Hi Anna,
Yes I know. I have this beans poriyal recipe. You can replace beans any other veggie like cabbage, carrots etc. Hope this helps
Super yummy. Tried it and turned out very well! For more difficult recipes than this, the pictures are really helpful!
Thanks for sharing!!
You are welcome Anna! Glad you liked it. Thank you!
I love your dishes thank you Swathi Garu for helping us… Actually i learnt frm ur recps cookng prcedur thnq ?
Hello Afzal garu,
You are most welcome. Glad the recipes are helpful.
Thanks for trying!
Hi andi, what should be the temperature of the milk while adding to vermicelli?
Hi Usha,
I use milk straight from fridge. No problem! If you have preboiled hot milk you can use that as well.
Thanks Swathi garu, tried today. Turned out awesome. I like the pan you used. May i know what pan it is.
You are welcome Usha,
It is from le creuset
Thanks Swasthi garu. Tried today. Turned out awesome. I like the pan you used. May i know what pan it is.
I love your dishes thank you Swathi Garu for helping us
Came out very perfect with your measurements.. Thank you Swathi?
You are welcome Vaitheghi. Thank you!
🙂