Egg biryani recipe (Instant pot & stovetop)
Updated: August 30, 2022, By Swasthi
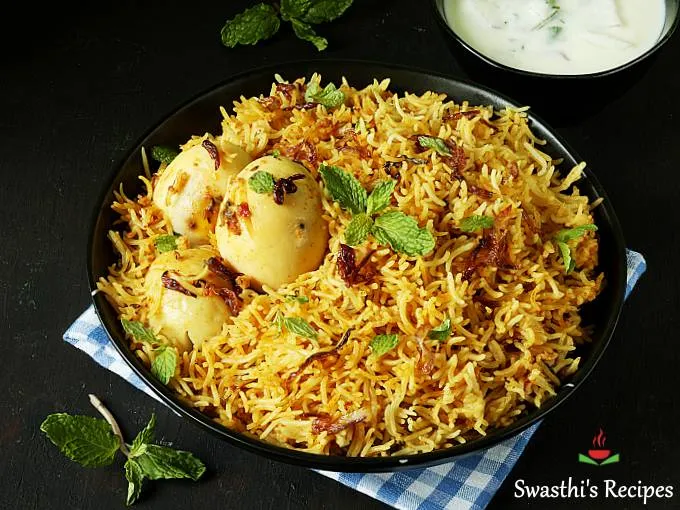
Egg biryani recipe – Fragrant basmati rice cooked with aromatic biryani spices, herbs & boiled eggs to yield a delicious one pot egg biryani. This post includes instructions to make it in a pressure cooker, pot & Instant pot. This is one of the most easiest, delicious and flavorful biryani that you can make at home with very few basic ingredients. Most often I make this when I am short of time yet desire to have a special meal. Any raita varieties like onion raita or mint raita with some papads go well with this.
This is not a dum biryani, but tastes great with good flavors and can be prepared in a pot, pressure cooker or an Instant pot. Traditionally a biryani is dum cooked after layering partially cooked rice over marinated meat.
Making a traditional biryani takes a lot of time. So I make egg biryani often following this recipe.
For years I have made egg biryani in a traditional whistling pressure cooker. I had posted this recipe earlier with instructions to make it in a normal pot & traditional cooker.
It’s been more than an year since I moved to Instant pot for my regular cooking. So I have updated this post with a video of Instant pot egg biryani along with instructions.
Photo Guide
1. Boiling eggs in pot: Rinse the eggs well under running water. Pour water to a pot and gently place the eggs in it. Pour enough water to cover the eggs. Cover and cook on a medium heat until you see cracks on the eggs. Turn off and rest for 5 mins. Later drain the water and keep the eggs under running cold water. Shell the eggs. Make 2 to 3 slits on them and set aside.
Boiling eggs in Instant pot: Pour 1 cup water to the steel insert of your Instant pot. Place the steaming rack and arrange the eggs on the rack gently. Alternately you can place them in a steel bowl and cover it. Press PRESSURE COOK button and set the timer to 5 mins.
Once the IP finishes let the pressure release naturally for 5 mins. Release the rest of the pressure manually by moving the steam release value from sealing to venting.
Remove the eggs carefully and keep them under running cold water. Peel the eggs. Make 2 to 3 slits on the eggs and set aside.
Making egg biryani
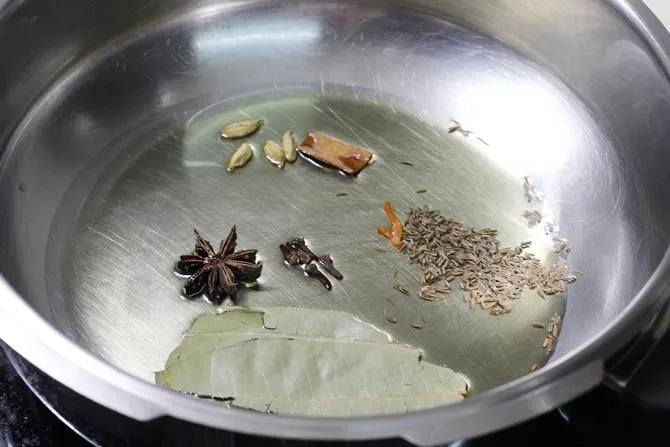
2. Heat a pot or pressure cooker with oil. Add whole spices – cinnamon, star anise, shahi jeera (or cumin), cloves, bay leaf and cardamom. Sometimes I first fry capsicum in oil for a few minutes and set them aside. I use them towards the end to garnish.
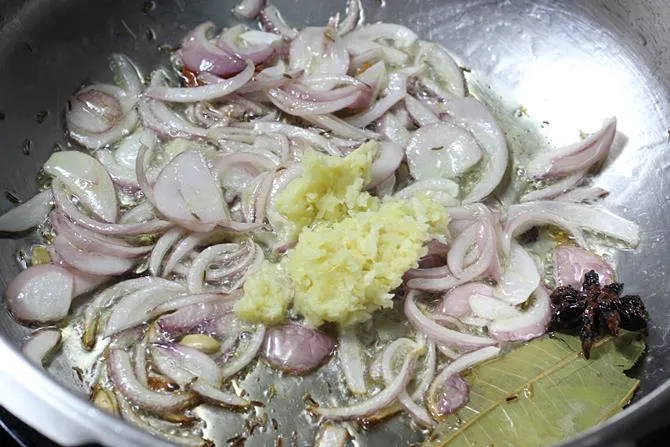
3. When they begin to sizzle, add onions and green chilies. Then fry till lightly golden.
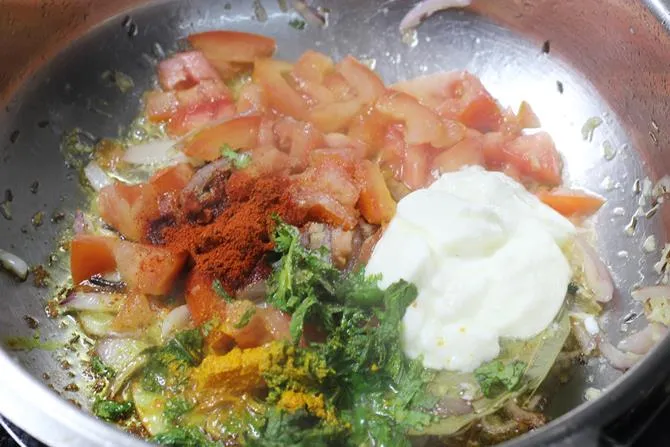
4. Add ginger garlic paste and fry until the raw smell goes away.
5. Add tomatoes, turmeric, red chili powder, salt, yogurt, coriander and mint leaves. Mix and cook till the tomatoes become mushy.
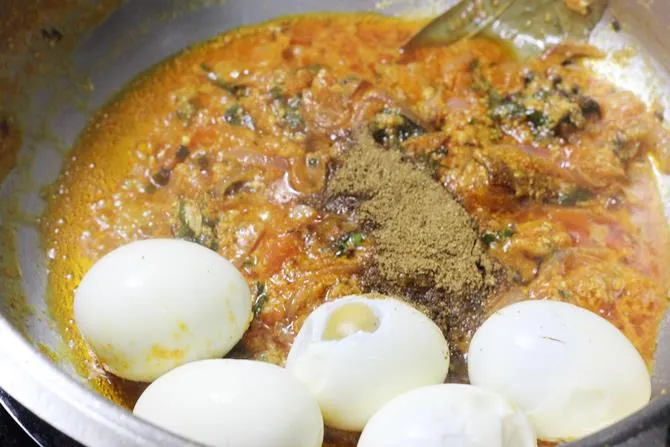
6. Add the eggs and the biryani masala powder. If you wish to use potato, you can use at this stage. Mix well and cook until the mixture thickens and begins to leave the sides of the pan.

How to make egg biryani
7. Pour water and adjust salt if needed. Bring the water to a boil.
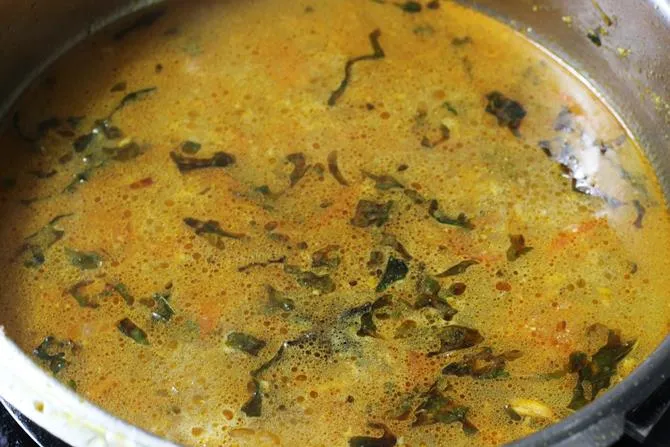
8. Add rice. I also added some fried capsicum here.

9. If using the pressure cooker, close the lid and cook for 1 whistle on a medium flame. Set aside to cool.
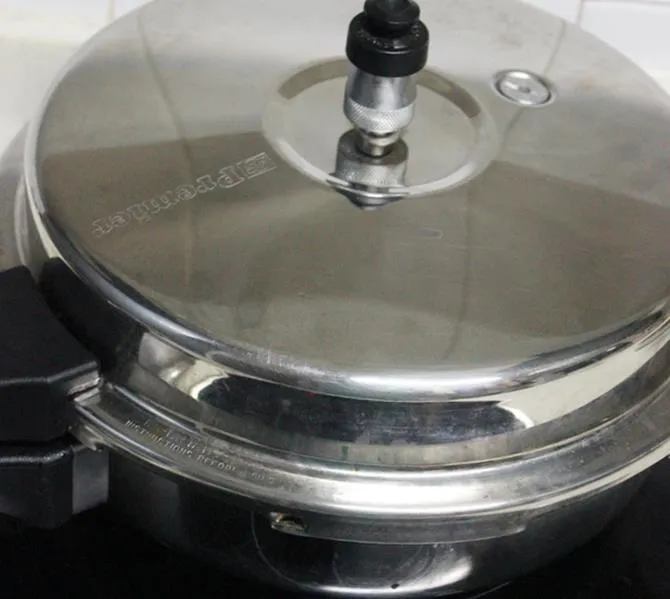
10. Fluff up biryani when you open the lid.
Serve egg biryani with onion raita or a mint raita.
Here are some tips that may be useful if you are a new cook.
Tips
Basmati rice: To make the best egg biryani, I always use aged basmati rice. Other kinds of rice may turn sticky or mushy. Soak the rice for at least 30 mins to get rid of the excess starch. Soaking also helps the grains to absorb water and cook to fluffy texture.
Whole Spices like cumin, bay leaf, cardamoms, cloves and cinnamon impart a lot of flavors to the egg biryani. However you can also skip them if using a good garam masala or biryani masala.
Ghee or oil: Using ghee to fry the onions enhances the flavor of the biryani. If you do not have it you can use oil. I use this homemade ghee.
Herbs: Mint and coriander leaves are the 2 fresh herbs used to make any biryani.
Boiled eggs do not turn hard or mushy in the cooked biryani since they are cooked in water. They absorb the flavors from the spices and herbs used.

More biryani recipes on the blog,
Hyderabadi style anda dum biryani
Egg roast biryani
Chicken biryani
Recipe card

Egg biryani
For best results follow the step-by-step photos above the recipe card
Ingredients (US cup = 240ml )
- 3 tablespoon ghee or oil
- 2 cups basmati rice or any aged rice
- 1 tablespoon Ginger garlic paste
- 1 cup onion thinly sliced (1 large)
- 1 to 2 green chilies slit or chopped
- 4 to 5 boiled eggs (make few gashes)
- 1 medium tomato chopped finely
- ¼ teaspoon turmeric or haldi
- 1 teaspoon red chili powder
- 1 tablespoon garam masala or biryani masala
- ¼ cup mint and coriander leaves finely chopped
- 1 teaspoon Salt (adjust to taste)
- 6 tablespoons (¼ cup + 2 tbsps) curd (yogurt)
Water (use any one)
- 3¾ to 4 cups water to cook in Regular pot
- 2½ cups water to cook in Instant pot
- 3½ cups water to cook in Indian Pressure cooker
Whole spices (skip if you don't have)
- 1 star anise or chakri phool
- 1 bay leaf or tej patta
- ½ teaspoon cumin (jeera or shahijeera)
- 4 green cardamoms or elaichi
- 4 cloves laung
- 1 inch cinnamon dalchini
- 1 strand mace (optional)
Instructions
Preparation
- Soak rice for at least 20 to 30 mins. Drain water and set the rice aside in a colander.
- Boil eggs and remove the shells and rinse them. Make few gashes using a knife or a fork. Set aside.
How to make egg biryani (stovetop)
- Heat a pressure cooker or a pot with oil.
- Add star anise, bay leaf, shahi jeera, cardamoms, cloves, cinnamon and mace. Allow them to sizzle.
- Next add onions and green chilies. Fry/saute till golden or light brown.
- Add ginger garlic paste. Fry till the raw smell goes off.
- Add tomatoes, mint, red chili powder, turmeric, salt and yogurt. Cook until the tomatoes turn mushy.
- Add eggs, potatoes (if using) and biryani masala powder. Fry till the mixture thickens.
- Pour water and add salt as needed. Taste to check for salt and spice levels.
- Bring it to a boil & add drained rice.
- If cooking in pot lower the flame completely, cover and cook till the rice is done fully. If the rice seems to be uncooked, then pour few tablespoons of hot water. If using pressure cooker, close the lid and cook for 1 whistle. Set this aside, don’t leave on the hot burner.
- Fluff up the egg biryani and serve with raita.
Instant pot egg biryani
- Press SAUTE button on the Instant pot. Pour ghee to the inner pot of the IP.
- When the ghee melts add the onions. Spread them in the oil & saute occasionally until deep golden.
- Remove half of the onions and set aside for garnish.
- Add the whole spices to the pot and stir.
- Next add ginger garlic & chilli. Saute for 30 to 60 seconds.
- Then add tomatoes and sprinkle salt. Saute until the tomatoes turn mushy.
- Stir in the spice powders – chilli powder, turmeric and biryani masala.
- Then add the yogurt and deglaze the pot by scrubbing the bottom with a spatula. This releases any bits of food stuck there and avoids burn notice.
- Press CANCEL button when the mixture turns thick in a minute or so.
- Then make incisions on the eggs and stir them with the spicy masala.
- Layer the rice evenly in the pot.
- Pour 2 cups water around the edges and half cup on top.
- Ensure the rice is under the water. (Check the video below.)
- Add some mint leaves and saffron soaked in 1 tbsp milk (optional). Taste the water and add more salt if needed.
- Secure the Instant pot with the lid & position the steam release handle to sealing.
- Press PRESSURE COOK button (high pressure) & set the timer to 5 mins.
- When the Instant pot beeps wait for 6 to 7 mins. Then release rest of the pressure manually.
- Do not stir the egg biryani a lot. Serve it gently with a spatula.
Making Raita
- Whisk 1 cup yogurt with salt. Add 1 sliced onion, green chilli & 2 tbsps coriander leaves. Mix well and serve.
Notes
Video
NUTRITION INFO (estimation only)
© Swasthi’s Recipes
About Swasthi
I’m Swasthi Shreekanth, the recipe developer, food photographer & food writer behind Swasthi’s Recipes. My aim is to help you cook great Indian food with my time-tested recipes. After 2 decades of experience in practical Indian cooking I started this blog to help people cook better & more often at home. Whether you are a novice or an experienced cook I am sure Swasthi’s Recipes will assist you to enhance your cooking skills. More about me
Follow Swasthi’s Recipes


Comments
Why don’t u use coriander in this along with mint leaves?is their any particular reason
Very easy steps and delicious results , love it ❤️
Nice recipe. Came out good. The qty was perfect for two.
Nice receipe. Came out good. The qty was perfect for two.
Hi Swasthi,
I have been following your recipes for quite some time but lately the egg roast biryani recipe is not available on your site and it is one of my favourite. Can you please upload the recipe
Hi Megha,
Thank you! Yes that post is unpublished. I will put the recipe back in a few days and update the new link in this comment.
Excellently Explained Recipe(s). All of them. Keep doing the Great Job.
I have a doubt, in the instapot version of the amount of water to be added. The number 2.5 doesnt change while increasing the number of servings . Can you please fix this?
Hi,
That’s a plugin glitch. I edited to fix it. Hope that helps
It came out so well, we loved it! The quantity worked well for 2 meals for 2 people. Thank you!
Glad you like it. Thank you so much
Nice Recipe. Tried and it came well!
Glad you like it Srini. Thank you
Where is the green chili in the instructions Ive read stove top and instant pot but I am only seeing red chili powder?
I updated it. Thanks for pointing
Great recipe! I have a general question. I get confused with some of the terminology. Here’s one example. In some recipes you call for yogurt, some curd, sometimes you say do not use sour curd, sometimes you say Greek yogurt and sometimes you say hung curd. What are all of these? Are they really different or are some the same just 2 different words? Help
Thanks Jim,
Indian curd is the same as homemade yogurt (with the whey). Greek yogurt is strained yogurt and this is same as hung curd (Indian term). Whenever I say do not use sour yogurt because that can easily ruin the dish by making it too sour. So – curd and yogurt are same. Greek yogurt and hung curd are same. If you want to substitute curd/yogurt with Greek yogurt, simply use 3 parts Greek yogurt and 1 part homogenized milk or water. Hope this clears.
I loved the recipe, so I made it. Now I don’t feel like eating plain rice. Eggs are my favorite protein too. Thank you. God bless.
Glad you like it Meera
Thank you
My mouth really wattered to see your recipe. I’ll try it myself. Is this really tasty in real?
I LOVE each and every one of her recipes. They are perfect every time. Balanced classic flavors with perfect consistency. She has a gift. If you follow directions exactly, you will not be disappointed. Just make her Chicken Pulao in the instant pot tonight and I’m still thinking about how I cant wait to make and eat it again!
Thank you so much Divya
Hi Swasthi,
I am going to make the biryani following your steps. But want to ask if I have to use delay timer what would be the last steps to follow. Please advice. Thanks I’m advance
Hi Gayatri,
Not sure if this recipe works with delay timer – 30 mins should be okay. If the rice soaks up longer, biryani will turn out mushy.
Hi Swasthi, I always love all of your recipes! I was just wondering, how much saffron do you think should be soaked in the milk? Thank you!
Hi Gabriela,
Thank you! Soak 1 pinch of saffron (about 12 to 15 strands) with 2 tbsps of milk. You can also add it directly to the pot without soaking.
Very good recipe I am happy
Thank you
What does 1x means – for how many people
Hi,
This recipe serves 4. If you follow the recipe as is, it is 1X.
If you double it is 2X, if you triple it is 3X. Hope this helps
Hi Swasthi ,
Can u tell the time if using brown sona masoori rice in IP instead of biryani rice ?
I have tried your recipe with biryani rice it’s wonderful but today I don’t have any biryani rice ?
Hi Rupa,
Try 10 minutes. To be on the safer side, transfer the entire contents to a bowl and do a pot in pot. The cook time varies with the brand and age of rice. For me brown sona masuri from organic mantra works pot in pot for 10 minutes with 15 mins soak. Hope this helps
I tried egg biryani for the first time. The taste was awesome but the rice was a bit grainy. I used same amount of water and I used curd too. I followed all the steps but still don’t know what went wrong. I made this in instapot.
Thank you so much for the recipe.
Hi Priya,
You are welcome! These may help you to fix it
1.After you open the lid, just fluff up the rice with a fork especially the top layer which looks dry. Mix this with the rest gently and put back the lid. Leave for 10 mins.
2.Try adding 2 tablespoons more water next time.
3. Ensure the rice is soaked well for 30 mins. Hope these help.
Thank u. I will try it again.
Wow !!!!!!!!
Thanks!
Dear Swasthi,
I am new here and I tried egg biryani today. I much say such an easy preparation and so yummy! I tried your veg biryani also before and it came out really well! Thank you so much and much love from London!
Dhanya 🙂
Hi Dhanya
You are welcome! Glad to know you liked them. Thank you so much!
🙂