Masala Vada | Chana Dal Vada
Updated: February 16, 2022, By Swasthi
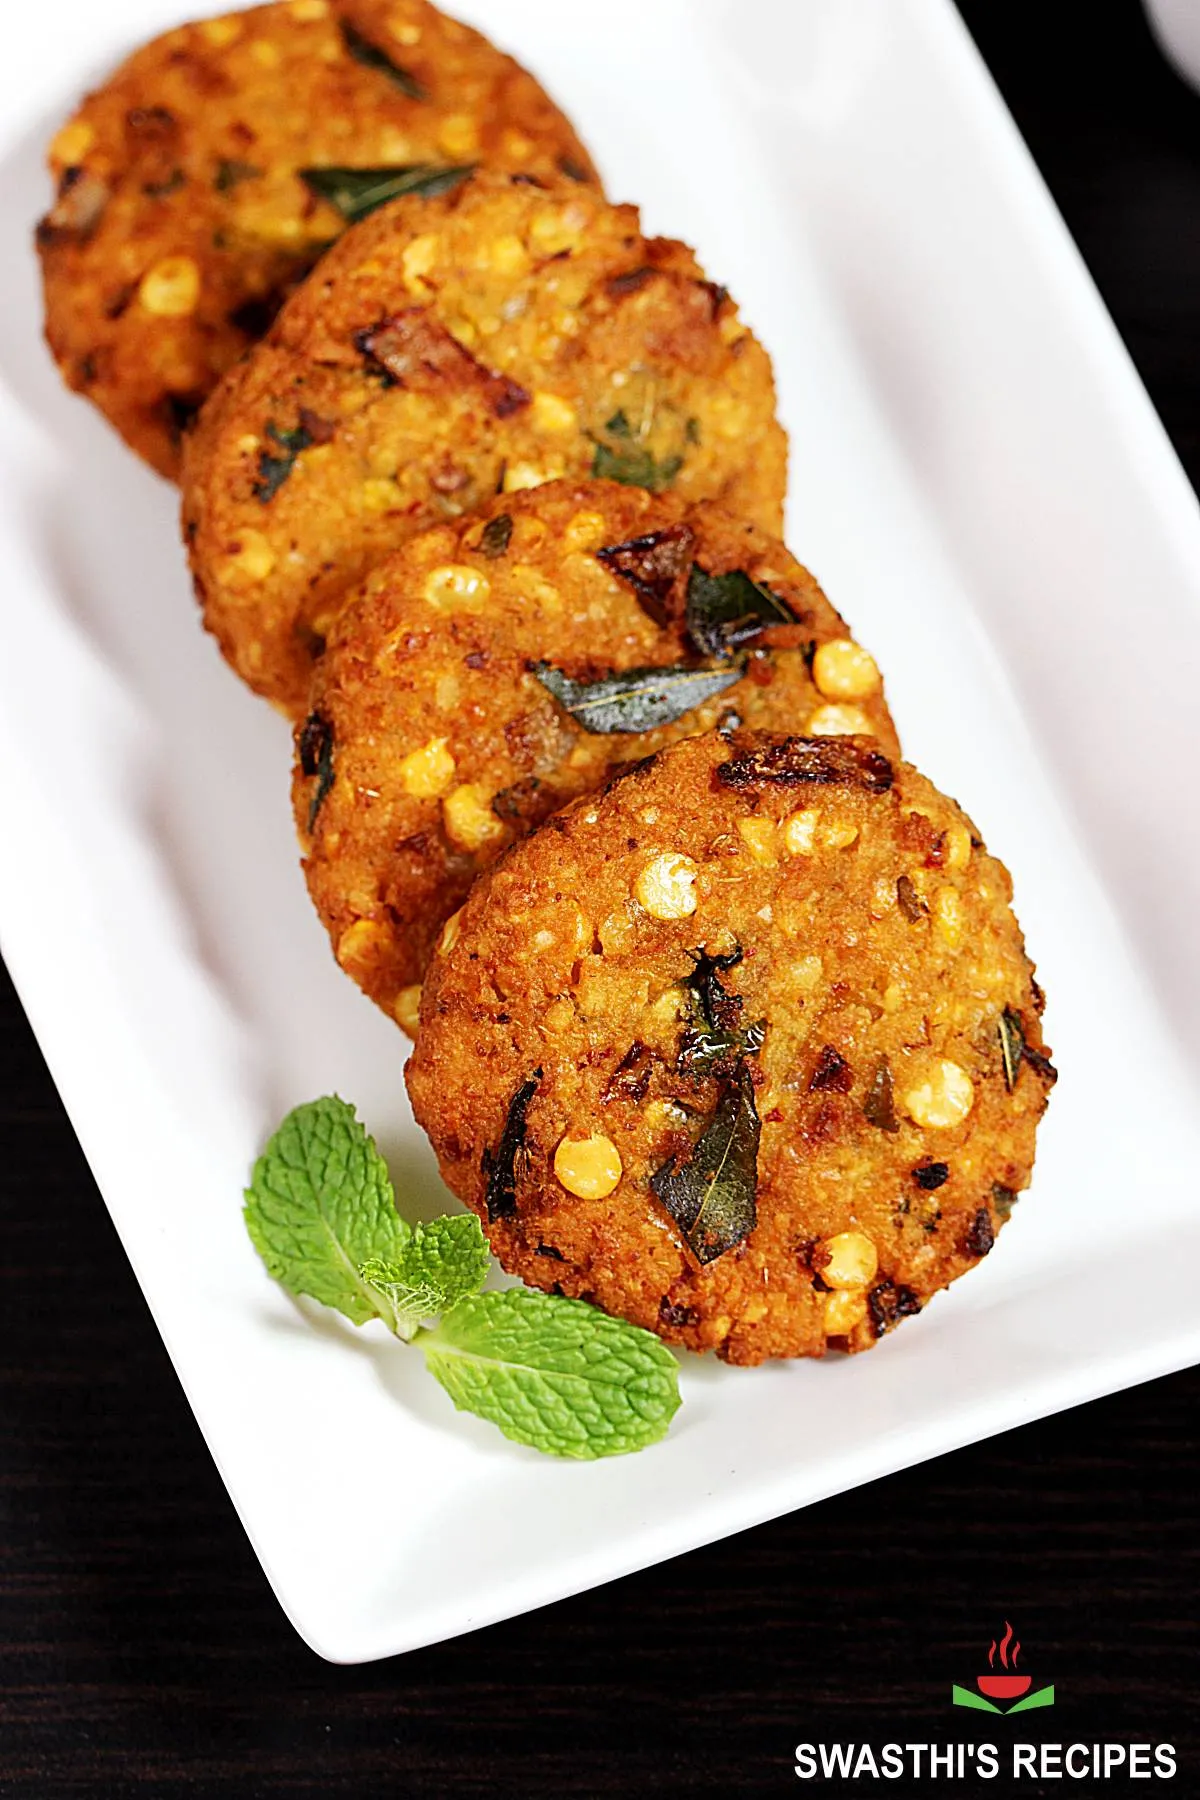
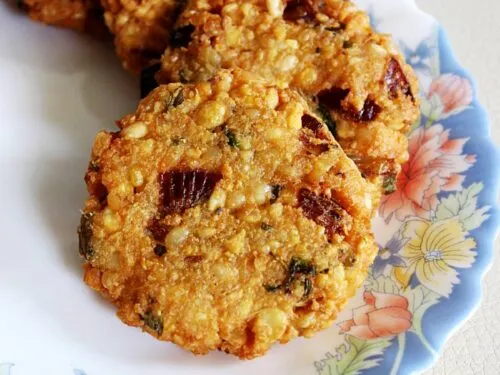
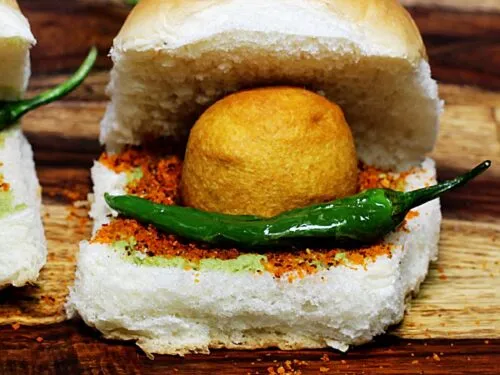
Masala vada recipe with air fryer & oven baked options. Masala vada also known as Chana dal vada or paruppu vadai is a popular South Indian tea time snack made with chana dal, spices, onions & herbs. It is also a street food & most commonly served in tiffin centers & cafes as a evening snack with a chutney. In this post, I share with you how to make Street style masala vada that are crispy from outside, yet soft inside.
About Masala Vada
Masala means a mixture of spices & vada is a fried lentil snack. So masala vada translates to a fried snack made with lentils and spices. These are made by coarsely grinding soaked chana dal or bengal gram. Then spices, onions & herbs are added to the dough. This dough is then shaped to small disc or patties & deep fried.
Massala vada is also known as chana dal vada in some parts of India. These are crispy, very flavorful & addictive in taste. The street style masala vada is much loved by most south Indians & are enjoyed with a cup of masala tea.
If you are looking for a street style masala vada, then this recipe is absolutely for you. This recipe will yield you flavorful, super delicious & crispy chana dal vada!
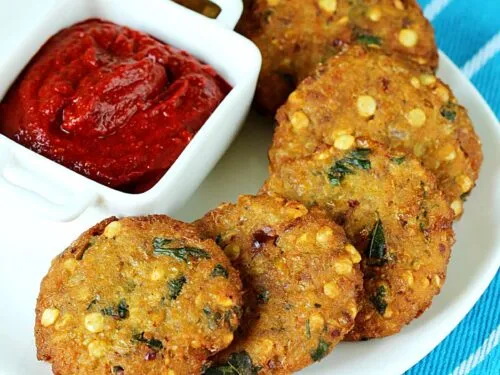
Masala vada from the street stalls are very flavorful due to the addition of mint and coarsely crushed spices, especially cinnamon adds a unique aroma to these. This recipe yields chana dal vada that comes very close to the ones served in south Indian street stalls and restaurants.
You can find more Vada recipes on the blog,
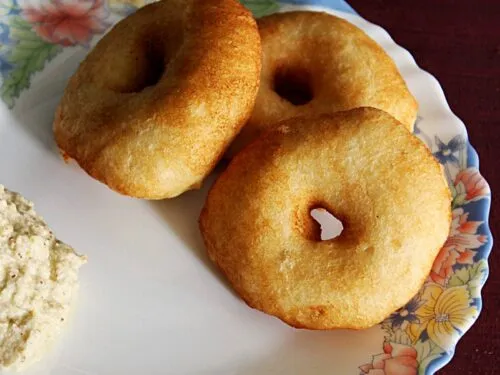
Medu vada
Maddur vada
Dal vada
Sweet corn vada
Sabudana vada
Alasanda vada
Photo Guide
How to make Masala Vada (Stepwise photos)
Preparation
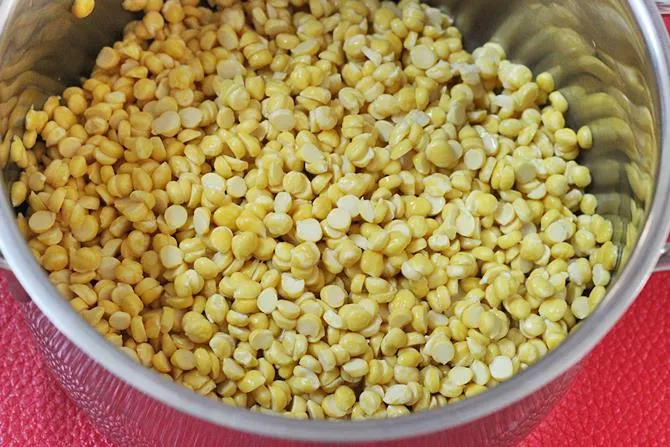
1. Wash 1 cup chana dal several times until water runs clear. Soak it in water for 2 hours. Drain off and set aside. Make sure there is no water in the dal. Do not over soak. Chana dal must be fully tender and soaked without any hard center. This is the indication to know dal has soaked enough.
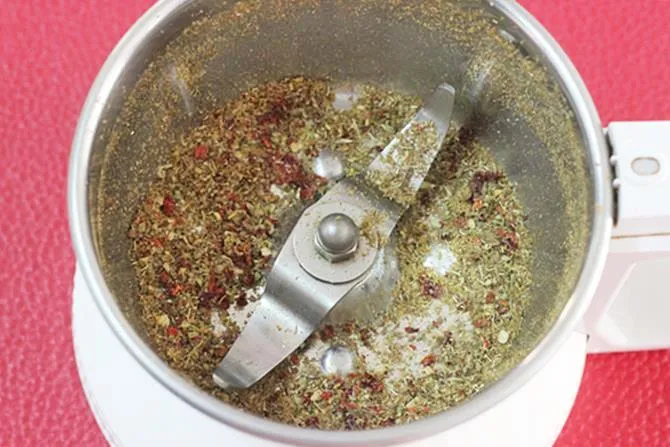
2. To a blender jar add –
- ¾ teaspoon jeera (cumin seeds)
- ¾ teaspoon saunf (fennel seeds)
- 1 to 2 dried red chili (reduce for kids)
- 1 inch cinnamon piece
An inch long cinnamon is good enough I used ceylon cinnamon so used more.

3. Make a slightly coarse powder. Set it aside.
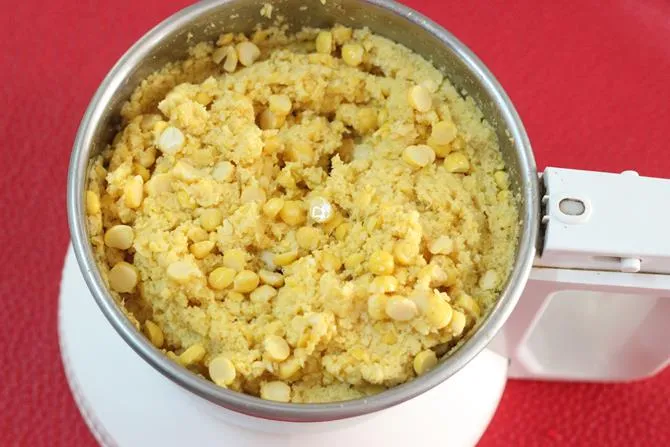
4. Drain the water from the dal. Take 2 tablespoons soaked dal and keep it aside with spice powder. To the same jar add rest of the soaked dal, ½ teaspoon salt and pulse it several times to get a coarse mixture.

5. We also need to have few lentils intact to get the right texture. So pulsing it does the job.
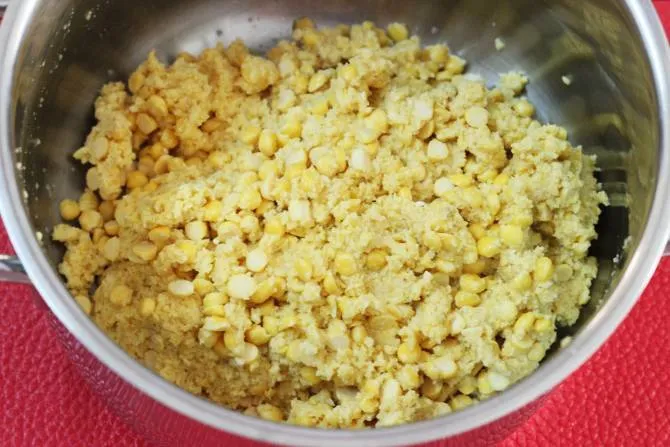
6. To a mixing bowl, add ground chana dal mixture & dal that was set aside.
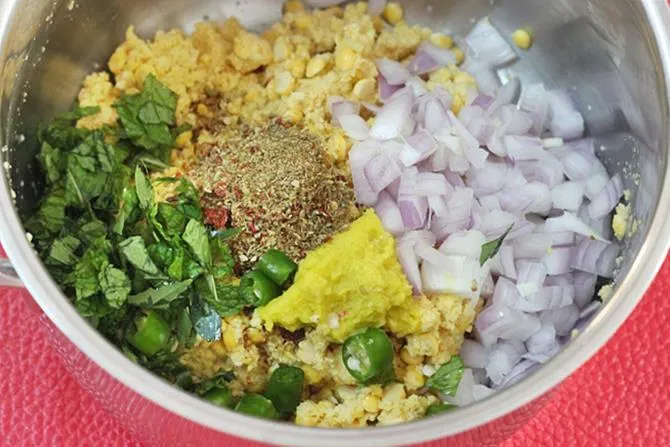
7. Next add the following ingredients
- 1 chopped onion
- handful of chopped pudina leaves (mint, skip if you don’t have)
- 1 sprig chopped curry leaves (chopped)
- 1 to 2 chopped green chilli
- 1¼ teaspoon ginger garlic paste
- ground spices (masala)
Shape Masala Vada
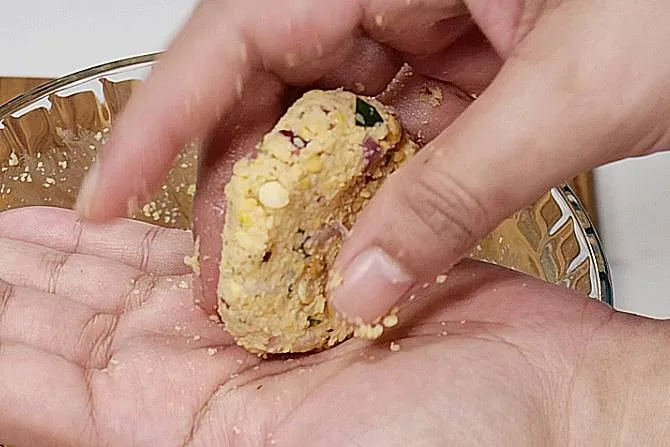
8. Mix together all the ingredients to get a well binding mixture. To check, take a small portion of the dough and shape to a vada. The mixture should hold shape well and not fall apart.
9. If it does not bind well, then take 3 to 4 tbsps of this mixture and grind again. Then add that back to the bowl and mix to check.
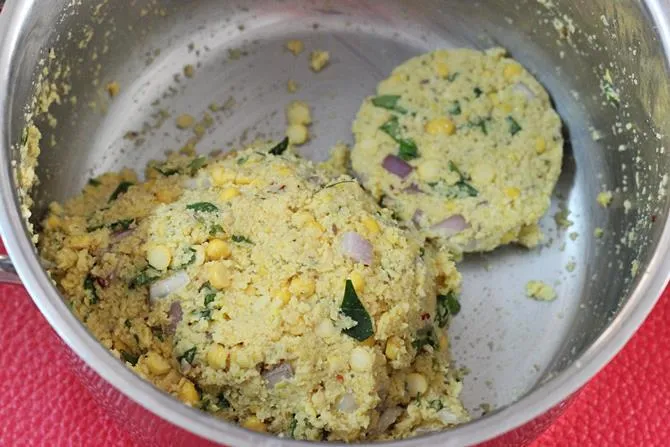
10. Divide the mixture to 9 portions. The easiest way to shape these chana dal vada is to take a small portion of the mixture, press down in your palm to form a ball. Place it on the left palm, flatten it, then reverse it on the fingers of right hand and drop in hot oil. (check video to understand better)
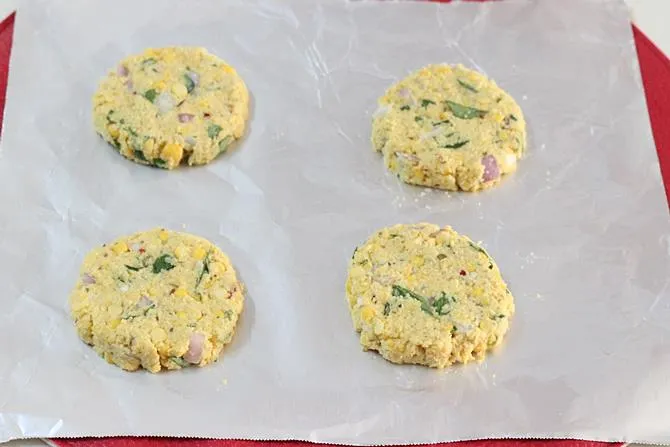
Beginners can make these on a foil or cling wrap or on a moist cloth too.
Frying
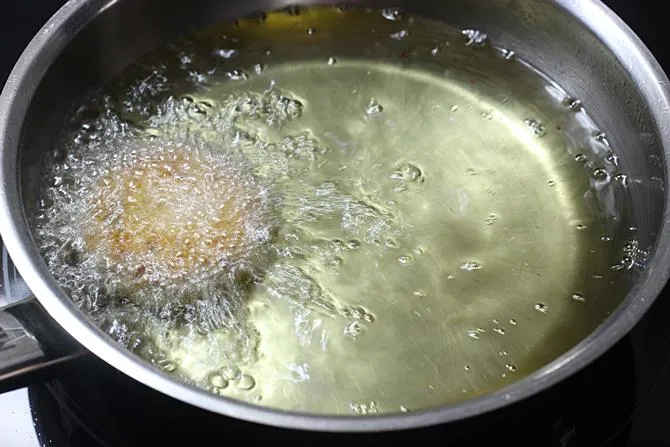
11. On a medium flame, heat oil in a pan for deep frying. Do the heat check by sliding a small portion of dough to the hot oil. The dough must rise without browning. This is the right temperature. Gently slide the vadas one after the other from the sides to the hot oil. I fry about 3 in each batch. Do not disturb them after adding to the oil until they become firm. This may take about 2 mins depending on the flame.
12. Later turn them to the other side with perforated ladle and fry until golden & crisp on both the sides. Remove them to a steel colander.
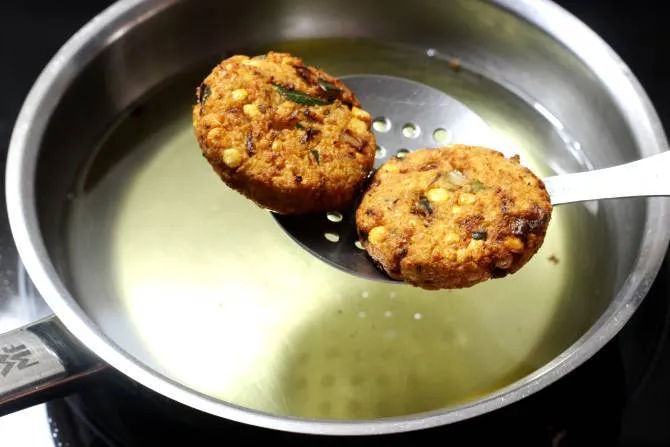
13. To fry the next batch of masala vada ensure the oil is hot enough and not too hot. Do not crowd adding a lot of them at one time while frying.
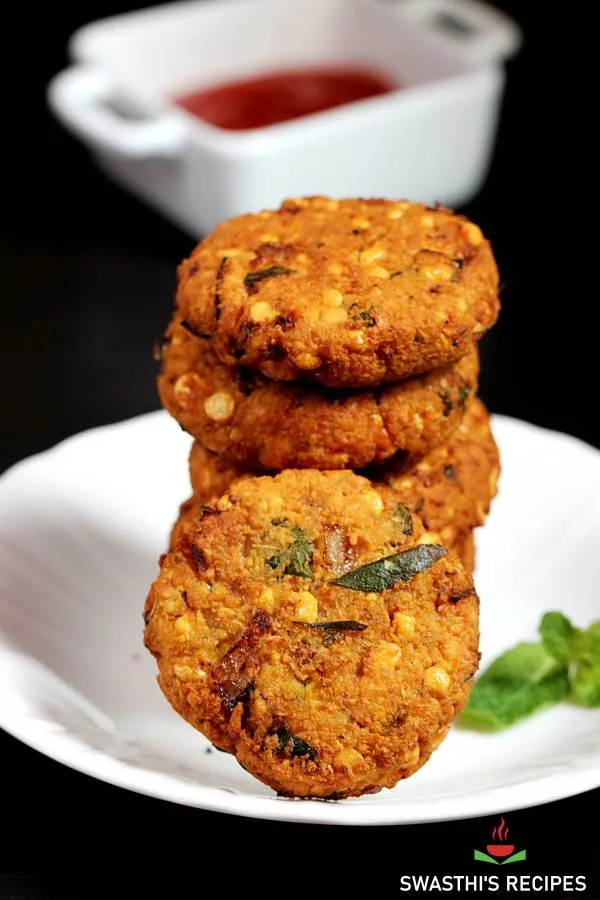
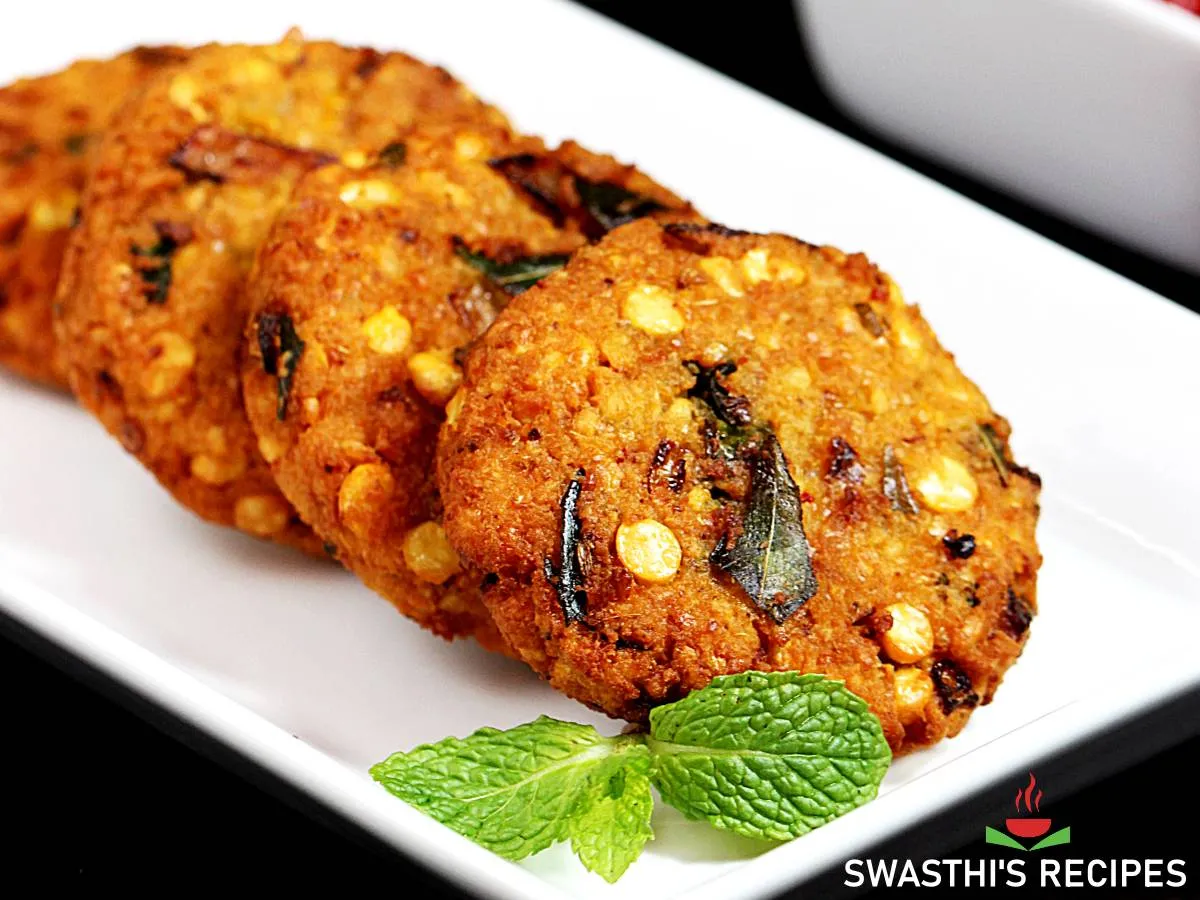
Serve masala vada hot with sauce or coconut chutney.

Serving suggestions
Masala vada are also prepared during festivals in most South Indian homes. These are usually served alone with tea as a snack or with coconut chutney for breakfast. They can also be served as a part of festive meal. Here is one such meal – lemon rice or puliyogare, curd rice & rava kesari.
I made these masala vada for a special family occasion few weeks ago. Sheera, beetroot halwa, mixed veg kurma, masala vada Coconut rice, and pudina chutney were part of our meal.
Air fryer & Oven baked
This year I got to make these more often as my family loved these air fryer masala vadas a lot. Though the texture is not the same as the deep fried ones, they still taste great & will be loved if you love healthy foods. I used to make a lot of the dough and refrigerate this for 4 to 5 days.
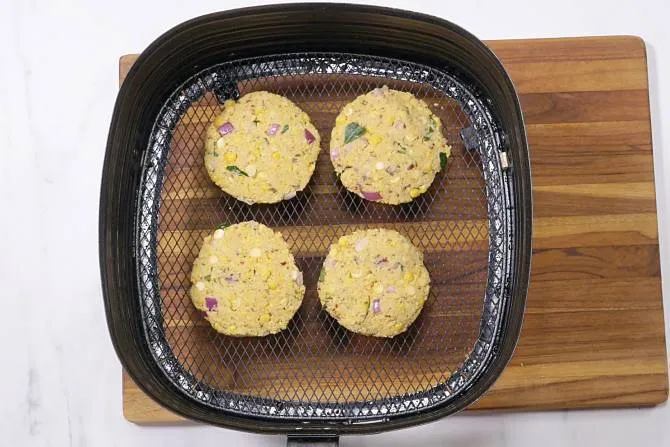
So making them was a breeze anytime as I only had to pop them either in the oven or in the air fryer. Make the patties and place them on a rack or on a parchment paper. If your air fryer needs preheating pre-heat it for 15 mins at 180 C or 350 F.
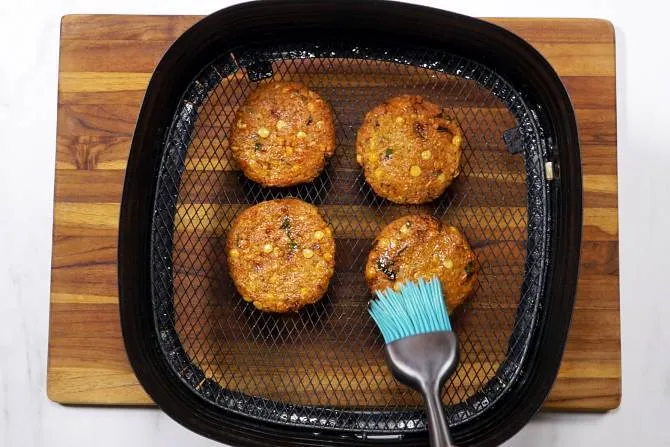
To bake them in oven, preheat your oven to 200 C or 390 F for 15 mins. Air fry or bake for 10 mins, turn them to the other side and air fry for another 6 to 8 mins. Brush them lightly with oil or ghee. In the oven bake them for 12 mins and then check.
I do not preheat mine as mine don’t need preheating. If air frying, I don’t spray or brush oil in the beginning. When I bring them out, I brush them with ghee generously. They will be too dry so they need some oil or ghee. If you are serving with coconut chutney, then you can skip brushing them with ghee. Oven baked masala vada will have some cracks on top.
Notes to air fry or bake
- I felt these masala vadas turn out much better with 4 hours of soaking time (lentils). This keeps them moist from inside and prevents them from turning dry or hard on the outside.
- The dough keeps good in the fridge for 4 to 5 days but don’t add onions when you make the dough. I add everything else except the onions which I skip most times.
- Adjust the air frying and baking time. I felt the chilled mixture gets done faster than the fresh ground mixture.
- Mine takes exactly 16 to 17 mins with chilled dough and 19 mins with fresh ground room temperature dough in air fryer.
- In the oven I had varying results with different pans, with & without parchment paper. If the dough is too loose and too moist it will get stuck to the tray. For the consistency check the video.
- Adjust the air fryer and baking time depending on the kind of oven/ air fryer.
- If they are not removed in time, they will become too hard.
Pro Tips
1. Soak the chana dal just for 2 hours. Chana dal vada made with over soaked dal will not turn out crispy. I usually do it for 1½ hours, drain the dal and then prepare the rest.
2. Do not skip the spices & mint leaves as they are the key to make the vadai flavorful. If you do not have mint you can still make them by adding some coriander leaves but the unique aroma will be missing.
3. If you are making for a festive meal or do not consume onion & garlic. Simply skip them, but do not skip ginger.
4. Blending the chana dal to a coarse and thick consistency is very important. If the dough has lot of moisture then the masala vada will not turn crunchy.
5. Traditionally no flour is added to the masala vadai dough. But by mistake if your dough becomes too soggy with lot of moisture then add little rice flour or powdered poha. Adding rice flour does alter the taste of the chana dal vada and should be used just to fix the consistency.
6. The shape of the masala vada must be flat and slightly on the thinner side. Do not shape them very thick as they will turn fluffy in the center and not taste good.
Related Recipes
Recipe card
Masala Vada | Chana Dal Vada
For best results follow the step-by-step photos above the recipe card
Ingredients (US cup = 240ml )
- 1 cup chana dal (bengal gram)
- ½ to ¾ teaspoon salt as needed
- 1 inch cinnamon (dalchini)
- 1 to 2 dried red chili
- ¾ teaspoon cumin seeds (cumin)
- ¾ teaspoon saunf (fennel seeds)
- 1 onion chopped (medium sized)
- handful pudina (mint leaves)
- 1 sprig curry leaves chopped
- 1 ¼ teaspoon ginger garlic paste (equal proportion)
- 1 to 2 green chilies chopped (skip for kids)
- oil for deep frying
Instructions
Preparation
- Add chana dal to a bowl and wash it with lot of water a few times.
- Soak it in good amount of water for 2 hours. Drain completely. Chana dal must be fully tender and soaked without any hard center.
- Add cinnamon, red chili, jeera and saunf to a blender jar. Make a coarse powder. Keep this aside with 2 tbsp soaked chana dal.
- Next add the drained chana dal & salt to the same blender jar.
- Pulse it a few times until it turns to a coarse mixture. The dough must have some uncrushed chana dal. Transfer to a bowl.
- Next add finely chopped mint, curry leaves, onion, masala powder we just made above.
- Also add green chilies and ginger garlic paste. Mix everything well. Taste and add more salt if needed.
- Take a handful of the dough & check if it binds well. To check make a ball & then flatten it to a masala vada. The mixture must have a good binding to shape them to vadas.
- Remove this to your fingers & check if the masala vada is binding well. If the mixture doesn't bind well, then take a handful of this mixture and blend to a smooth paste.
- Mix that with the rest of the dough.
How to make masala vada
- Heat oil in a deep pan on a medium flame.
- While the oil heats, divide the dough to 10 parts.
- Make small balls and flatten them on your palm. You can also make these on a greased plastic sheet or dry cloth.
- Check if the oil is hot enough by gently dropping a small portion of the dough to the oil. The dough must rise without browning quickly. This is the right temperature.
- Slide masala vada one by one gently to the hot oil. You can add about 3 to 4 vadas in each batch.
- Do not disturb them immediately otherwise they will break. Wait until they firm up for 2 to 3 mins before turning them over to fry the other side.
- On a medium flame deep fry the masala vadas until golden & crisp on both the sides.
- Transfer the masala vadai to a kitchen tissue. Fry the rest of them in batches following the same procedure.
- Serve masala vada hot with coconut chutney or ketchup.
Air fryer
- If your air fryer needs preheating, then preheat it for 15 mins at 180 C or 350 F. Place the masala vadas on the rack. I don't brush mine with oil or ghee in the beginning. You may do if it is okay with your air fryer.
- Air fry for 10 mins at 180 C or 350 F. Turn them to the other side and air fry for another 6 to 7 mins. Please adjust the time as needed depending on your air fryer. They will turn hard if you over fry them. Once done brush the air fried masala vadas lightly with oil or ghee.
Notes
- Soaking lentils: Soak the chana dal just for 2 hours if deep frying. For 4 hours if air frying or oven baking. If the lentils are over soaked, the vadas soak up more oil and will turn less crispy. I soak them for 1 ½ hours for deep fried version and 4 hours for air fryer & oven versions
- Spices & herbs: For aromatic street style masala vadas do not skip cinnamon, fennel and mint leaves. If you don’t have mint leaves you may use coriander leaves but the flavour won’t be the same.
- Grinding: Grind the lentils to a coarse and thick well binded mixture. If it has lots of moisture the vadas will break in the oil or may not turn crunchy.
- Binding: Traditionally no flour is added to the dough. If the dough looks too loose and don’t bind, then simply blend ¼ cup of the mixture in the grinder and mix well. If it is too moist then add some rice flour.
- Shaping: Shape the dough to flat vadas. Do not shape them very thick as they will turn fluffy in the center and not taste good.
Video
NUTRITION INFO (estimation only)
© Swasthi’s Recipes
Masala vada recipe first published in 2015 August. Update & republished in January 2021.
About Swasthi
I’m Swasthi Shreekanth, the recipe developer, food photographer & food writer behind Swasthi’s Recipes. My aim is to help you cook great Indian food with my time-tested recipes. After 2 decades of experience in practical Indian cooking I started this blog to help people cook better & more often at home. Whether you are a novice or an experienced cook I am sure Swasthi’s Recipes will assist you to enhance your cooking skills. More about me
Follow Swasthi’s Recipes
Comments
I love masala vadas. Tried this recipe and they came out great! Thank you.
Your recipes are always excellent ,The detailed instructions and tips make it special it is always a never fail.
Thank you dear Swasthi
So happy to read that! Thank you so much for letting me know!
Your receipes are awesome. They turn out excellent even f you are trying it for the first time. I’ve tried others but it’s always not as expected. So glad that I was introduced to your site. God bless. Thank you.
So happy to read that Prema. Thank you so much
Awesome recipe will surely give it a try. Thank you
Made it turned out to be very tasty every one liked it thankyou
Madhavi, Happy to know you all like it. Thank you for sharing back
I made turned out very nice loved it
Every body liked it
I will try it ☺️
I luv it.
I made it today for my family and they loved it! And it’s my first ever time making these vadas. Thank you so much ?
Perfect vadas!
చనగా పప్పు పచ్చి ది వేయాలా లేదా వేపింది వేయాలా దయచేసి చెప్పండి
Hi Harshita,
It is pachi senaga pappu. You can take a look at the pictures and the video.
Hi I have been religiously following your recipes and they’ve always turned out just perfect. However this time while preparing for the vada I put excess salt. Can anything be done to make that right ?
Hi Raji,
Thank you! Make another batch of the same without adding salt. Mix both and use. You can refrigerate the left over dough.
Swasthiiiiiii !!!!
These vadas turned out TERRIFIC !!!!!!!
Sooo crisp, sooooo flavorful !!! I cannot stop praising myself for achieving this !!
ALL THANKS TO YOUR RECIPE !!
I fully agree that these vadas tasted just like the street vendor’s vadas.
Thank you soooo much.
I would like to ask can we re-use the oil that was used to make these vadas ?
There are so many different opinions about this. I would like to hear what you have to say.
Once again, Thank you !!!!
Hello Lakshmi,
Happy to know you like them so much! I would say just discard the used oil without a second thought. We may need about 2 to 3 liters oil per month (for a family of 3 to 5) for deep frying. It cost us about 40 to 60$. I think we shouldn’t risk our health for a small amount.
🙂
Hi.. I made the dhal vada today using the air fryer method and it came out excellent. Thank you so much for the recipe with tips.
Hi Sara,
Glad to know! Thanks for leaving a comment
Hello, can I fry the vada mixture a day after I grind the chana? I will keep the ground chana in the fridge over night. Add the spice and onions before I fry them
Hi Veronica,
Yes you can keep it for 4 days. I add everything when I make the mixture including mint and spices except for onions.
Thank you for this recipe ma’am. Can you please tell me if I can shallow fry this on a non stick tava? Deep fried food is a no for my family. That’s why I asked.
Hi Tina
I don’t think lentils will cook well. If you have a paniyaram pan you may try adding generous amount of oil to each cavity.
Came out to be very nice and perfect.. I made coconut chutney along. Enhancing my culinary skills during lockdown.. Lucky to get a great recipe which came out very tasty.
Glad to know!
Thank you
Hi
Pls specify the quality of chana dal to be soaked ?
Thanks
Hi, it is mentioned in recipe card.
Hi Swasthi, can we shallow fry or bake these in the oven for a healthier option? Thanks
Hi Reva,
Yes you can bake but they will turn dry. Smear some oil towards the end and grill for another 2 mins. If shallow fried I don’t think they will cook well.
How do I fix watery masala vada batter?
May be you can try adding some flour – besan or rice flour should work. But the taste will not be the same.
Hi mam,
Tried vaada “too”
Vade has come out really really well.. Crispy and yum!! I am mentioning “too” Within quotes coz I browse ONLY “Swathis Recepies” If I want to do anything at home!!
Thanks a lot.. Very precise and easy to make procedure and very well explained with the pictures..! Thanks again:)
Hello Anusha
Very Glad to know! You are most welcome! Thank you so much for following the blog!
🙂